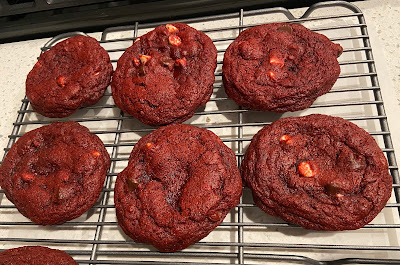
Stamped Brownie Cookies #26 - made dough December 22, 2022 from Apt 2B Baking Co
3 cups (384 grams) all-purpose flour
1/2 cup (50 grams) dutch-process cocoa powder
1/2 cup (50 grams) black cocoa powder
1 teaspoon kosher salt
1/2 teaspoon baking powder
1/4 teaspoon cinnamon, optional
1 cup unsalted butter, softened
1 1/2 cups (330 grams) light brown sugar
2 large eggs
1 teaspoon vanilla extract
Glaze
1 cup confectioners sugar
3 tablespoons cream
1/2 teaspoon vanilla bean paste
1 teaspoon peppermint or vanilla extract (I used vanilla)
pinch salt
- In a medium bowl, whisk together flour, both cocoas, baking powder and salt.
- In the bowl of a stand mixer fitted with the paddle attachment, cream together butter and brown sugar until light and fluffy. Add eggs, one at a time, mixing after each addition until combined. Add vanilla and mix to combine.
- Add dry ingredients and mix on low speed until combined, scraping down sides and bottom of bowl to keep mixture even textured.
- Turn dough onto piece of plastic wrap and form into thick disc. Wrap tightly and refrigerate for at least 1 hour and up to 2 days.
- Once dough is chilled, roll out between two large sheets of parchment paper to desired thickness (usually 1/4" - 3/8"). Using a mixture of equal parts flour and black cocoa powder, lightly dust top of rolled out dough and cookie stamps to prevent sticking. Cut or stamp out cookies. Arrange in single layers on flat containers, cover and chill or freeze an additional 30-60 minutes or overnight.
- When ready to bake, preheat oven to 350 degrees F and line baking sheets with parchment paper. Evenly space cookies on prepared sheets, leaving 1 inch apart. Bake 7-10 minutes, until cookies are just firm to the touch and puffed.
- Prepare glaze while cookies are baking: whisk all glaze ingredients in a small bowl. Once cookies have been out of the oven for 5 minutes, brush or dab glaze with a pastry brush to lightly coat cookies.
This is not like a snappy-crisp chocolate cookie. Instead, these really do taste like brownies in cookie form.
And look how faithfully they kept the impressions! I haven't tried it with more finely detailed stamps but I think they'll work well with those too. The dough came together easily and was the perfect consistency for stamping, not too dry or crumbly and not sticky and too soft.
Although the original directions say to roll out the dough for stamping and cutting or using an embossed rolling pin, I prefer to make the dough into balls, roll the balls in granulated sugar and press a cookie stamp over each dough ball. Then I cut the stamped cookie with a round cookie cutter to make neat edges.
It's much easier and faster for me to stamp cookies this way and you don't have to handle the dough too much like you do with rolling and re-rolling the leftover dough.
The original recipe includes a glaze but I only made a tiny amount and only glazed the taste test cookie. Since I was mailing these out for Soldiers Angels' care packages, I didn't want to risk a glaze with cream in it in case it didn't hold up well in mailing, even if the cookies are vacuum sealed.


