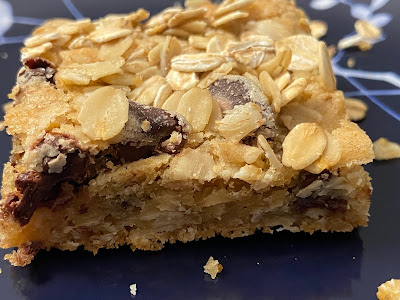
Wednesday, November 24, 2021

Pumpkin Sugar Cookies

Pumpkin Sugar Cookies - made dough October 14, 2021 from Life Made Simple Bakes 
3/4 cup unsalted butter, room temperature
1/4 cup vegetable oil
2/3 cup canned pumpkin puree
1 cup granulated sugar
1/2 cup powdered sugar
1 1/2 teaspoons vanilla extract
1 egg
1 egg yolk
4 cups all-purpose flour
1/4 teaspoon baking soda
1/4 teaspoon cream of tartar
1/2 teaspoon salt
1 teaspoon pumpkin pie spice
1/4 teaspoon ground cinnamon

Cream Cheese Frosting
1/2 cup butter, room temperature
1 1/2 teaspoons vanilla extract
1/4 teaspoon salt
3 cups powdered sugar
1 8-ounce block cream cheese, room temperature
splash milk or cream
1/2 teaspoon ground cinnamon, optional
  1. In a large bowl, whisk together flour, baking soda, cream of tartar, salt, pumpkin pie spice and cinnamon; set aside.
  2. In the bowl of a stand mixer fitted with the paddle attachment, cream together butter, granulated sugar and powdered sugar until combined, creamy and no lumps remain. Beat in oil, pumpkin and vanilla extract until just combined. Beat in egg and yolk until just combined.
  3. Add the dry ingredients in three additions, mixing until just combined after each addition. Do not overmix.
  4. Cover and chill in the refrigerator for 1 hour.
  5. Preheat oven to 350 degrees F. Line baking sheets with parchment paper. Portion chilled dough into golf-ball size dough balls and evenly space onto prepared baking sheets. Flatten each dough ball slightly with the bottom of a glass or jar to 1/2-inch thickness. Bake for 10-14 minutes or until edges are set and middles no longer look raw. Remove from oven and let cool for 5 minutes before transferring to a wire rack to cool completely.
  6. Make the frosting: in the bowl of a stand mixer fitted with the paddle attachment, cream the butter, vanilla and salt for 2 minutes or until light and fluffy. Gradually add the powdered sugar in 1 cup increments, beating on low speed after each addition. Add the cream cheese and splash of milk on low speed and beat for 1 1/2 minutes until well combined. Frost cooled  cookies and dust tops with cinnamon, if desired.
This is reminiscent of the Glazed Pumpkin Sugar Cookies I've blogged before from Together as a Family's blog. The ingredient list is similar; it's just the proportion of those ingredients that differ slightly.
I made the earlier ones over two years ago and can't remember them other than what I wrote that they weren't too sweet, were soft and cakey and dense. I would say the same thing of this version from Life Made Simply Bakes.
I liked these as well and they seemed fitting for the season. Do not overbake these. They won't look done at the 10-minute mark but don't bake them longer than 15 minutes unless your oven really runs cool and they still look raw at 15 minutes. 

The oil and the pumpkin keep these cookies moist and dense; don't overbake or you won't get that "fudgy" texture in the cooled cookie. These don't spread much so make them the thickness and size you want the finished cookie to be.

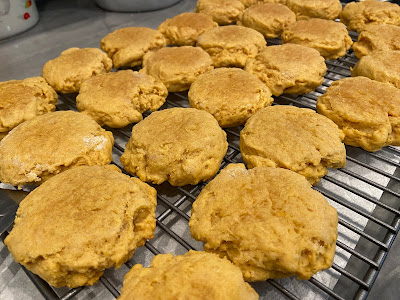

Monday, November 22, 2021

Stamped Cookies #10 - Chocolate Thumbprint Cookies

Chocolate Thumbprint Cookies (Stamped Cookies #10) - made dough October 26, 2021 from Beyond the Butter
2 cups all-purpose flour
1/2 cup unsweetened cocoa powder
1 teaspoon salt
1 cup unsalted butter, room temperature
1 cup granulated sugar
1 large egg yolk
1 teaspoon vanilla extract
Hazelnut spread, cookie butter or any other filling of your choice
  1. In a medium bowl, whisk together flour, cocoa powder and salt; set aside.
  2. In the bowl of a stand mixer fitted with the paddle attachment, beat the unsalted butter and granulated sugar on medium speed until well combined and fluffy. Beat in egg yolk and vanilla extract.
  3. Add the dry ingredients in two additions, beating on low speed after each addition, until just combined.
  4. Cover the dough tightly with plastic wrap and chill for at least an hour or more.
  5. When ready to bake, roll out the dough to a 1/4-inch thickness onto a floured surface. If dough is too cold to roll out easily, let sit on kitchen counter for 15-20 minutes before rolling.
  6. Lightly flour or sugar cookie stamps and stamp out cookies from rolled dough. Place in a single layer and freeze for 10 minutes. 
  7. Preheat oven to 375 degrees F. Line baking sheets with parchment paper. Evenly space stamped cookies. Bake 10-12 minutes or until set. Remove from oven and let cookies cool on baking sheets for 5 minutes before transferring to wire rack to cool completely.
  8. Once cookies are cool, place filling in Ziploc bag and seal. Depending on your filling, you may want to warm in microwave for 15 seconds to make piping more easy. Snip a corner of the ziploc bag and pipe filling into each indentation.
I first saw these thumbprint stamps from - where else - pinterest. I was immediately taken with them so, of course, I had to buy a set for myself. They're available at Williams Sonoma and, if you believe Williams Sonoma, only at Williams Sonoma. Link here. I'm not affiliated with Williams Sonoma and that isn't an affiliate link and I don't make any money on it if you click on it and buy or not buy. I just linked it in case anyone wants to look further into it; now you know where to get it.

My stamping skills still need some practice as you'll see from some of the pictures. Sometimes I didn't use enough dough and the cookie didn't fully form all the way to the edges. Sometimes I used a little too much dough and the cookies came out thick. Sometimes I used too little dough and the cookies were thin. If I baked thin and thick cookies on the same cookie sheet, the thinner cookies baked more than the thicker ones. 
But, to me, none of that matters. Yes, it'd be nice to have uniform perfection but it doesn't bother me if things don't look perfect. For one thing, taste is always more important to me than appearance. For another, baking as a hobby is for fun, not for commercial resale or perfection. So no matter how your baked goods turn out, have fun making them and sharing them. That's what it's about.
And I've been having a lot of fun with new cookie stamps and making pretty cookies. Chocolate dough can be a little more tricky to work with than non-chocolate dough. The cocoa powder makes for a more dry dough and if you chill this for too long, the dough crumbles more and is more difficult to work with.
Case in point, this dough was already so stiff when I finished mixing it that I ended up not needing to chill it before I formed it with the cookie stamps. I did liberally sugar the dough balls before I stamped the thumbprints and that helped prevent sticking.
As you can see, this held their shape really well. Don't overbake them as you want the texture to be soft and not crumbly. I used some dough to form into my other new cookie molds shown below (available on etsy). I was running out of dough so the cookies were a little thinner. 
You can see the heart cookie on the bottom left was a little misshapen after baking. I think I accidentally stretched that left side slightly when I (gingerly) got the dough out of the mold. Top left round wreath cookie was also a little thinner than the others as I ran out of dough so it baked a little more than the others did. Oh well :).

Saturday, November 20, 2021

Stamped Cookies #9 (Hello Kitty cookies)

Stamped Cookies #9 - made dough October 26, 2021 from If You Give a Blonde a Kitchen 
3 cups (375 grams) all-purpose flour
2 teaspoons baking powder
1/2 teaspoon salt
1 cup shortening
1 cup granulated sugar
1 large egg
2 tablespoons milk
2 teaspoons vanilla
  1. In a medium bowl, whisk together flour, baking powder and salt; set aside.
  2. In the bowl of a stand mixer fitted with the paddle attachment, cream together shortening and sugar until light and fluffy, 3-5 minutes. Beat in egg, milk and vanilla until just combined. Add in flour mixture in 2 additions, beating on low speed, until just combined after each addition. Do not overbeat.
  3. Form dough into a disk, wrap in plastic wrap and chill for at least one hour.
  4. When ready to bake, preheat oven to 350 degrees F. Line baking sheets with parchment paper.
  5. Portion chilled dough into balls about 1 1/2" in diameter. Slightly flatten the balls and stamp with a flour-dusted stamp.
  6. Evenly space on prepared baking sheets and bake for 8 - 10 minutes or until edges are golden. Cool for 5 minutes on baking sheet then transfer cookies to wire rack to cool completely.
My cookie stamping interest obsession continues. I bought these Hello Kitty stamps awhile back with the idea of doing a Hello Kitty-themed care packaged for my friends with kids. I finally got a chance to use them when a good friend mentioned how much her daughter likes sweets and cats. Serendipity.
I wanted to try this recipe since it's made with shortening, rather than butter, and past experience has shown me that cookies made with shortening tend to spread less and have a more crisp texture. I'm not convinced that taste-wise, shortening is better than butter (it isn't) but I really wanted the Hello Kitty impressions to still be distinct even after baking.
One thing I've found with trying out various recipes for cookie stamping is they'll almost all show beautiful impressions from the stamps when you press them into the dough. But the true test is how the cookies will look after baking. Too often, the impressions aren't as sharp or clear as before baking.
This dough turned out to be a little fragile and I wonder if I should've used more flour in it. I went by the weight measurements of the original recipe which are supposed to be more accurate. But the dough was soft, even after chilling, and a bit fragile. The sharp-eyed among you will notice the Hello Kitty in the bottom left of the picture below is missing her (stage) left arm. Yeah, that must've fallen off when I put them in the freezer. 
You definitely want to freeze these first and handle carefully. Then bake at initial high heat to let the cookies set and not spread so you can keep the impressions as clear as possible. With this dough, it's best to use cookie stamps that don't have a lot of intricate detail as those might blur out in baking. 
This kept the Hello Kitty impressions pretty well but I'm not sure it would work with more intricately detailed cookie stamps.
As for taste, when I first ate a taste test cookie while it was still a little warm, I thought it was "okay". I was missing the butter. I had used butter-flavored shortening but that's not the same as real butter.
However, when I ate another cookie at room temperature, I liked it much better. The texture was crisp and the taste was pretty good. And okay, I also used two cookies and sandwiched them with cookie butter. But I swear, the cookies themselves also tasted better at room temperature.
The final step was to vacuum seal them so they would arrive in fairly good shape. I made two cookie sandwiches, sandwiched with Nutella, but left the rest plain to leave it up to my friend's daughter how she'd best like to consume them.  

Friday, November 19, 2021

Apple Pie #2

Apple Pie #2 - made October 3, 2021 from, pie crust from Little Spoon Farm and filling from Chew Out Loud
2 1/2 cups all-purpose flour
1 cup unsalted butter, cold, cut into small cubes
1 teaspoon salt
1 teaspoon sugar
1/2 cup cold water, plus 1 ice cube
2 teaspoons vinegar
  1. Drop an ice cube into a measuring cup and fill the measuring cup with water up to the 1/2 cup mark. Add 2 teaspoons of white vinegar; set aside.
  2. In a medium bowl, combine flour, salt, sugar and butter cubes. Cut the butter into the flour mixture with two knives or a pastry cutter until the mixture forms large crumbs.
  3. Add water, a few tablespoons at a time, into the flour-butter mixture and toss with a fork until the dough is evenly moist. 
  4. Use your hands to quickly bring the dough together in the bowl. Do not overwork the dough.
  5. Divide the dough in half and flatten into disks. Wraps the disks separately in plastic wrap; chill in the refrigerator for at least 1 hour.
1/2 cup butter
3 tablespoons all-purpose flour
3 tablespoons water with 2 teaspoons cornstarch fully dissolved in it
1 tablespoon vanilla extract
1/2 cup granulated sugar
1/2 cup packed light brown sugar
2 teaspoons cinnamon
dash nutmeg
8 Granny Smith apples, peeled and sliced
  1. Melt butter in a large saucepan. Whisk in flour to form a roux. Add water with dissolved cornstarch, granulated sugar, brown sugar, vanilla, cinnamon and nutmeg, whisking to combine. Bring to a boil then immediately reduce to barely simmer. Keep sauce warm while rolling out the pie crust.
  2. Reserve 1/4 cup of the butter sauce.
  3. In a large bowl toss the apple slices with the remaining sauce, coating completely.
  4. Preheat oven to 425 degrees F.
  5. Roll out bottom pie crust into a 9-inch pie pan. Brush with beaten egg white. Fill with coated apple slices, mounding in the center. Roll out top pie crust and cover apples. Seal and crimp the edges together. Cut several slits in top crust. Brush with remaining butter sauce and lightly sprinkle with coarse sugar and a dusting of cinnamon.
  6. Place pie pan over baking sheet and bake for 15 minutes. Reduce heat to 350 degrees F and bake another 35-45 minutes or until crust is golden and apples are soft. If crust is browning too quickly, cover lightly with foil. Cool completely before serving.
This is my second attempt in recent months at making pie crust. You'd think I'd get better with a little practice, right? Well, welcome  to attempt #2 which, sadly, turned out worse than attempt #1.
I thought I was getting smarter about pie crusts and was sure the crust on Apple Pie #1 was so difficult because I hadn't added enough water. So I turned to a new crust recipe and a new filling recipe for this one. Plus I got cute new pie tools that made embossed pie crust strips. What could go wrong? 
*Raises hand*. I, I could go wrong. And I did. In an attempt to (over)compensate for the dry pie dough last time, I added more water. So much more, in fact, that even the little handling I tried to do made the pie dough not so much sticky as develop the gluten. Which you don't want to do when you're trying to make a flaky crust. Fail.
You also apparently don't want to have pretty pie impressions on your crust when your filling recipe calls for you brushing it over the unbaked pie crust and having it be so thick that it obliterates the impressions anyway. Plus pie dough is unlike shortbread cookie dough and doesn't lend itself well to small, intricate designs stamped on it. Like of cute little apples.
My third fail with what I did to this pie was to bake it in a cast iron pie pan. That sounded reasonable enough and I like baking with cast iron (sort of). But I had to bake this so long until the apple filling was soft enough that the crust hardened in the cast iron pie pan. Note to self: pie crust, flaky or not, doesn’t do well in cast iron. Maybe they do for other people but it didn't work for me. How do I know? I got the hint when I had to use a knife to cut the bottom crust. Not the knife to slice a piece of pie out of the whole pie. But a knife to cut the piece of pie so I could lift it with my fork and eat it. Let that sink in.

As a side note: the recipes themselves were fine so feel free to try them on your own. I just need to execute better on them. Dammit, I refuse to be beaten by pie. I'll be back again with attempt #3.


Wednesday, November 17, 2021

Honey Garlic Glazed Pork Loin

Honey Garlic Glazed Pork Loin - made October 29, 2021 from Diethood
3-lb pork loin
1 tablespoon olive oil

Spice Rub
1 teaspoon sweet paprika
1 teaspoon garlic powder
1/2 teaspoon onion powder
1/2 teaspoon dried thyme
1/2 teaspoon dried rosemary
salt and fresh ground pepper, to taste

Honey Garlic Glaze
4 cloves garlic, minced
1/4 cup honey
3 tablespoons soy sauce
1 tablespoon dijon mustard
1 tablespoon olive oil
  1. Preheat oven to 375 degrees F. Line a rimmed baking sheet with foil and set aside. 
  2. Pat pork loin dry with paper towels.
  3. Spice rub: in a small mixing bowl, combine paprika, garlic powder, onion powder, thyme, rosemary, salt and pepper.
  4. Lightly spray pork loin with cooking spray. Rub spice mix all over pork loin, coating as much as possible.
  5. Heat olive oil over medium heat and sear pork loin until browned on all sides, about 3 to 5 minutes per side. Transfer pork loin to prepared baking sheet, fat layer side up; set aside.
  6. In a bowl, combine garlic, honey, soy sauce, mustard and olive oil; whisk until well combined. If too thick, add a little more oil or soy sauce. Brush mixture over pork loin. Roast for 55-60 minutes or until inside temperature reaches 145 degrees F. If pork is browning too quickly, loosely tent with foil on top.
  7. Remove from oven and let rest for 10 minutes. Slice and serve warm.
Pork loin seems to be one of the easier proteins to cook with, at least for me. It doesn't take long to cook and flavors well with the right spices or marinade.
The hardest part of this recipe isn't hard at all. And that's searing the pork loin before baking it. You rub the spice mixture into the tenderloins, sear over high heat then place in a baking dish, pour the sauce over it and bake until done.

This turned out really tender and the sauce had a great flavor. An easy weeknight meal if you need something tasty and no-fuss.


Monday, November 15, 2021

Chewy Oatmeal Blondies

Chewy Oatmeal Blondies - made October 23, 2021 from Paris Loves Pastry 
1 cup all-purpose flour
1/2 cup granulated sugar
1 teaspoon baking powder
1/2 teaspoon salt
1/2 cup (1 stick) unsalted butter, room temperature
1/2 cup packed light brown sugar
1 large egg
1 cup old-fashioned rolled oats
  1. Preheat oven to 350 degrees F. Line a 8 x 8-inch baking pan with foil and lightly spray with nonstick cooking spray.
  2. In a large bowl, whisk together flour, granulated sugar, baking powder, and salt.
  3. In the bowl of a stand mixer fitted with the paddle attachment, beat together butter and brown sugar until light and fluffy. Add egg and beat until just combined. Add flour mixture in two additions, beating on low speed after each addition. Mix in 3/4 cup of oats. Pour batter into prepared pan and smooth top.
  4. Sprinkle remaining oats, pressing gently to adhere. Bake until a toothpick inserted in the center comes out with a few moist crumbs, not raw batter, 30 to 35 minutes. Cool completely before cutting and serving.
These were good for what they are: an oatmeal blondie, easy to make, easy to package and would survive well in mailing.

That said, I'm not sure I loved them. In fairness, I only ate a sliver so maybe that wasn't enough for a proper taste test. I didn't want to eat a whole piece since I was mailing these off in military care packages and my (jaded) taste buds usually don't need more than a sliver. I taste enough to make sure they turned out and were good enough to send to others.

Which these were. If you want a sturdy, care package bar cookie, these work well. The original recipe called for making these plain but I added chocolate chips for a little extra flavor. I do like the direction in the recipe to sprinkle some of the oats over the bar cookie before baking. That way the oats don't get lost in the batter during baking and you can clearly see what these are: oatmeal bars.