Thursday, November 8, 2012

Creamy Scallop Fettuccine

Creamy Scallop Fettuccine - made October 27, 2012 from Fitness Magazine

Another found-it-on-pinterest dinner recipe.  I used whole wheat spaghetti instead of fettuccine because that's what I had handy in the pantry.  I think I overcooked my scallops though in my quest to get them nicely browned as they turned out a bit chewy.  This recipe made for a nice creamy sauce although I don't really know how to describe the flavor.  It isn't tomato-based or an alfredo sauce but the milk and cheese helps make it creamy.  It was good but I used whole milk instead of low-fat so I think that helped with the creaminess but also made it a tad rich and a little filling.  Oh and I don't like peas so I substituted a can of whole kernel corn instead.

8 ounces  whole-wheat fettuccine
1 pound large dry sea scallops
1/4 teaspoon salt, divided
1 tablespoon extra-virgin olive oil
1 8-ounce bottle  clam juice
1 cup low-fat milk (I used whole milk)
3 tablespoons all-purpose flour
1/4 teaspoon ground white pepper
3 cups frozen peas, thawed (I used whole kernel corn)
3/4 cup finely shredded Romano cheese , divided
1/3 cup chopped fresh chives
1/2 teaspoon freshly grated lemon zest
1 teaspoon lemon juice

1. Bring a large pot of water to a boil. Cook fettuccine until just tender, 8 to 10 minutes or according to package instructions. Drain.
2. Meanwhile, pat scallops dry and sprinkle with 1/8 teaspoon salt. Heat oil in a large nonstick skillet over medium-high heat. Add the scallops and cook until golden brown, 2 to 3 minutes per side. Transfer to a plate.
3. Add clam juice to the pan. Whisk milk, flour, white pepper and the remaining 1/8 teaspoon salt in a medium bowl until smooth. Whisk the milk mixture into the clam juice. Bring the mixture to a simmer, stirring constantly. Continue stirring until thickened, 1 to 2 minutes. Return the scallops and any accumulated juices to the pan along with peas and return to a simmer. Stir in the fettuccine, 1/2 cup Romano cheese, chives, lemon zest and juice until combined. Serve with the remaining cheese sprinkled on top.

Cast Party Wednesday  HungryLittleGirl

Wednesday, November 7, 2012

Peanut Butter & Chocolate Oatmeal Bars

Peanut Butter & Chocolate Oatmeal Bars - made October 26, 2012, recipe adapted from What's Cooking, Love?

My boss was in town the week I made these and I knew he was a peanut butter fan so I was looking around for peanut butter recipes (no, I'm not sucking up - really).  We had a team dinner one of the nights he was here and, as is tradition, I bake for the team when we go out.  It gives me a chance to try out new recipes so I can't claim to be entirely altruistic since I'm using them as guinea pigs for my experiments (no one's complained yet, at least not to my face). 
This has nothing to do with Peanut Butter & Oatmeal Bars but I just like this ornament :)
This is one of those versatile bar cookies you can do a lot with.  I added chocolate chips and peanut butter chips to the top layer to dress it up a little.  You can also sprinkle chopped up peanut butter cups on top as well or toasted peanuts or anything else in keeping with the peanut butter chocolate flavor combination.  What I liked best about these is the top oatmeal layer baked enough to add a little crunch to the bar and paired well with the smooth creaminess of the chocolate layer.

1 cup butter, softened
1 1/2 cups packed brown sugar
2 cups old-fashioned oats
2 cups flour
1 teaspoon baking soda
1 teaspoon vanilla
8 ounces semi-sweet chocolate (can also use unsweetened chocolate)
3/4 cup creamy peanut butter
1/2 cup chocolate chips
1/2 cup peanut butter chips

1.  Preheat the oven to 350 degrees.
2.  Beat the butter and brown sugar in a large bowl with a mixer until the mixture is combined.  In a separate bowl combine the oats, flour and baking soda then add that mixture into the butter and brown sugar mixture. 
3.  Press 3 cups of the mixture into the bottom of a 13x9 inch greased pan.
4.  Microwave the chocolate for 45 seconds, and then in 10 second increments until melted.  Stir in the peanut butter.  Carefully spread the chocolate and peanut butter over the crust.  Then sprinkle with the remaining oat mixture and the chocolate and peanut butter chips.
5.  Bake for 22-25 minutes or until the edges are golden brown.  

What's cooking, love?

Tuesday, November 6, 2012

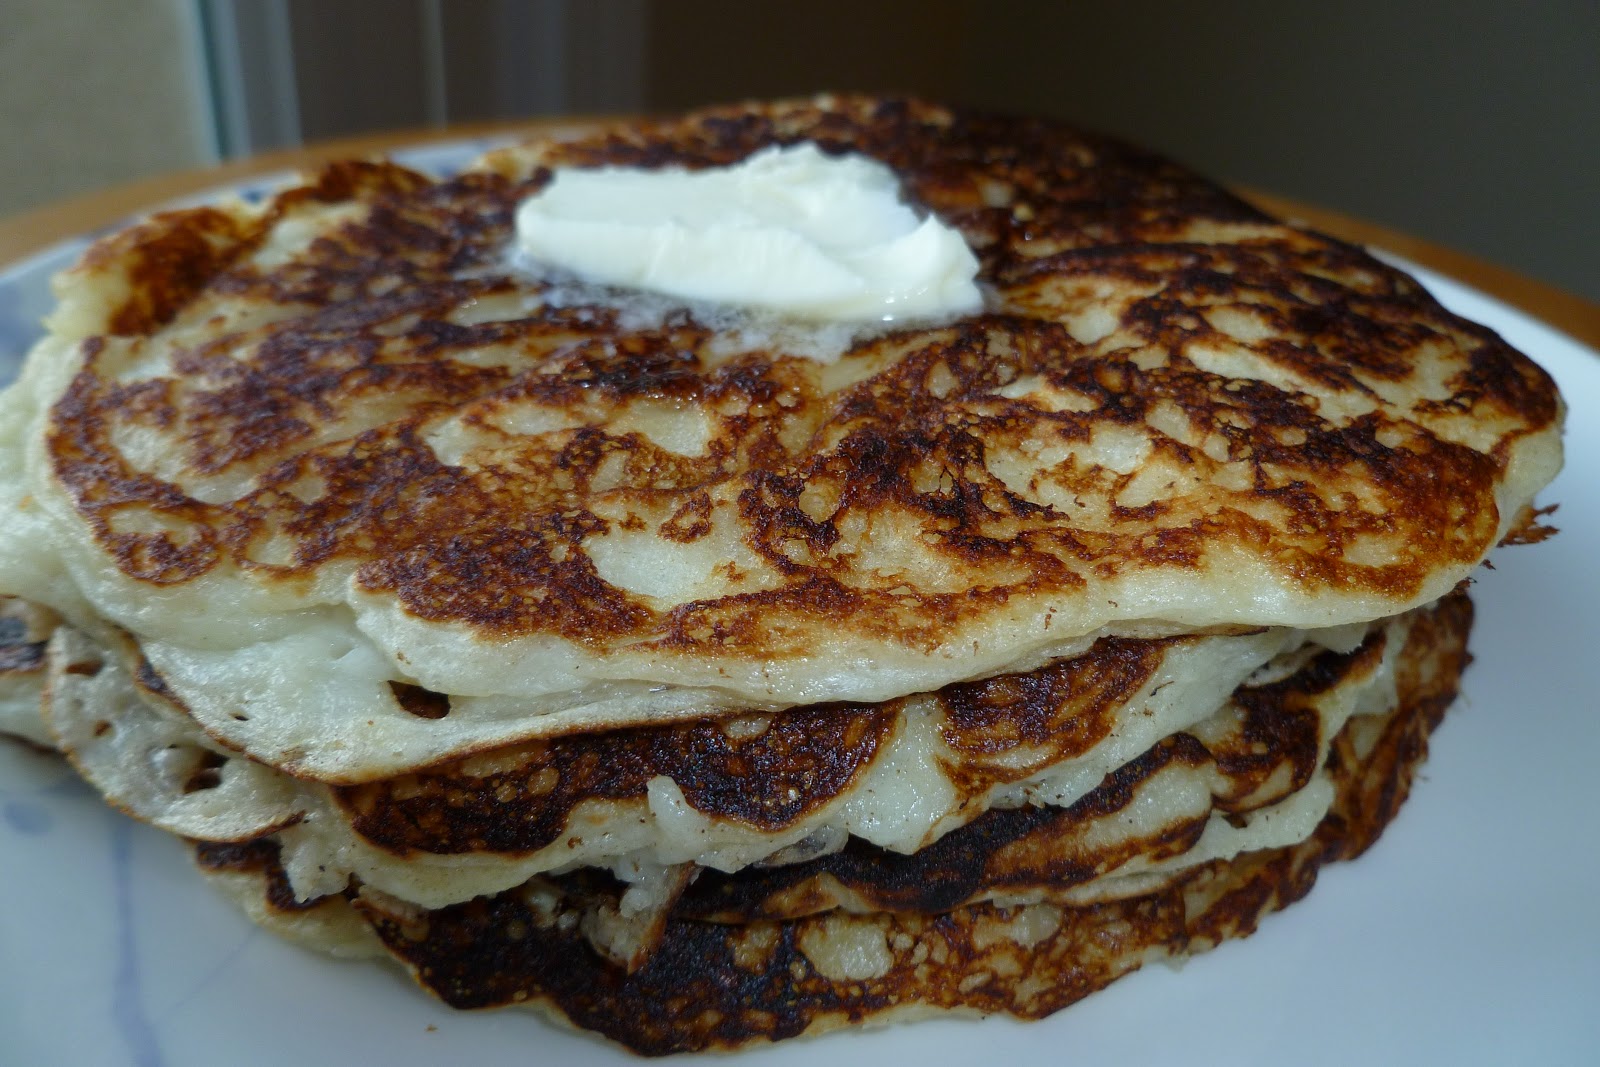
Buttermilk Pancakes

Buttermilk Pancakes - made sometime in October 2012 from Chef in Training

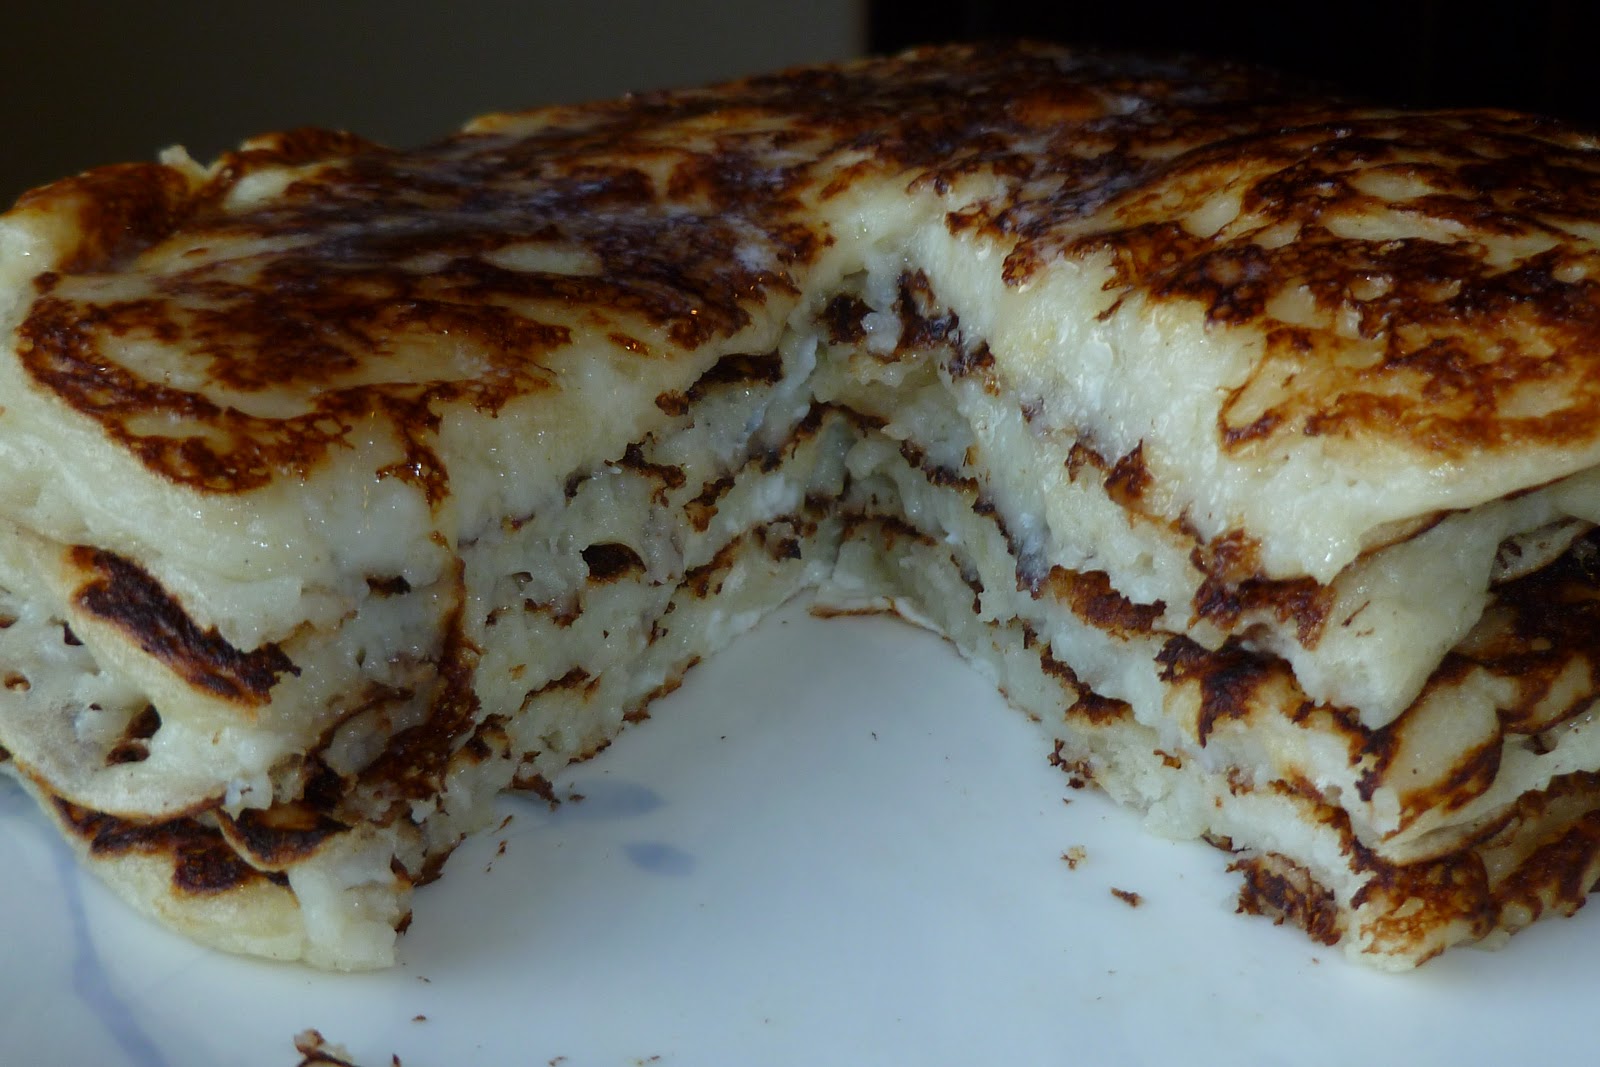
I have such a backlog of posts, this one got buried.  I made this a few weeks ago on one of those days when I came home from work, didn't feel like eating anything I had in the fridge and decided breakfast sounded good for dinner.  Make sure you click on the recipe title to see the original blog post from Chef in Training because the picture of her pancakes was what drew me in to try this recipe.  Mine didn't come out quite as picturesque, although really, it's hard to make bad pancakes.  The batter on this was quite liquidy so the pancakes came out soft.  Or I didn't cook them long enough.  They still tasted pretty good though.  I did skip the buttermilk syrup out of expediency and because I wanted to use the last of my maple syrup.  But maybe next time.

One of my favorite ornaments from last year - these pancakes have no calories
 And since I have the holidays on the brain, I will intersperse my posts with gift giving suggestions to go with the recipes because I love the holidays and I love food.  Most of the people I give gifts to typically have all the "stuff" they need so I try not to give non-consumables unless I know it's something they want, need and can really use.  Otherwise, it's foodstuffs.  I like putting together themed gifts of consumables.  For instance, for a pancake theme, buy a pancake mix, a bottle of maple syrup, and a pancake turner.  You can package up your gift in a basket or gift bag, tied with a pancake ornament like this one and/or do a bunch of creative add-ons: a gift card to IHOP or a local pancake place, locally made jams or jellies (farmers' markets are great sources for these), include a pancake cookbook or print out your favorite pancake recipes onto cute recipe cards. 

Strawberry Waffle ornament
 With some creative substitutions, you can also put together the same kind of gift with a waffle theme and up the ante by including a waffle maker if your recipient doesn't already have one.

2 cups flour
2 teaspoons baking powder
1 teaspoon baking soda
1/2 teaspoon salt
3 tablespoons sugar
2 eggs
3 cups buttermilk
4 tablespoons melted butter

Sift flour, baking powder, baking soda, salt and sugar.  Add eggs, buttermilk and melted butter.  Stir with a fork until just combined.  Cook in a greased skillet or pan until bubbles form on one side then flip over and cook all the way through.  Serve warm.

BUTTERMILK SYRUP
1/2 cup butter
3/4 cup sugar
1/2 cup buttermilk
1 teaspoon baking soda
1 teaspoon vanilla

Combine butter, sugar and buttermilk in a medium saucepan.  Cook on medium heat until dissolved then add baking soda and vanilla.  Stir until smooth and use immediately.

Monday, November 5, 2012

Preparing for the holidays


It might seem a little early to post about preparing for the holidays but the whole point of preparing is to do it early.  I don't believe in stressing for Thanksgiving or Christmas.  That's missing the point of both holidays.  I'm also starting my Christmas decorating so in this and future blog posts, I may be including shots of some of my favorite Christmas ornaments.  I've been collecting ornaments since I was in high school so there aren't enough posts to include all the pictures but I'll show some of my favorites.
A fellow ornament collector, Linda, was kind enough to gift me with this Christmas cupcake ornament

My stress-avoidance means doing a lot of stuff ahead of time so when the big day(s) arrive, I can enjoy it.  By that I don't mean just stocking up on cookie doughs for the freezer, ready to be baked at a moment's notice when I need a gift or to go to a party.  Although that is one tip/trick I do every year.  But this is also the time of year to do other kinds of prep.

Stocking your pantry:
Buy bananas early and give them time to ripen
As the holidays approach, many ingredients go on sale.  Keep an eye out but don't necessarily wait for it either if you can find something already at a good price.  A 10-lb bag of granulated sugar at Costco is $5.29.  If I see a 5-lb bag selling for half that or less, I'll stock up but right now, the Costco price is the most competitive.  There's already 20 lbs sitting in my pantry, ready for the holiday baking season.  A 72-ounce bag of Nestle semisweet chocolate chips went on sale, also at Costco, for $8.74.  That translates into $1.46 for a normal 12-ounce bag.  A price I never see, even with a good sale elsewhere.  144 ounces of chocolate chips are also now in my pantry.  Stocking up early on ingredients ensures I don't run out of anything at a crucial moment and, since I'm buying the stuff when I'm normally already out, I don't waste time or gas making any special trips to the store for something I need later on.  Oh, and if you plan to bake anything with bananas like banana bread, cake, muffins, cupcakes, etc for Thanksgiving or Christmas, I would highly advise you buy your bananas now and give them plenty of time to overripen.  If they get too ripe before you need them, peel them, plastic them in freezer bags and put them in your freezer until you're ready to use them.

Packaging items:
You know those 40%-50% off coupons from Michaels that come out pretty much every week?  I use those throughout the year to get parchment paper and plain treat bags.  As the holidays approach, I also use them to start buying holiday-themed packaging items like Christmas cellophane treat bags, cupcake liners, and decorated treat boxes.  The best time to buy that stuff is as soon as your store stocks them, not when the holiday is actually getting nearer.  Once we're full swing into holiday season, those items go on sale but at less than a 40% discount so you're better off when it's regular price and you can use a 40% off coupon for it.  Plus early on is when you get the best selection.

Cleaning
Thanksgiving is fast approaching - 'tis the season for pumpkin pie
Thanksgiving is my favorite holiday but Christmas is the one I decorate all out for.  (Yes, I'm one of those people.)  I used to alternate between decorating big one year for Halloween and more modestly at Christmas and vice versa the following year.  Then it got to be too much in too short a timeframe and now I alternate between decorating with 50% of my Christmas stuff and decorating with almost 100% of it.  Halloween got back burnered.  But before I decorate, my house has to be clean.  And I mean clean.  As in, for a couple of October weekends, I moved furniture and vacuumed and swept underneath them, hands-and-knees-on-the-floor scrubbing, dusting all the way down to the baseboards, cleaning blinds and shutters slat by slat with an actual cleaner, and spiders fleeing in terror as any hint of a cobweb was aggressively dusted out of existence.  That kind of clean.  And while I'm at it, I'm decluttering stuff I don't need to give away to Goodwill, gathering excess jackets to give away to One Warm Coat as the weather cools, and thinning out my embarrassingly large collection of books to give the ones I'll never reread to the library.  Freaky-obsessive fall housecleaning time is also when I put away picture frames and knick knacks that have been out all year so I can clear display space for my Christmas decorations.  It's a 2-weekend project and one I strive to complete in October so I give myself enough time to finish decorating by Thanksgiving.  Because all I do in my free time between Thanksgiving and Christmas is bake and socialize.  I don't want to spend it deep cleaning so I get it out of the way first thing.

Shopping
One of my new additions this year - "tiramisu"
There was a point in time where I actually enjoyed shopping.  As in I made a near-weekly trip to the mall every Saturday just to browse even if I didn't have anything I had to buy.  Not that that stopped me from buying stuff since, you know, I was already there anyway.  Then, some years ago, I went through a major decluttering phase and I haven't stopped decluttering since.  Now I only go to the mall if I absolutely have to - meaning I can't buy something online or my clothes are threadbare rags that need to be replaced.  Otherwise I'd rather spend my downtime baking or reading or working out or poking my eye out rather than braving the throngs at the mall.  It's worse during the holiday season because the novice shoppers are out.  You know the ones that I mean: the dawdlers who aren't aware there's a tide of people behind them but they're in the way, the baffled-looking ones who actually want assistance from the store clerks but can't find any, the impatient ones who can't believe there are this many people in line at the store but when it's their turn at the cash register, they pull out their checkbook and then start writing a check.  I like people but not all of them in a confined space.  So no malls for me in the weeks leading up to Christmas.

Which means I either shop online (Cyber Monday is superior to Black Friday), I bake my gifts, or I buy stuff way ahead of time.  Throughout the year when I do buy something, I ask for a box, whether it's for a gift or not.  So when December comes, I already have a stockpile of boxes to use if I need them - which beats standing in line at the store in December to ask for a box for a gift I just bought.  Usually I don't even need boxes anymore as lately I've been giving more gift cards and service-oriented items.

Ultimately, you have to do what works for you - some people love the last-minute frenzy (I'm not one of them), some people enjoy a minimalist holiday so the spirit doesn't get lost in the letter, and others believe in letting it all hang out as their expression of enjoying what they love about the holidays (that would be me in case it's not obvious).  Whichever type of person you are, do what you love and share with those you love.

Sunday, November 4, 2012

Deep Dark Chocolate Cake

Deep Dark Chocolate Cake - made October 24, 2012 from Favorite Brand Name Best-Loved Chocolate Recipes


This is the third thing I made for my nephew's bake sale and the only one I had time to make the night before my cousin picked up the baked goods and previously blogged cookie doughs.  This is a perfect cake for a bake sale.  It's quick and easy to put together and because of how liquid the batter is, the baked cake is moist and stays moist for a few days.  I did make one mistake and took the cake out too soon.  You can tell it's underbaked by how dark the top half looks beneath the frosting.  I ended up slicing the edge pieces but held back the two middle pieces as being a little too underbaked to sell (darn, had to eat those myself).  To dress it up a little and make it more visually eye catching, I sprinkled toffee pieces on top of the frosted cake.  It added a bit of crunch and paired nicely with the dark chocolate of the cake and the sweetness of the frosting.

The only caveat is this cake has a pretty soft texture so you don't want to stack it on top of each other or place anything on top of the wrapped cake.  You'll crush the cakiness of the texture into something inadvertently more dense.  For people who like boxed cake mixes (shudder), this has the fluffy texture of a boxed cake mix but infinitely superior flavor.


2 cups sugar
1 ¾ cups all-purpose flour
¾ cup unsweetened cocoa powder
1 ½ teaspoons baking powder
1 ½ teaspoons baking soda
1 teaspoon salt
2 large eggs
1 cup milk
½ cup vegetable oil
2 teaspoons vanilla extract
1 cup boiling water

1.     Preheat the oven to 350˚F.  Line a 9 x 13 pan with aluminum foil and spray lightly with nonstick cooking spray.
2.     In a large mixer bowl, stir together sugar, flour, cocoa, baking powder, baking soda, and salt.  Add eggs, milk, oil and vanilla; beat on medium speed of electric mixer 2 minutes.  Stir in water.  Batter will be thin.
3.     Pour batter into prepared pan.  Bake 30 to 35 minutes or until wooden pick inserted in center comes out clean.  Cool completely.
4.     Frost with Chocolate Buttercream Frosting.  Sprinkle with toffee pieces if desired.

Chocolate Buttercream Frosting
6 tablespoons butter, softened
2 2/3 cups powdered sugar
½ cup cocoa powder
1/3 cup milk
1 teaspoon vanilla extract
1/2 cup - 1 cup toffee pieces, optional

1.     In a small mixer bowl, beat butter.  Blend in powdered sugar and cocoa alternately with milk, beating well after each addition until smooth and of spreading consistency.  Blend in vanilla.  Add additional milk, if needed.  Spread over cooled cake and sprinkle with toffee pieces if using.

  Inside BruCrew Life  Chef In Training

Saturday, November 3, 2012

Milk Chocolate Chip Nutella Swirl Cookies

Milk Chocolate Chip Nutella Swirl Cookies - made October 23, 2012, recipe adapted from The Good Cookie by Tish Boyle
This is the other cookie dough I made for my nephew's bake sale that my cousin Christine picked up to bake on her own.  The original recipe was essentially for a milk chocolate macadamia nut cookie but I modified it to leave off the macadamia nuts and instead I dolloped nutella in the dough as I scooped it out so I could have swirls running through the cookie, similar to the Almond Butter and Nutella Swirl cookies.  I was trying to make a chocolate chip cookie that had generous swirls of nutella running through it but I was only partially successful.  The cookies spread a bit more than I wanted and the nutella spread with it so instead of moist, melt-y dollops through the cookie, it was more like a marbling of nutella in it.  Still tasted good but I think it would work better with a cookie that didn't spread as much.


2 1/2 cups all-purpose flour
1 teaspoon baking soda
½ teaspoon salt
1 cup (2 sticks) unsalted butter
1 cup firmly packed dark brown sugar
½ cup granulated sugar
2 large eggs
1 tablespoon vanilla extract
6 ounces Swiss milk bar chocolate, cut into 1/3-inch chunks
6 ounces bittersweet chocolate, cut into 1/3-inch chunks
3/4 cup to 1 cup nutella

1.     Position a rack in the upper third of the oven and preheat the oven to 350˚F.  Spray two baking sheets with nonstick cooking spray.
2.     In a medium bowl, whisk together the flour, baking soda, and salt.  Set aside.
3.     In the bowl of an electric mixer, using the paddle attachment, beat the butter and brown and granulated sugars at medium speed until well blended.  Add the eggs one at a time, beating well after each addition.  Scrape down the sides of the bowl and beat in the vanilla extract.  At low speed, beat in the dry ingredients.  Using a wooden spoon, stir in the milk chocolate and bittersweet chocolate.  Cover the bowl and let the dough stand for 10 minutes.  (The dough can be wrapped in plastic and stored in an airtight container in the refrigerator for up to 3 days or frozen, well wrapped, for up to a month.)
4.     Drop dollops of nutella in teaspoonfuls over the top of the dough as you scoop it out, leaving the nutella dollops intact (don't marble into the dough).  Drop the dough by 2-tablespoon mounds onto the prepared baking sheets, spacing them at least 2 inches apart.  Bake the cookies, one sheet at a time, for 11 to 13 minutes, until golden around the edges.  Cool the cookies on the baking sheet for 5 minutes, then transfer them to a wire rack and cool completely.

Store in an airtight container at room temperature up to a week.  Makes about 40 cookies.

HungryLittleGirl