Monday, August 15, 2016

Eats in Dublin, Ireland - July 25-28, 2016

Eats in Dublin, Ireland – July 25-28, 2016

I traveled to Dublin for work last month and, as is now second nature to me, I took pictures of (almost) every scrap of food I ate on the trip. We had a couple of team dinners so I was fortunate enough to experience two Dublin restaurants, a boat ride to one of them, and an honest-to-goodness musical Irish pub crawl. 
My favorite part was singing Molly Malone, in case you wondered. Maybe because it was one of two Irish songs I was familiar with. "Cockles and Mussels, alive, alive-o!" Reminded me of Arya on Game of Thrones. But I digress....


First restaurant was Aqua, which was in Howth and which entailed us getting on a boat, sailing on the bay for almost an hour (fortified with a seafood appetizer buffet en route which I could not enjoy because while I was fine for the first 20 minutes, the last 30 were not my friends) and pulling up to the pier in front of the restaurant. That’s not your grandmother’s Uber ride..  


Smoked Salmon with crab
Steak with what I called "Jenga potatoes"
Since Aqua was set near the water, a great view was mandatory and that’s what we had. I only remembered to take one picture of the spectacular view because I was too busy talking, eating and taking pictures of the food. I had the steak and ordered it “medium”. The waiter informed us they only did rare, medium and well done. I thought medium was a safe, moderate bet but unfortunately I was wrong. Either I got someone else’s steak by mistake or the Irish version of “medium” was “seared on each side, middle just barely lukewarm. Meaning by my standards, it was really rare. I ate the outside but couldn’t do the middle. The potatoes were terrific though and artistically presented as to what I call a Jenga pattern. I’ve never had a bad potato in Ireland. I don’t think it’s allowed.
Chocolate Tart


Very excellent creme brulee

The next night, we went on a carousing musical pub crawl through 3 pubs, guided by local musicians who sang and taught us some Irish songs at each pub. Definitely a new and fun experience, even or especially if you can't sing. I can't so I kept my "singing" voice low enough not to embarrass myself. I don't drink so I'm never going to be drunk enough to actually sing.


The front of 41 Restaurant
After the musical pub crawl, we had dinner at 41 Restaurant, which from the outside, didn't look like a restaurant at all, more like someone's home.. This one was fancier, reminiscent of Alexander’s back home where they do fancy little one-bite palate cleansers between courses, whether you ordered it or not. One was a single dumpling in a tasty sauce, that was pretty good. Another one was butter foam with random popcorn on it. I don’t know what that was except odd. I didn’t care for it. I got the steak again here but prudently ordered it “well-done” this time. That turns out to be the right choice as it was closer to medium-well than well-done. Whew. Pretty tasty too.


Foie Gras
Steak Medallions
Some weird butter foam thing
Peach Vol au Vent
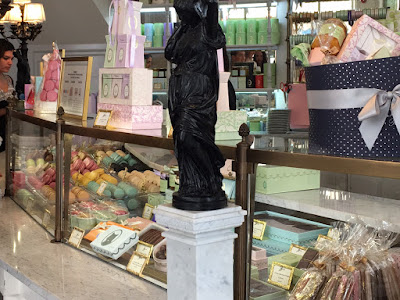
When I wasn’t having team dinners or working, I did manage to venture out during my lunch hours to do my usual “I’m on a mission, have to find a bakery to try while I’m out here” walk. I found Laduree which was a pleasant surprise as I didn’t know they had one in Dublin. I went in hoping for something like the hazelnut slice I had at the Laduree in Paris but alas, this one was so small, they only did macarons. I “settled” for the salted caramel macaron (2 euros) as memory served that this was the only flavor macaron I like. With like being a strong word for describing me and a macaron.
One of the coworkers also recommended I try Queen of Tarts. It was just over a mile from the office so it was an easy 15-minute walk with the GPS function on my phone. I couldn’t find anything in Dublin without it. Queen of Tarts was a cute little place, half of it filled with small tables and the other half with the kitchen and the counter display cases full of mouth-watering desserts. While my eyes always round out bigger than my stomach (and that’s saying something), past experience says I shouldn’t get more than ONE thing or I’ll regret it, especially since I was leaving the following day and I had already bought the salted caramel macaron.


So although I could’ve hung out in front of the display cases, licking my chops, eating with my eyes all day and risk having the Queen of Tarts people call the garda to throw out the weird American, I did manage to observe propriety and sedately asked for just the apple crumble “for takeaway”. That means “to go” since I wasn’t going to be eating it until after work that night. Apple crumble in Dublin, in case you wanted to know, is like American apple pie with a Dutch crumble or streusel topping. Except it’s less sweet, there’s less of the gelatinous filling and more pure apple. This particular one gets high marks from me because, most importantly, there were no raisins in it. No raisins. So that makes it a near-perfect apple crumble to me.  3.95 euros so it might seem a tad expensive but that’s not too bad and it was definitely worth it.


So that was a slice of my almost-week in Dublin, not counting my pacing of the airports, racing through Heathrow to catch connections, staying up all hours because I can’t sleep on airplanes and waking up at 1 am thanks to jet lag. But I still love to travel and I love trying new places to eat.

Saturday, August 13, 2016

Molten Lava Cakes - again

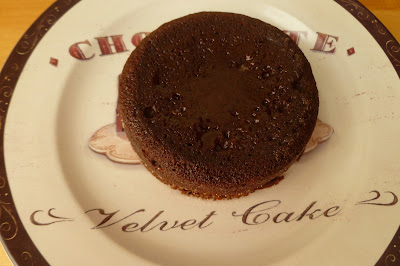
Molten Lava Cakes - made July 2, 2016, recipe from Christine Byrne, Buzz Feed staff
Don’t ask me why I made molten lava cakes with Nutella in the middle again. I don’t know. Because I can, I suppose. Or I wanted to rectify the mistake I made last time in taking them out of the ramekin too soon while they were still hot and fragile and wanted to see if I could do it better the next time. So I tried a different recipe and corrected my mistake from the first one.

It actually worked (it doesn’t always). Instead of buttering and flouring the ramekins, I sprayed them with nonstick cooking spray and sugared the insides by dropping a little granulated sugar and tapping them around to cover most of the inside. After I took the cakes out of the oven, I did manage to let them sit in the ramekins undisturbed for 5 minutes. Then I loosed the sides with a small spatula, upended them onto a dessert plate and kept the ramekin in place for another 5 minutes. Take off and tada – whole cake with the molten chocolate still on the inside. 
Similar to the last molten chocolate cake I made, this one was incredibly rich and chocolaty. The cake part was a bit more dense than the other recipe I tried, almost like a flourless chocolate cake and the middle part incredibly gooey, helped along by the warm Nutella. You definitely want to have some chocoholics with you when you make this. Half a ramekin was my limit. In one sitting.

4 ounces semisweet baking chocolate, chopped
2 tablespoons unsalted butter, at room temperature, plus more for greasing custard cups
2 tablespoons sugar, plus more for the custard cups
2 large eggs
2 tablespoons all-purpose flour
1/8 teaspoon kosher salt
PREPARATION
1. Preheat oven to 425°F, and grease two 6 to 8-ounce custard cups or ramekins generously with butter. Put a small spoonful of sugar in each cup, then turn the cup sideways and rotate it so that the sugar is coating the butter all around. Dump out any excess sugar. Place the greased cups on a baking sheet or oven safe dish.
2. Put the chopped chocolate in a microwave-safe bowl. Microwave it on high for 30 seconds, take it out and stir it, then microwave it for another 30 seconds and stir it again. It should be completely melted. If there are still chunks of unmelted chocolate, microwave for another 20 seconds and stir.
3. In a medium mixing bowl, cream the room temperature butter and the sugar with an electric mixer or a rubber spatula. The mixture should be thoroughly combined, smooth, and paste-like, not lumpy.
4. Add the two eggs to the creamed butter and sugar, and beat it with the electric mixer or a whisk until everything is combined and the mixture is starting to foam, about a minute. Add the flour and salt, and again beat everything with the mixer until it’s thoroughly mixed.
5. Add about 1/3 of the melted chocolate to the mixture in the mixing bowl, then use a rubber spatula to gently fold it in. Add the rest of the chocolate mixture, and fold together until you have a uniform batter with no streaks.
6. Divide the batter evenly between the two greased custard cups, then bake the cakes in the preheated oven until the tops are just set but the cakes still jiggle slightly when you shake them, about 11 minutes.
7. Let the finished cakes sit in cups for five minutes when they’re finished baking. Then, flip each cup over on a dessert plate, and tap the bottoms of the cups so that the cakes fall out.
8. Serve immediately. If you want, you can garnish them with powdered sugar, whipped cream, and berries.

Friday, August 12, 2016

"Perfect" Snickerdoodles

"Perfect" Snickerdoodles - made dough July 4, 2016 from Cookies and Cups
Along with the crème brulee, one of my guests also asked for snickerdoodles. Did I go with my tried and true recipe? Of course not! I wanted to try a new recipe so I did.

This was actually pretty good. I think I underbaked it just a tad too much though or else ate it too soon after I took it out of the oven as it was a little gummy in the middle. But if I had eaten it the next day, I think it would’ve been perfect because that slight gumminess would’ve been more like a moist cookie.

Snickerdoodles are easy to overbake and when you bake them too long, they’ll be cakey and dry then cakey and crunchy. I abhor dry and crunchy so I’m paranoid about overbaking and err on the side of underbaking. This stayed pretty thick and didn’t spread too much so that was another point in its favor. 
1 cup butter
3/4 cup granulated sugar
1/2 cup brown sugar
1 egg plus 1 egg yolk
1 tablespoon vanilla
1 teaspoon baking soda
1 teaspoon cream of tartar
1/2 teaspoon salt
1 teaspoon cinnamon
2 3/4 cups flour

Cinnamon Sugar
1/4 cup granulated sugar
1 tablespoon cinnamon
  1. In bowl of a stand mixer, beat butter and both sugars until light and fluffy, 2-3 minutes. With mixer on medium speed, add egg, yolk and vanilla; beat for another minute, scraping down the sides of the bowl as needed.
  2. With mixer on medium low, mix in baking soda, cream of tartar, 1 teaspoon cinnamon and 1 cup flour. Turn mixer on low and add remaining flour. Mix until just combined. Do not overbeat.
  3.  Portion into golf-ball-size dough balls, cover and chill or freeze for several hours or overnight.
  4. When ready to bake, preheat oven to 325 degrees F. Line baking sheets with parchment paper.
  5. Combine 1/4 cup sugar and 1 tablespoon cinnamon in a small bowl. Roll dough balls in mixture and evenly space on baking sheets. Bake 10-12 minutes. Remove from oven, let set for several minutes then transfer cookies to wire racks to cool completely.

Wednesday, August 10, 2016

Restaurant Review: Sara's Kitchen

Sara's Kitchen - brunch on July 23, 2016
I haven’t done restaurant reviews in awhile but I still like to plug small business owners and mom & pop places for people to try. Even if you don’t live where I live and have access to the places I write about, my hope is it prompts you to consider “eating local” at a small business in your area. Eating local to me doesn’t have to be the super uppity gourmand places with high prices, large plates and small portions. And it doesn’t have to be the dive-y greasy spoon where you risk ptomaine poisoning. C’mon, there’s a lot of middle in between there.
Berry Shortcakes
Sara’s Kitchen is the kind of place I’m talking about. It’s small, seems like it’s been there awhile and they don’t have a super glitzy website or marketing gimmicks. They just serve good breakfast and brunch food. I love breakfast and brunch so my biggest problem is narrowing down what I’m going to eat. Because there were lots of good choices on the menu, many of them the traditional breakfast fare that I love. I just can’t eat them all at once.
Extra Crispy Bacon, Scrambled Eggs and Hash Browns

Short Stack (2) Pancakes
This time around, I compromised and got the chicken fried steak with eggs and hash browns with a side order of 2 pancakes. Why, yes, that is a lot of food. I ate the pancakes, a bite of the steak, two bites of eggs, 1 bite of hash browns and took the rest home to eat later that day. Win-win. My friend Shawn got the French Toast combo which came with bacon, eggs and hashbrowns. Both of us liked our respective orders. Was it gourmet? No. Was it good? Yes. All served by some very nice ladies so it was a good experience and one I would recommend.
Chicken Fried Steak, Scrambled Eggs and Hash Browns

Sunday, August 7, 2016

Poke Turtle Brownies

Poke Turtle Brownies - made June 25, 2016 from Carlsbad Cravings
I took a brief break from cookies to make brownies. Brownies have long been my go-to desserts but lately it’s been easier to make cookie dough to freeze and bake later. Whereas brownies I usually bake right before I need them to bring into work or a party so they require a trifle more timing and planning.
Turtle brownies are always a favorite since they involve chocolate and caramel. I’m not a fan of nuts in my brownies but on top of them is okay. This version had the added decadence of poking holes into the top of the baked brownie so there was room for the caramel layer to dribble inside the brownie itself. I loved that concept and poked with abandon (and a wooden chopstick) when the brownie came out of the oven.

I cheated and used a jar of salted caramel sauce from Trader Joe’s rather than making my own caramel. I don’t have good experience with making my own caramel so I don’t even bother to try anymore, not when Trader Joe’s is right there and they make a spankin’ good caramel. I warmed up the jar a bit so that the caramel would pour more easily. I used about half of the jar to fill in the holes and saved the other half for the final topping.
Surprisingly, I even liked the frosting in this recipe and you know I’m not a frosting person. Let the caramel set before you frost the brownie or else they’ll intermingle. Not that that’s a bad thing but it’s easier to frost without sticky caramel getting in the way. Toast the nuts (always) to bring out the flavor and add some crunch. I used mini chocolate chips for looks and to get more chips on there but you can also use the regular size. Once you’ve sprinkled enough nuts and chocolate chips to your satisfaction, drizzle the remaining caramel over the brownies and there you have decadence personified.
I haven’t met a turtle brownie yet that I didn’t like and this was no exception. Cut the pieces small as they are rich. The caramel didn’t drip as much as I expected into the brownie itself although it certainly added to the moistness and richness. Next time I think I’ll use 2/3 of the jar to fill in the holes instead of just half a jar.
1 cup butter (2 sticks), melted
2 cups granulated sugar
3/4 cup unsweetened cocoa powder
4 large eggs
2 teaspoons vanilla extract
1 cup flour
1/2 teaspoon baking powder
1/2 teaspoon salt
1/4 - 1/2 teaspoon cinnamon, optional
1 cup semisweet chocolate chips
1 1/4 cups pecans, roughly chopped
3/4 cup caramel sauce (I used salted caramel from Trader Joe's)
1/4 cup mini semisweet chocolate chips

Chocolate Frosting
6 tablespoons butter, softened
1/4 cup + 2 tablespoons cocoa powder
2 tablespoons light corn syrup
1 teaspoon vanilla extract
1 1/2 cups powdered sugar, sifted
2-3 tablespoons milk
  1. Preheat oven to 350 degrees F. Line a 9 x 13" pan with foil and lightly spray with nonstick cooking spray; set aside.
  2. Cream together butter, sugar and cocoa powder in the bowl of a stand mixer with the paddle attachment. Beat at medium speed for 2 minutes. Add eggs to the batter, one at a time, beating after each addition just until incorporated. Beat in vanilla.
  3. In a separate bowl, mix together flour, baking powder, salt and cinnamon if using then beat into batter just until combined. Add 1 cup semisweet chocolate chips and stir until just combined. Pour batter evenly into pan. 
  4. Bake for 30-35 minutes or until toothpick inserted near the middle comes out with moist crumbs. Let pan cool on a wire rack for 5 minutes then poke holes all over with the handle of a wooden spoon or a chopstick. Pour 1/2 cup caramel over brownies and spread into holes with a spatula. Refrigerate brownies for one hour or freeze for 30 minutes to let the caramel set. 
  5. Meanwhile prepare the chocolate frosting: beat butter, cocoa, corn syrup and vanilla in a small bowl until blended. Add powdered sugar and 2 tablespoons milk; beat until smooth, adding additional milk if needed to reach spreading consistency.
  6. Once caramel has set, frost brownies. Sprinkle evenly with 1/2 cup chopped pecans, 1/4 cup mini chocolate chips and drizzle with 1/4 cup caramel.

Saturday, August 6, 2016

Creme Brulee from Cooking Classy

Creme Brulee - made July 3, 2016 from Cooking Classy
I rarely make crème brulee. For one thing, it’s hard to make for just one person unless you’re going to take just a fraction of all of the ingredients to make one serving. Do you know how hard it is to gauge half an egg yolk? And I would only want to make one serving if it was just for me because no one person should eat double servings of crème brulee. Not if she wants to fit into her clothes the next day.
But I was having friends over for dinner and one of the requested desserts was crème brulee. Since I hadn’t made it in so long, I thought I’d better do a trial run of a recipe the week before the dinner to make sure I could do it right.  How embarrassing would it have been if I screwed up dessert?

Most crème brulee recipes are pretty simple. Heat the cream, steep with the vanilla bean pod, whisk the egg yolks with sugar, temper in the hot cream, pour mixture into ramekins, bake in a water bath. Seriously, it’s that easy.
What is not easy, however, is gauging when it’s done. If you overcook crème brulee, it’ll be scrambled eggs. If you undercook it, instead of smooth custard, it’ll be liquidy and drippy that will be no fun to eat. To tell if it’s done, you’re supposed to shake it and see if the middle is still jiggly but not too jiggly. But remember that water bath? It’s not like you can shake the whole pan without risking some of your water spilling into your crème brulee. And unless you have fingers of steel, you can’t dip in your bare hand to jiggle the ramekin itself. Using a potholder potentially hides the custard you’re trying to tell if done.
Some recipes advocate putting a knife through it and if it comes out with custard (instead of liquidy cream), it’s done. I have never conducted the knife test successfully. For one thing, I don’t like making the knife slit into my custard; it ruins the smooth surface of the top to make a cavity in it. For another, it’s still hard for me to tell if it’s done or not based on the custard smear on the knife. So I do the jiggly test very carefully, making sure the water doesn’t spill over into the ramekins. Even then, I’m not always sure whether it’s still too jiggly or not jiggly enough. Remember, the custard will also “set” once it cools. So you won’t know how done (or not) the crème brulee is until after you’ve taken it out and chilled it thoroughly.
This one turned out okay, once I stopped second guessing myself. It still had a bit of a jiggle in the middle when I took it out but once I had chilled it overnight and then bruleed the top, it turned out pretty well. If you do happen to undercook your crème brulee, after you brulee the sugar on top, put it back in the fridge for a few minutes to firm it back up.

The taste was smooth vanilla creaminess. The only thing I wish had worked better is all the vanilla bean seeds from the vanilla bean pod I used sank to the bottom. Other than that, I thought this was a pretty good crème brulee. 
4 cups heavy cream
1 1/4 cups granulated sugar, divided
1 pinch salt
8 large egg yolks
1 vanilla bean
1/2 teaspoon vanilla extract
hot water for water bath
  1. Preheat oven to 325 degrees F. Pour cream into medium saucepan. Scrape seeds from vanilla bean and add to saucepan along with vanilla bean pod. Heat mixture over medium-high heat, stirring occasional, until it reaches a light boil. Remove from heat and let rest 15 minutes.
  2. In a mixing bowl, whisk together 3/4 cup granulated sugar and salt with egg yolks until mixture becomes slightly pale. Remove vanilla bean pod from cream. 
  3. While whisking, pour cream mixture into egg yolk mixture. Stir in vanilla extract.
  4. Place ramekins in baking pans. Divide cream mixture among ramekins, filling each nearly full. Pour hot water into pan and fill water level to about halfway up the sides of the ramekins. Bake for 30-45 minutes, depending on size of ramekins until set but centers still jiggle slightly. Cool at room temperature for 30 minutes then transfer to refrigerator to chill 3 hours.
  5. Remove from refrigerator and let rest 20 minutes, then sprinkle tops evenly with remaining sugar. Holding a hand-held kitchen torch, about 4 inches from sugar, evenly brown sugar. Remove flame just before desired shade is reached. Return to refrigerator and chill 20 minutes. Serve cold.