Monday, February 2, 2015

Kahlua Espresso Chocolate Chip Cookies

Kahlua Espresso Chocolate Chip Cookies - made dough January 24, 2015, modified slightly from Jenn's Food Journey
I need to do some virtual decluttering on my pinterest boards. I go through periods of wanting to either delete all the pins on my boards and start over or make them all so they’re not a constant reminder of the baking I intended to do at one point and still haven’t done. Some of the pins are so old and still unmade that the original link that the pin goes back to is no longer active or has moved and I’ve lost the recipe.

With that risk in mind, I’ve been turning my attention to some older pins that represent recipes I really want to try so I could at least capture them on my blog. I loved the chubby look of these because we know how I feel about the chubby – good on a cookie, not so good on me. I like the size and thickness of them in the original blog picture from Jenn's Food Journey so I thought I’d take a stab at them for myself, especially as I needed cookies for my next book club meeting. Easy to make the dough on a weekend then bake off the night before.
This was a good marriage of chocolate and espresso. The coffee taste wasn’t too pronounced but you could definitely taste it. Make sure you use a good dark cocoa so the chocolate can hold its own against the coffee which tends to be a dominant flavor. I used Pernigotti cocoa and it resided in perfect harmony with the espresso in this cookie. But alas, the Kahlua was a casualty as you can’t really taste it. Jenn's Food Journey had the same observation and I was tempted to up the Kahlua amount but ended up keeping it as is since I didn’t want the dough to have too much liquid and potentially spread more. As it was, it didn’t bake up quite as thick as the original blog. If hers was chubby, mine was slightly pudgy. Still, they tasted good and were decently thick enough. They also had a nice, soft, chewy texture the next day when I brought them in for my book club meeting.
2 2/3 cups all purpose flour
1 teaspoon baking soda
1 teaspoon cinnamon
1/2 teaspoon salt
1/4 cup cocoa
1/2 Tablespoon instant coffee (original recipe calls for espresso powder)
1 Tablespoon Kahlua
1 cup unsalted butter, room temperature
1 cup packed brown sugar
1/2 granulated sugar
2 eggs
1 teaspoon vanilla
1-2 cups chocolate chips
  1. In a bowl, whisk together the flour, baking soda, cinnamon, salt and cocoa; set aside.
  2. In a small bowl or measuring cup, add the instant coffee and Kahlua; stir to combine.  Allow to sit and let the coffee granules dissolve.
  3. In a bowl of a stand mixer with a paddle attachment, cream together the butter and both sugars until light and fluffy.  Scrape down the sides and add the eggs, one at a time, beating until just incorporated.  Add the vanilla and beat until just combined.  With mixer on low, slowly add in the dry ingredients until just combined.  Remove from stand mixer and fold in chocolate chips.
  4. Portion into golf-ball-size dough balls and freeze for several hours or overnight. When ready to bake, preheat oven to 375 degrees F. Bake 8-10 minutes, or until slightly browned on the edges. Remove and allow to cool for 5 minutes.  Finish cooling completely on a wire rack. 

Saturday, January 31, 2015

Triple Chocolate Brownies

Triple Chocolate Brownies - made January 10, 2015 from Extreme Brownies by Connie Weis
This was the first brownie recipe I made this year before the pms'ing buttercrunch one and it's just as good. Actually, I'm 2 for 2 from the Extreme Brownies baking book so I'm pretty pleased with that investment. Not that I don't already have a bunch of great brownie recipes to fall back on but, like workout DVDs and books, you can't have too many.
The first  three pictures were taken when the brownies had barely cooled to room temperature so they look a bit gooey (nothing wrong with that). Connie's directions say to chill these overnight. I never did the chilling thing though. I don't mind freezing brownies and thawing them as they keep just fine with no ill effects. But I've been conditioned from culinary school that refrigerating baked goods dries them out. Lord knows I've had enough bakery items from refrigerated display cases to bear that out. So I simply left these, covered, overnight on my counter.
The bottom two pictures were taken after the brownies had cooled completely and were cut, er eaten, the next day. You can tell the texture is more firm, closer to fudge than gooey chocolate cake. Fudge-like is how I like my brownies so this is one of the few times that something completely cooled and set is better than gooey warm from the oven. But that's a personal preference. Either way, these are fudgy goodness if you want a shot of chocolate in your system.

Brownie batter
3 sticks (12 ounces) unsalted butter
4 1/2 ounces unsweetened baking chocolate
1 1/2 cups (9 ounces) 60% cacao bittersweet chocolate chips
6 large eggs, room temperature
1 1/2 cups (10.5 ounces) granulated sugar
1 1/2 cups (12 ounces) light brown sugar
1 teaspoon salt
1 tablespoon pure vanilla extract
1 1/2 cups (6.8 ounces) bleached all-purpose flour
3/4 teaspoon baking powder

Chocolate drizzle
1 tablespoon unsalted butter
1 teaspoon light corn syrup
1/4 cup (1.5 ounces) semisweet chocolate chips
1 teaspoon very hot water
  1. Preheat oven to 350 degrees F. Line a 9 x 13 pan with foil and lightly spray with nonstick cooking spray.
  2. Cut the butter into 1-inch slices. In a small, heavy saucepan, melt the butter pieces over the lowest setting. While the butter is melting, chop the unsweetened chocolate into 1/4-inch pieces and add to the melted butter along with the bittersweet chocolate chips. Use a small whisk to speed the melting process. When the chocolate is melted and completely smooth, turn off the heat but leave the saucepan on the burner while proceeding with the recipe.
  3. Using a large whisk, lightly beat the eggs in a large mixing bowl. Place the sugars and salt in a separate small mixing bowl, then whisk into the eggs until just incorporated. Briefly whisk the melted chocolate mixture, then gradually whisk into the egg mixture until just combined. Briefly whisk in the vanilla. 
  4. Place the flour and baking powder in a small mixing bowl; whisk together to combine. Sift through a medium strainer directly onto the batter; stir in with a spatula until just combined. Pour the batter into the prepared pan and spread evenly with a small offset spatula. Bake for 34 minutes, until a toothpick inserted in the center comes out clean. Transfer the pan to a cooling rack and let cool at room temperature for at least 15 minutes.
  5. Chocolate drizzle: Melt the butter and corn syrup over low heat in a small, heavy saucepan. Remove the pan from the heat and add the chocolate chips; stir with a small spatula until the chocolate is melted and smooth. Stir in the hot water to thin it out. Using the spatula, drizzle thin, random stripes over the top of the cooled brownie slab. Let the drizzle cool at room temperature for 30 minutes, then refrigerate the pan for 7 to 8 hours or overnight. 

Thursday, January 29, 2015

Cupcakery Review: Sibby's

Sibby's Cupcakery - January 5, 2015
I first had Sibby’s Cupcakes when I worked at Yahoo! Back then, Sprinkles was my cupcake of choice but I have to admit, Sibby’s unseated them. Three things work in Sibby’s favor: first, the cupcakes are the perfect size, maybe a bit smallish but that’s not a bad thing because they’re so good you’ll want to eat more than one. Second, they don’t put a ton of frosting on their cupcakes. For a non-frosting person like me, it’s refreshing not to have to scrape off a mountain of creamy sugar to get to the cupcake. Third, did I mention they’re so good you want to eat more than one??
Sibby's Sampler
When I left Yahoo! a few years ago, my team was nice enough to order Sibby’s as part of my send off. I’m glad they did as my Sibby’s source dried up after that. They’re a small business in the Bay Area but they don’t have a retail storefront so you have to order online then go pick up your cupcakes at their commercial kitchen. Which I’m not opposed to doing but I generally don’t order a dozen or two cupcakes, no matter how much I want to. That irritating portion control thing. I suppose I could have bought a (couple) dozen to share but Sibby’s kitchen was far enough away from where I lived and worked that even *I* paused at making the trek “just for cupcakes”. I know, that makes you want to take away my crazy-foodie status, don’t you? 
Salted Caramel

Fortunately, at my current company, when someone was asking my advice on where to get good cupcakes for a coworker gathering, I thankfully remembered Sibby’s. Even more thankfully, they took my recommendation and one morning, I faced that beautiful box of delicious cupcakes again. My favorite – or one of my favorites because it seems wrong to choose just one – is the Salted Caramel. Lots of desserts claim to have salted caramel but their caramel is either too salty or not salty at all. Sibby’s Salted Caramel has just the right amount of saltiness. Plus the cupcake itself was delicious.

Coconut Cupcake
Then, because it’s been such a long dry spell without Sibby’s, I ended up taking a second cupcake for later (don’t judge). This time I got the Coconut with cream cheese frosting.  Not quite as good as the Salted Caramel but still more delicious than your average cupcake. Believe me, when it comes to sugary calories, I don’t do average.

If you forced me to rate cupcakeries, I’d have to rank Sibby’s at the top for cupcakes in general, followed by the Cookie Butter cupcake from Fairy Cakes, the Samoa cupcake from Sift, the red velvet at Sprinkles then the Toffee Crunch cupcake from Minicakes by Tasha. It shows how highly I think of Sibby’s when I don’t limit their ranking to a particular flavor like I do with the other cupcakeries. Yep, they’re that good. I want them to go on Cupcake Wars, win the $10,000 and open their own storefront. Then I don’t have to dream up reasons to order a dozen cupcakes and drive miles away to pick them up. They are a bit pricey for what you get ($42 for a dozen of the regular size which are smaller than Sprinkles and about the size of Kara's) in terms of size but if you're a foodie, it's worth it for the taste.

Monday, January 26, 2015

Samoa Sheet Cake

Samoa Sheet Cake - made January 25, 2015 from Chef in Training
As I've celebrated every year, January 27 (tomorrow) is National Chocolate Cake Day. We're also getting into Girl Scout cookie selling season if my Facebook feed is anything to go by with parents of said Girl Scouts pimping offering their kids' cookies for sale. With this recipe from Chef in Training, I'm going to honor this sacred day and its Girl Scout cookie namesake as well as maximize your empty calories to the fullest extent.

I'm just going to say it: skip the cookie pushers. Salve your conscience by donating $20 directly to the local Girl Scout troop and/or buy the boxes of cookies and ship them to our troops. I've done both. So I can feel free to break out this Samoa Sheet Cake. Move over Girl Scout Samoa Cookie, there's a new cake in town and it kicks your butt. Best rendition of Samoas ever.

If all the versions I've made of Texas Sheet Cake are any indication, we all know of my fondness for easy-to-make chocolate fudge cakes. This is that and so much more. As always, I never actually bake the cake in a sheet pan so I've modified the directions slightly. Instead, I baked it in a 9 x 13 pan because that gives the right amount of cake thickness to me. I kept the frosting amount the same this time and that turned out okay too. Do not skip the step about toasting the coconut. It gives the cake a nice crunch and provides a great contrast with the gritty sweetness of the frosting. The chocolate and caramel drizzled on top just push this cake over the edge and I made the leap right along with it. As long as I have this cake, I'll never eat a Samoa cookie again.

2 cups flour
2 cups sugar
½ cup butter
1 cup water
4 tablespoons cocoa
½ cup shortening
½ cup buttermilk
½ teaspoon baking soda
2 eggs
1 teaspoon vanilla

Frosting
½ cup butter
6 tablespoons milk
2½ cups powdered sugar
1 teaspoon vanilla
⅛ cup caramel sauce

Additional Toppings
2½ cups toasted coconut
7 to 8 ounces caramel
⅛ cup whole milk
¾ cup milk or semisweet chocolate chips
1 teaspoon shortening or oil
  1. Line a cookie sheet with foil and spread shredded sweetened coconut evenly. Bake at 350 degrees for 10-12 minutes, checking and stirring regularly every 2-3 minutes to toast coconut evenly and keep from burning. When at least 2/3 of the coconut is light golden brown, remove from oven and let cool.
  2. Line a 9 x 13 inch baking pan with foil and lightly spray with nonstick cooking spray.
  3. In a large mixing bowl, measure flour and sugar. Set aside.
  4. In a medium sauce pan, combine butter, water, cocoa and shortening. Bring to a boil. After mixture reaches a boil, add it to the flour mixture and stir to combine.
  5. Add buttermilk, then baking soda, then eggs, then vanilla in that order, mixing in-between each addition.
  6. Pour into 9 x 13 baking pan and bake at 350 degrees F for 20-25 minutes or when a toothpick inserted near the center comes out clean or with a few moist crumbs.
Frosting
  1. In a medium microwave safe bowl, combine butter and milk and bring to a boil. Stir in caramel sauce and then add powdered sugar and vanilla and stir until smooth.
  2. After cake has baked, remove from oven and poke holes in hot cake with a fork. Pour frosting evenly over top. Immediately sprinkle top of warm frosting with toasted coconut.
  3. In microwavable bowl, add caramel and milk and cook on high in 30 second increments, string in between each increment. Continue to cook and stir until caramel is smooth. Drizzle over coconut.
  4. In another microwavable bowl, add chocolate chips and shortening (or oil). Microwave on high in 30 second increments, stirring in between each increment until the chocolate in melted. Drizzle over caramel.
  5. Let caramel and chocolate drizzle set before cutting cake into squares.

Saturday, January 24, 2015

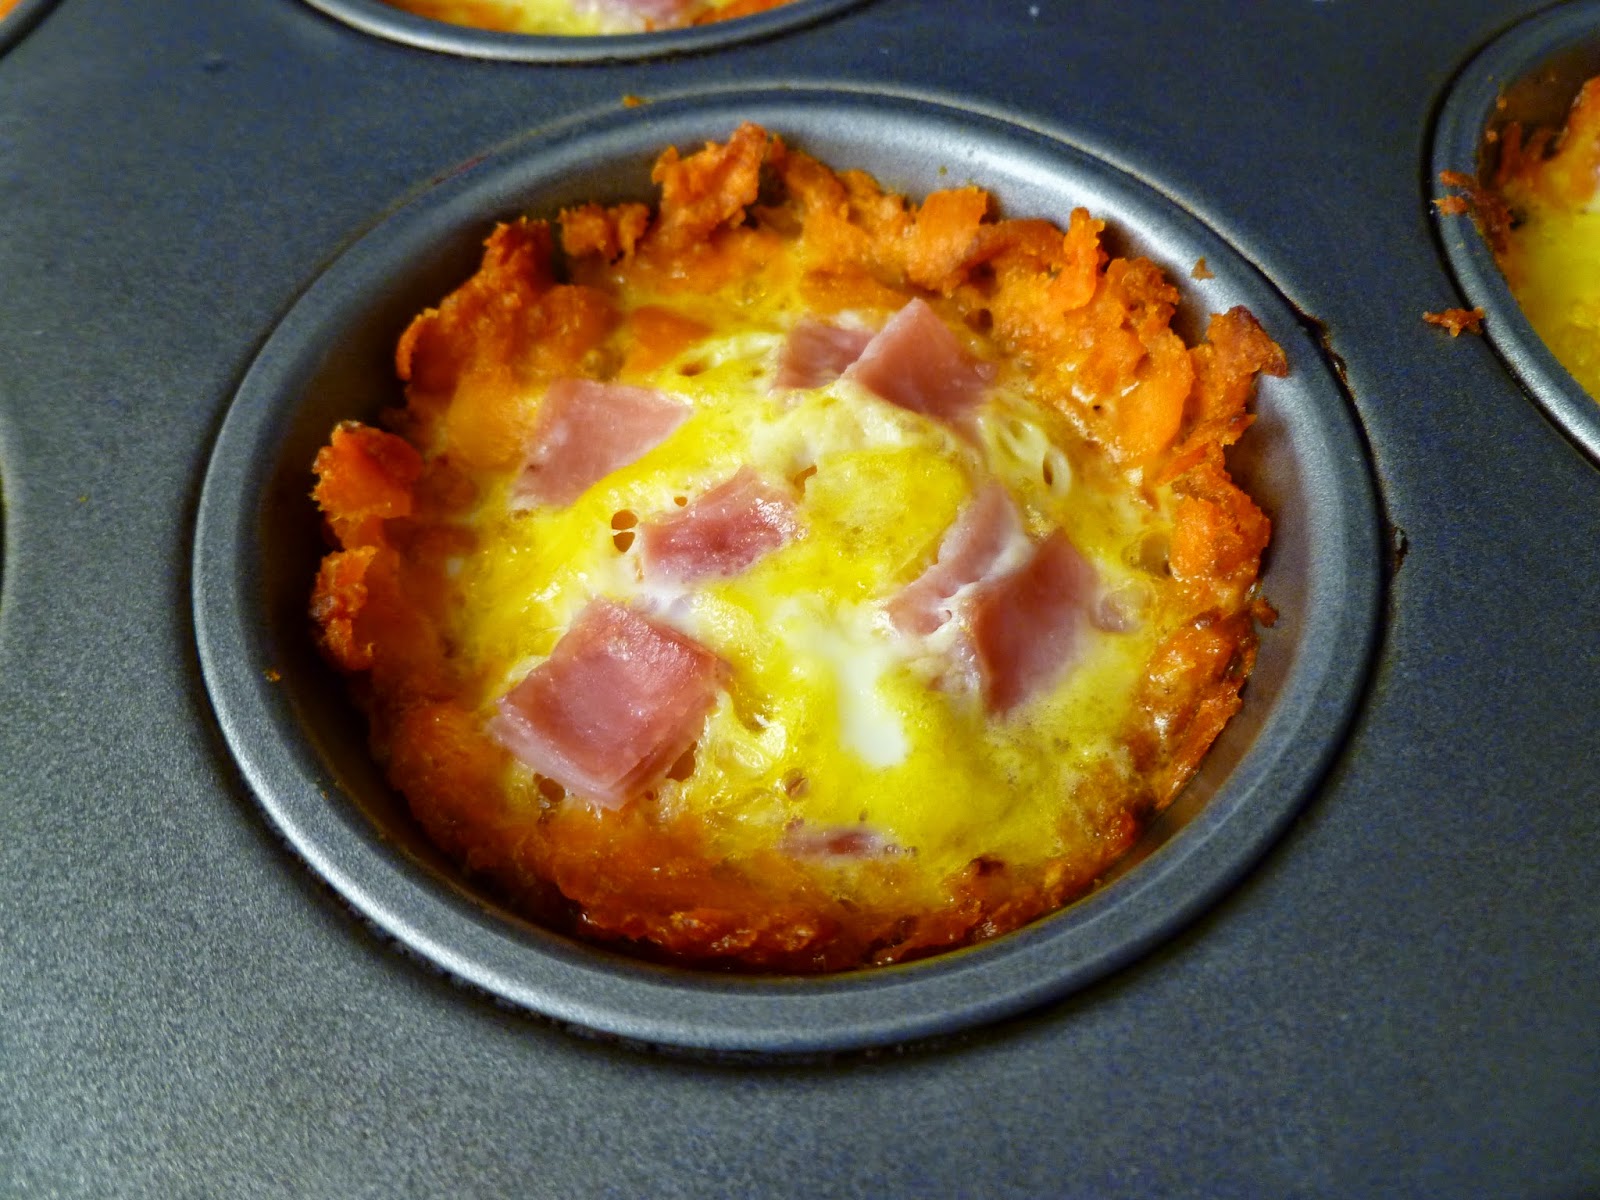
Sweet Potato Breakfast Cups

Sweet Potato Breakfast Cups - made January 10, 2015 from Easy Healthy Living
I did take a stab at healthier eating this month. If you consider sweet potato tator tots healthy. They make the base for this breakfast cup recipe. At first I was inclined to boil sweet potatoes, mash them and form them into cups in muffin tins but I didn’t know if that would provide enough structure or just result in sweet potato mush so I went along with the tator tot idea.


For the most part, it worked. This was super easy to make so it was suited to my cooking “skills”.Make sure to bake the "tot cups" long enough for them to crisp up before adding the ham and the eggs. Because of the eggs, you don’t want to bake these too long or the eggs will get rubbery. I made a basic mistake (typical) and didn't read the directions carefully so I didn't prebake the tots like I should have. My bad. The taste was still good but the texture would've been better had the sweet potato cups been a bit more crisp.


19-ounce package frozen sweet potato tots, thawed
½ cup lean diced ham4 eggs
1 tablespoon milk
  1. Preheat oven to 400 degrees. Coat muffin tin cups with nonstick cooking spray.
  2. Allow tots to thaw then place about 5-6 tots in each cup. Mash tots with back of spoon or small glass to form cup shape in muffin tin. Bake for 10 minutes.
  3. Remove cups from oven and add diced ham. Lower oven temperature to 350 degrees.
  4. Mix eggs and milk until evenly combined, add salt and pepper as desired.
  5. Divide egg mixture between muffin cups.
  6. Bake cups for 15 minutes or until eggs are set.

Thursday, January 22, 2015

Buttercrunch Brownies for National Buttercrunch Day (January 20)

Buttercrunch Brownies - made January 19, 2015 from Extreme Brownies by Connie Weis (originally called Connie's "PMS" Brownies)
Back to the desserts with a vengeance! Every January I say I’m not baking until February and every year my pants are on fire because it turns out to be a lie. Let’s be honest. I didn’t last a week into January before I made pandesal. I also made another brownie recipe earlier in the month but I’m leapfrogging this one because this was for National Buttercrunch Day which was on January 20. Yes, people, here in the US, we have a day set aside to honor toffee covered in chocolate and sprinkled with nuts. Because that’s what buttercrunch is and how it distinguishes itself from plain old toffee. Not that there’s anything wrong with plain old toffee but why eat it plain when you can cover it in chocolate and roll it in almonds? Probably the most famous buttercrunch is Almond Roca. I myself prefer the See’s Candy version called Toffee-ettes.
For the brownie base, I used my new baking book, Extreme Brownies by Connie Weis. I’d been doing well for awhile in not buying new baking books (really, I have!) but c’mon, this was not only about brownies but extreme brownies. Am I supposed to resist that? No, I didn’t think so either.
The original title of this recipe was Connie’s “PMS” brownies; you know, that old adage that women need chocolate during that time of the month to keep themselves from growing horns or fangs. I don’t subscribe to that belief. Too limiting. As if I didn’t need chocolate all 28-31 days of the month to keep my inner beast leashed. Please.
Based on reading the recipe, I figured this would be a really dark chocolate so I made a couple of adjustments. I didn’t use my super-duper Pernigotti cocoa for all of the cocoa called for in the recipe as that would’ve made it too dark of a chocolate brownie. Instead I cut some bland, grocery-store Hershey’s into the Pernigotti so I used about 2/3 Pernigotti and 1/3 Hershey’s to get the right level of chocolatey goodness. The original recipe called for keeping this plain but since this was meant to be a buttercrunch brownie for National Buttercrunch Day, I made up a chocolate frosting to spread on top and have something for the buttercrunch to stick to. Some buttercrunch brownie recipes I had looked up on pinterest has you sprinkling the buttercrunch pieces on top of the brownie batter and letting them bake but I’m leery of baking toffee or buttercrunch as I’m too afraid of it melting then hardening (too much) when it cooled after baking. This was the safer way to introduce the buttercrunch component into the brownie without altering its original texture.
And I'm not going to lie - I was smugly self-congratulatory when my modifications paid off. The brownie itself is excellent, all fudgy goodness, whether you're PMS'ing or not or if you're just a chocoholic dude. The thin layer of chocolate frosting was a good foil against the dark chocolate of the brownie and the buttercrunch provided amazing crunchy contrasting goodness. Don't chop the buttercrunch too finely as  the outer chocolate coating will naturally crumble on its own so do a rough chop into chunks and sprinkle generously on top. These also freeze well so feel free to wrap tightly and store in your freezer in case you need an emergency stash of brownies on hand.
3 sticks (12 ounces) unsalted butter
2 cups (12ounces) 60% cacao bittersweet chocolate chips
6 large eggs, room temperature
3 cups (1 pound, 5 ounces) granulated sugar
1 teaspoon salt
1 tablespoon pure vanilla extract
1 1/4 cups (5 ounces) cake flour
1 cup and 2 tablespoons (4.2 ounces) Dutch-processed unsweetened cocoa powder
  1. Preheat oven to 350 degrees F. Line a 9 x 13 pan with foil and lightly spray with nonstick cooking spray.
  2. Cut the butter into 1-inch slices and in the top half of a double boiler set over simmering water, melt butter and chocolate chips together, whisking until melted and smooth. Set aside to cool slightly.
  3. Using a large whisk, beat the eggs in a large mixing bowl. Whisk sugar and salt into egg mixture just until combined. Briefly whisk in the melted chocolate and butter mixture then vanilla. Whisk just until combined.
  4. Soft together flour and cocoa powder; stir into batter until just combined. Pour into prepared pan and spread evenly with a small offset spatula.
  5. Bake for 34 minutes, until a toothpick inserted in the center comes out with moist crumbs, not raw batter. Let cool at room temperature for at least 15 minutes then either refrigerate pan for 7 to 8 hours or overnight or let cool completely to room temperature.
Frosting (optional or your favorite recipe)
7 tablespoons butter, room temperature
1/2 cup unsweetened cocoa powder, sifted if lumpy.
2 cups powdered sugar
1 teaspoon vanilla extract
1/4 teaspoon salt
Milk to achieve desired consistency (1-2 tablespoons)
1/2 - 3/4 cup Almond Roca, See's Toffee-ettes or other buttercrunch candy, chopped into chunks
  1. Beat butter until soft and creamy. Whisk together cocoa powder and powdered sugar and beat into butter. Add vanilla extract and salt. Add milk, 1 tablespoon at a time, until desired consistency is reached.
  2. When brownie is completely cool, spread frosting in an even layer on top and sprinkle with chopped buttercrunch.

Wednesday, January 21, 2015

Philippines Day 10: Jose Rizal & New Year's Eve

December 31, 2014 - Luneta Park, Jose Rizal statue, my Filipiniana dress and New Year's Eve
The Philippine flag flying at Luneta Park

Last post of the trip and then we'll get back to our regularly scheduled programming of decadent desserts and other kitchen experiments. If you're still going strong on your new year's resolution to eat healthier and cut back on fat and sugar, enjoy the hiatus and prepare to be tempted with the next post. For now, we wrap up our last full day in the Philippines with a morning visit to Luneta Park.
Luneta Park is where the statue of Jose Rizal resides. Jose Rizal was a Filipino nationalist and one of the country's greatest heroes, executed in the late 1800s by Filipino soldiers in the Spanish army. The Philippines was under Spanish rule and Rizal was a nationalist who spoke out about establishing more equal rights for Filipinos and fair representation under Spanish colonial rule, not unlike America's own fight against the British when they were initially colonized.
December 30 is Jose Rizal Day in the Philippines so we were there a day later to visit the park and see his statue. There's a "sister" statue or the same version of the statue in Spain that my niece Lauren had gone to see when she was studying abroad in Madrid last year. Luneta Park is also the only time I've seen the tourist trap of being able to take a kalesa ride through the streets of Manila. A kalesa is a horse-drawn carriage, similar to what you can find in Central Park in New York City, albeit on a smaller scale in terms of the carriage and even the horses. Kalesas were more common years ago but time and progress marches on and they've largely been replaced by jeepneys, tricycles (motorcycles with a side car) and of course, cars. Nowadays, kalesas are for the tourists.
I've rarely done touristy things in the Philippines so I hadn't seen Jose Rizal's statue until now. It's roped off so you can't get too close to it but we were able to get some decent touristy shots in front of it and walk around. The park wasn't very crowded, probably because it was the day of New Year's Eve and a holiday for most people.
Statue of Jose Rizal
When we drove the streets of Manila to and from the park, I also caught a picture of the banners mounted on most of the streetlights depicting the imminent visit of Pope Francis. The Philippines is a predominantly Catholic country and a pope hasn't visited the country for over 20 years, not since the days of John Paul II. Understandably, the country was in a frenzy of excited welcome for the new pope and it showed in the signage lining most of Manila.
Following the visit to Luneta Park, I had to go pick up my Filipiniana dress that I'd bought the day before which was being altered overnight. My nieces wanted to pick up a few more things at the tiangge so my cousin Albert drove us back to Green Hills and we agreed to split up to do our respective shopping and meet back again in half an hour. Unfortunately, when I went back to the store, to my dismay, they were closed. I was dumbfounded. Um, hello, you told me to pick up the dress today at a certain time and you're not even open? Worse, they had taken my name and phone number down but I'd never gotten a warning call that they would be close during my pickup time.
Fortunately I had my receipt from the deposit and it included the store's business card. I met up with Albert and my nieces and had Albert call the number from his phone (mine didn’t work for international calls unless I wanted to mortgage a kidney). The person who answered the number wasn’t the shop owner I had done business with but someone who worked for her. Fortunately Albert was able to confirm they had my dress, it was completed but that it was at the owner’s home in Makati. Albert assured me it wasn’t too far and that we could drive there to pick it up. I hated for him to go out of his way but it was my only chance to get the dress and be fitted for it to make sure the alterations worked so we made the drive to the owner’s home. I'll admit I was irritated. I roll with a lot of punches when traveling and try not to impose my Western standards everywhere I go but this seemed a bit much. We found the owner’s home and her assistant had me try on the dress. It fit as they had done the adjustments well. The owner arrived before I left and apologized profusely. By that point, I was into the zen mantra of “don’t sweat the small stuff” so I managed not to show my displeasure too much. What’s done was done and being annoyed wasn’t how I wanted to spend my last day so I let it go. I still can’t fathom why she didn’t think to tell me they would be closed that day when I arranged for the pick up based on the day and time she had given me nor why she didn’t call me when she realized the mistake and that she would be closed but….okay, I really had to let it go. Fortunately, I liked how the dress turned out and once it was safely in my hands and packed in my suitcase, I moved on.

Our last night was New Year’s Eve. If you’ve never spent New Year’s Eve in Manila or its surrounding metropolitan area, you’re in for a loud time. Seriously loud. They say Manila beat out New York, London and Sydney in its fireworks – I believe it. Fireworks are a big deal in the Philippines and it doesn’t get any bigger than fireworks on New Year’s Eve. In my town, they started at 8 pm and kept on until well past 1 am. I tried to nap so I could be wide awake to usher in the new year but that proved impossible. Even my noise-canceling headphones couldn’t withstand the relentless fireworks for 5 straight hours. No, I’m not exaggerating and yes I had a pounding headache before the last Judas Belt and Anaconda were set off. They were beautiful when exploding in the sky and it was too bad I didn’t get any good pictures of them; they didn’t come out on my camera or my phone.
A painting of my paternal grandparents
Fortunately our flight didn’t leave until the following night so we had an acceptably late start the next morning and a mellow day packing and saying our goodbyes. I discovered a treasure of a painting of my paternal grandparents sitting in the living room tucked into a corner that I took a snapshot of. A good memento to end the trip with.  Goodbye, Philippines, thanks for a great trip.