Thursday, October 16, 2014

Loaded Pumpkin Caramel Blondies

Loaded Pumpkin Caramel Blondies - made October 6, 2014 from Taste and Tell

It's still Indian summer where I live when I made these and I keep yearning for colder weather and rain. So I keep baking with fall flavors. It's like my version of a baking rain dance. If I make enough stuff with apples or pumpkin, maybe autumn will actually arrive. We can only hope.
I'm not even a super huge fan of pumpkin but I like it well enough and even though it's available year round, I tend to bake with it mostly around this time of year. Although caramel I'm down with at any time. So pumpkin caramel blondies seemed like a perfect dessert to make for work last week.

Sadly, I could not take a good picture of these to save my life. Which is truly sad as these were pretty good and the pictures don't do them justice. They were moist thanks to both the pumpkin and the caramel and both flavors marry well. I actually would suggest not adding the semisweet chocolate chips if you want to stick to a more pure pumpkin and caramel combination. The semisweet chocolate does provide a contrast if that's your thing but I think I would prefer the blondie without it.
Either way, these make for a good fall dessert. Bonus that they're easy to make too. It's best to wait until they're completely cool before you cut them and serve or they won't cut very cleanly and they'll be a bit too gooey.
2 1/2 cups flour
2 teaspoons cinnamon
1/2 teaspoon baking soda
1/4 teaspoon salt
1/4 teaspoon nutmeg
dash of cloves
1 cup butter, melted
1 cup brown sugar
1/2 cup granulated sugar
1 egg, lightly beaten
1 teaspoon vanilla
1 15-ounce can pumpkin puree
1 cup Pumpkin Spice Hershey kisses, roughly chopped (about 28)
1/2 cup white chocolate chips
1/2 cup semisweet chocolate chips
1/2 cup toffee pieces
1 11-ounce bag caramels, unwrapped
1/3 cup evaporated milk (I used whole milk)
  1. Preheat the oven to 350°F. Line a 9x13-inch baking dish with parchment paper or spray with non-stick cooking spray.
  2. In a bowl, combine the flour, cinnamon, baking soda, salt, nutmeg and cloves. In another bowl, combine the butter, brown sugar and granulated sugar. Stir in the egg and vanilla, then add in the pumpkin. Add in the dry ingredients and stir just until combined. Add in the chopped Hershey’s Kisses, white chocolate chips, semi-sweet chocolate chips and toffee pieces.
  3. Pour about 2/3 of the mixture into the prepared pan. The mixture will be fairly thick – use a spatula to spread the mixture to the edges. Bake in the preheated oven for 10 minutes.
  4. While the blondies are baking, combine the caramels and evaporated milk in a small saucepan over medium heat. Cook, stirring often, until the caramels are melted and the mixture is smooth.
  5. After the blondies have baked for 10 minutes, remove and carefully pour the caramel over the top. Take the remaining dough and drop by spoonfuls over the top of the caramel. Return the pan to the oven and let bake an additional 30 minutes, or until cooked through.
  6. Let cool completely before slicing and serving.

Tuesday, October 14, 2014

Cookie Butter Cupcakes

Cookie Butter Cupcakes - made October 4, 2014, recipe adapted from The Baker Chick
Awhile back, my local Target used to carry Biscoff cookies. If you're not familiar with Biscoff, they're to cookie butter what peanuts are to peanut butter. And ever since I had that delicious cookie butter cupcake from Fairy Cakes, I've been wanting to recreate something similar. Surprisingly, there weren't that many recipes for cookie butter cupcakes on pinterest. But I did find this one that used cookie butter as a filling and Biscoff cookies as a garnish.
Unfortunately, when I went to Target to buy some Biscoff cookies, it appeared they no longer carried them. Not that they were temporarily sold out but completely no longer available. Seriously? They carry 93 different kinds of Oreos but not even an inch of shelf space for Biscoff cookies? Total letdown. Fortunately, I had to go to Trader Joe's the same day and what should catch my roving, sugar-seeking eye than Speculoos cookies?? Speculoos and Biscoff have become synonymous in my vocabulary. Biscoff spread is just a tad smoother and less stiff than Speculoos cookie butter but I can confirm Speculoos cookies are just as delicious as Biscoff cookies. You're welcome.
So I was sufficiently equipped to make this cupcake recipe. But I have to confess up front that I made an error when reading the directions. Which means I thought the directions were wrong because they list cookie butter as an ingredient but skipped any step about adding cookie butter to the batter. So I did it myself. Of course as soon as I had added the cookie butter into the batter, I realized the original recipe meant the cookie butter was just for the filling after the cupcakes were baked, not for adding into the batter itself. Oops.
But I decided to go with it. C'mon on, it's cookie butter - how bad could the cupcakes turn out? I did make one more modification and added 1/2 teaspoon of baking soda as well. The batter has buttermilk in it and if you don't add baking soda to anything with buttermilk, there'll be nothing to neutralize the acid in the buttermilk and it'll have a tang to whatever you bake. Plus, with a heavy ingredient like cookie butter in the batter, I wanted a little more chemical leavening to prevent the cupcakes from being too dense.
Turns out my tinkering turned out pretty well.  The cupcakes had a nice fluffy texture. The cookie butter flavor wasn't too pronounced but still had a nice presence in the cupcake. Which was helped along by the cookie butter frosting. The frosting I made wasn't quite as good as the one from Fairy Cakes but it was still pretty decent. Which is code for I ate it but not every speck of it like I did with the Fairy Cakes one. Unless a frosting is super spectacular, I tend to eat less than half whatever was on the cupcake.
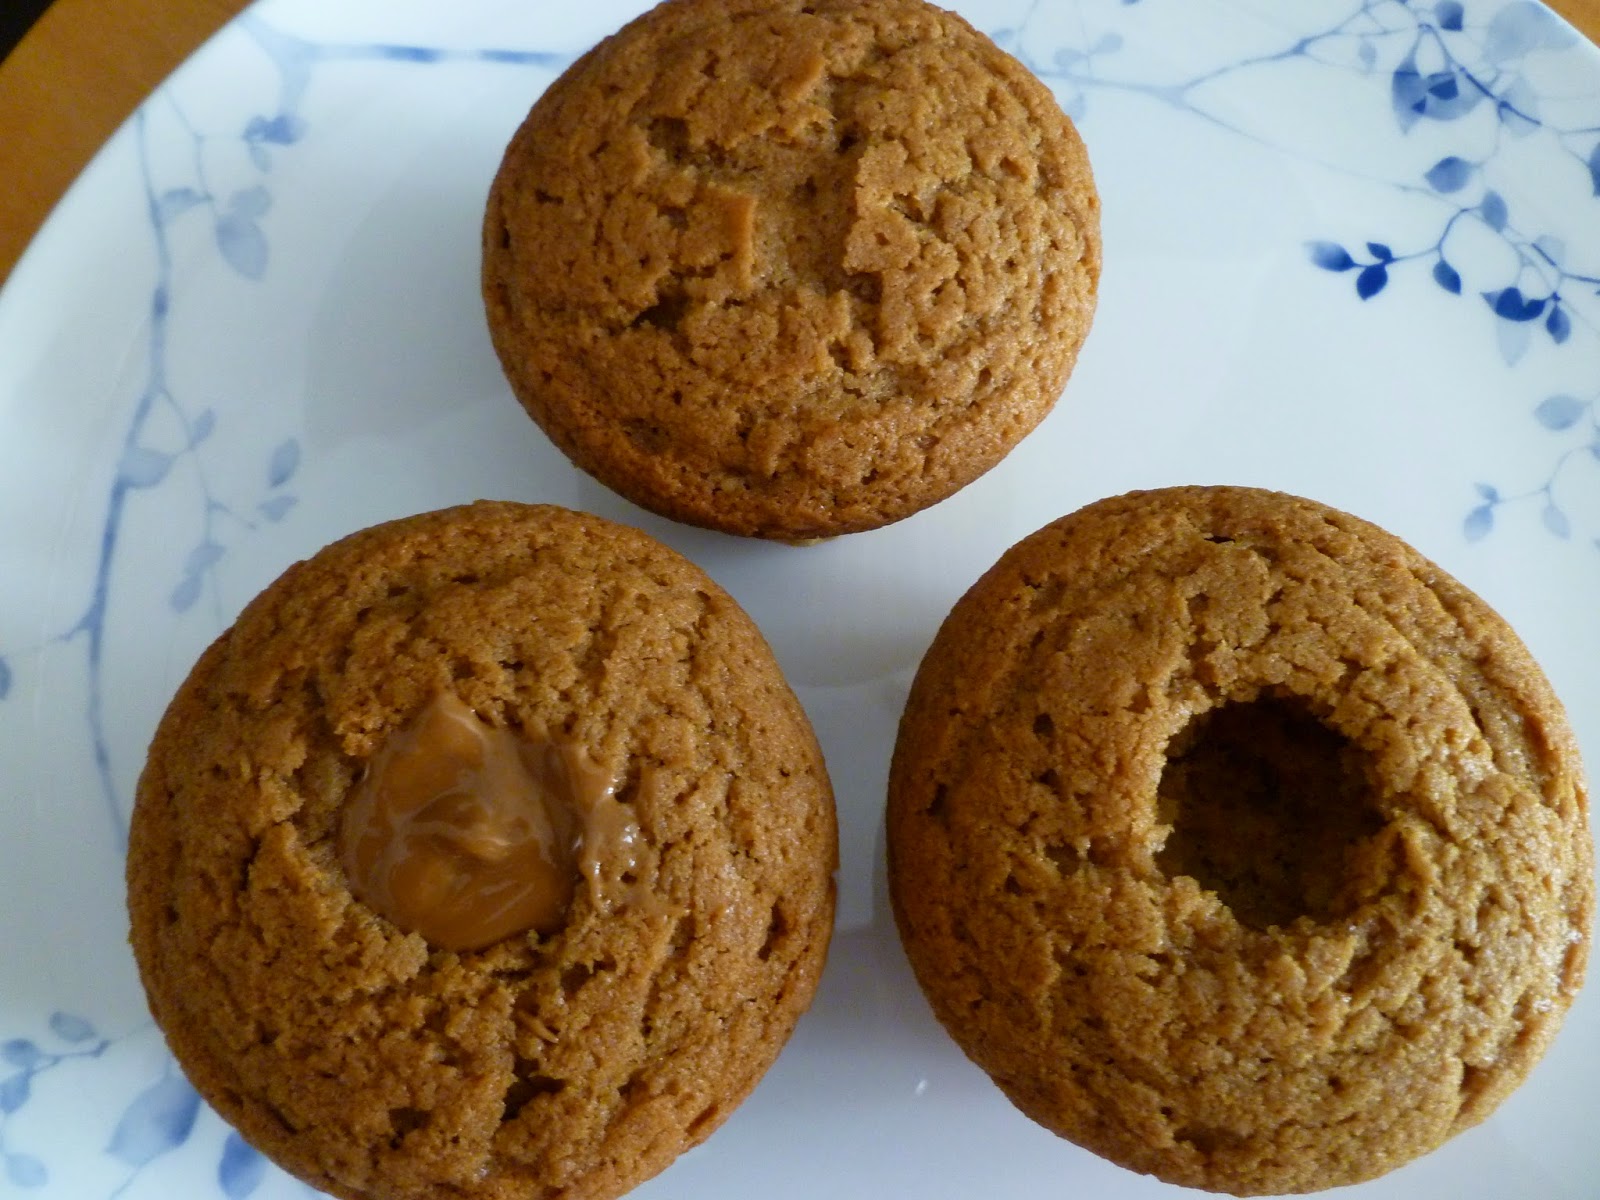
I cored the middle of these and filled the centers with Speculoos cookie butter then piped the frosting around it. I bought a large star tip to pipe with that was big enough to make those nice big swirls like you see on bakery cupcakes. I want one even bigger but not sure if they make it or where to get it. For now, this one will do.
The Speculoos cookie garnish is also a nice touch with these cupcakes but I would advise not adding them until the last minute or they might lose their crunch sitting in the frosting and exposed to air for too long. You want them to remain crisp to provide a good texture contrast between the fluffy cupcake and the smooth, sweet frosting. There's also half a cookie at the bottom of each cupcake but I didn't think that added anything spectacular to the cupcake since it softened in baking but was still more dense than the cupcake itself. Next time I'm going to make these the way they're supposed to be made without the cookie butter in the batter and without the cookie on the bottom. I want to see if they turn out closer to Fairy Cakes. I'm on a mission now.
1 1/2 cups all-purpose flour
3/4 teaspoon baking powder
1/2 teaspoon baking soda
a large pinch of salt
6 tablespoons of unsalted butter, room temperature
1/2 cup brown sugar
1/4 cup sugar
2 large eggs
1 tablespoon pure vanilla extract
1/2 cup plus 2 tablespoons buttermilk
12 speculoos cookies broken in half
3/4 cup cookie butter

Frosting
1 stick of unsalted butter
1/4 cup cookie butter
1-2 cups powdered sugar
splash of milk
Speculoos cookies for garnish
  1. Preheat oven to 350F.
  2. Line cupcake pans with liners and place half a cookie into each one, set aside.
  3. In a medium bowl, whisk together flour, baking powder, and salt.
  4. In a large mixing bowl, cream the butter and sugars until light and fluffy. Add eggs, one at a time, beating well after each addition, mix in vanilla. Add cookie butter.
  5. Add flour mixture and buttermilk alternately, beginning and ending with flour. Scrape down the bowl- don't over mix the batter.
  6. Divide batter evenly among liners, filling each about three-quarters full. Bake until tops spring back when touched, about 20 minutes. Transfer to a wire rack; let cool for 5 minutes and then remove from pan. Let cupcakes cool completely.
  7. Use a paring knife to core a small little but out of each cupcake and fill with a small dollop of cookie butter.
For Frosting:
  1. Cream together the butter and cookie butter. Add the powdered sugar one cup at a time until thick. Add a small splash of milk and mix on high until smooth and creamy.
  2. Spread or pipe onto the cooled and filled cupcakes and top with speculoos cookies if desired.


Instructions

Sunday, October 12, 2014

Peanut Butter Fudge Cake

Peanut Butter Fudge Cake - made October 3, 2014, recipe adapted from The Spiffy Cookie
I made this to bring to my friends' Bryan and Cheryl's birthday party for their one-year-old daughter. That would be the aforementioned Lemon Bar Bryan but I may have to rename him Peanut Butter Bryan as it turns out that's one of his favorite flavors. Cheryl, on the other hand, is probably my kindred spirit since she's a chocoholic. To pander to them both, I found this peanut butter fudge cake recipe from The Spiffy Cookie to combine both worlds in one cake.
I modified the recipe directions though as the original recipe called for adding eggs to the melted butter and cocoa mixture. I was concerned that would risk the eggs cooking from the heat before they could be incorporated into the rest of the liquid mixture. Then you'd end up with bits of scrambled eggs in your cake. Instead, I changed it so that you beat the eggs into the dry ingredients then temper the hot liquid into it gradually until they're just combined. No scrambled eggs that way.
I think this cake was decent. I confess I'm not entirely sure because I didn't eat a whole piece. I ate something akin to a sliver to make sure it was okay before I gave it away. The texture of the cake itself was nice and fudgy. The peanut butter layer that melted into the top of the warm cake then was covered by the fudge icing makes this a great peanut butter and chocolate combination. If you're a big peanut butter lover, be generous with that layer as it will get sandwiched between the two chocolates. You can also sprinkle chopped up peanut butter cups on top of the frosting for some extra punch.
2 cups all-purpose flour
2 cups granulated sugar
1 teaspoon baking soda
2 large eggs, lightly beaten
1 cup unsalted butter
1/4 cup unsweetened cocoa powder
1 cup water
1/2 cup buttermilk
1 teaspoon vanilla extract
16 ounces or 1 1/2 cups creamy peanut butter

Icing
1/2 cup unsalted butter
1/3 cup buttermilk
1/4 cup unsweetened cocoa powder
16 ounces confectioners' sugar, sifted
1 teaspoon vanilla extract
  1. Preheat oven to 350°. Grease and flour a 9” x 13” baking pan.
  2. Whisk together flour, sugar, and baking soda in a large bowl. Beat in eggs. Set aside. 
  3. Place butter in a medium saucepan. Melt over medium heat. Stir in cocoa powder. Then, stir in water and buttermilk. Continue cooking over medium heat, stirring constantly, until the mixture boils. 
  4. Remove the mixture from the heat and temper into the flour-sugar-egg mixture. Stir until smooth. Stir in vanilla. 
  5. Transfer batter to prepared pan and spread evenly. Bake 20 to 25 minutes, or until a pick inserted into the center of the cake comes out clean. 
  6. Cool in pan on wire rack for 10 minutes. Then, spread the peanut butter over the cake. Allow to cool completely. 
  7. To make the icing, place the sifted confectioners’ sugar in a large bowl. Set aside. Combine butter, buttermilk, and cocoa in a small saucepan. Cook over medium heat, stirring constantly, until the mixture begins to boil. Remove from heat and pour over confectioners’ sugar. Stir until smooth. Stir in vanilla. 
  8.  Spread icing over peanut butter. The cake can be served immediately or can sit at room temperature to allow the icing to set.

Saturday, October 11, 2014

Fudgy Brownies with Cookie Butter Frosting

Fudgy Brownies with Cookie Butter Frosting - made September 27, 2014 from Lauren's Latest
Since my encounter with the Cookie Butter Cupcake from Fairy Cakes, I've found a renewed love for cookie butter. I'd had this jar of Biscoff spread (aka cookie butter) in my pantry for awhile and it was time to crack it open and scrape bottom. If you click on the recipe title of this post, you'll go to the original blog post and recipe from Lauren's Latest. You'll also see her brownies look different from mine. I swear I followed her recipe exactly so I'm not entirely sure why my frosting ended up spreading so thin. In hindsight, I think I should've baked these in an 8 x 8 pan, instead of the 9 x 9 listed in the recipe. That would've made not only the brownies thicker but also the frosting.
Normally I don't care for a thick layer of frosting since I have a bad habit of scraping off most of the frosting anyway. But this was cookie butter frosting. I wanted to try and recreate the frosting from Fairy Cakes. This didn't quite do it as it set quite quickly and had a firmer texture. The taste was good though and the sweetness of the frosting was nicely complemented by the dark chocolate fudginess of the brownie.
1/2 cup butter
3/4 cup semisweet chocolate chips
3 tablespoons unsweetened cocoa powder
1 cup granulated sugar
2 eggs
3/4 teaspoon vanilla extract
1/4 teaspoon baking powder
1/2 teaspoon salt
1 cup all-purpose flour

Frosting
3 tablespoons unsalted butter, softened
3 tablespoons cookie butter
1/2 teaspoon vanilla extract
1 cup confectioners' sugar
1 tablespoon milk
  1. Preheat oven to 350 degrees. Line a 9x9 square pan with foil and lightly spray with nonstick cooking spray and set aside.
  2. In a small pot, melt butter, chocolate chips and cocoa together over medium low heat, stirring until smooth. Remove from heat and stir in sugar. 
  3. Stir in eggs, 1 at a time and vanilla. Gently stir in all dry ingredients until just incorporated. 
  4. Pour into prepared pan and bake 20-30 minutes or until just set. Set aside to cool.
  5. For the frosting, stir butter, cookie butter, vanilla and powdered sugar together until a thick paste forms. 
  6. Stir in milk carefully and then mix vigorously to smooth out any lumps. Spread over brownies, cut into bars and serve.

Friday, October 10, 2014

Restaurant Review: Flemings Steakhouse

Flemings Steakhouse- dinner on October 2, 2014
I met a couple of friends at Fleming’s a little while ago. I’ve never been there before and I had heard it was a little pricey but I’m usually up for trying a new place. Plus I just work it into my budget and cut back on other stuff so I can treat myself to a nice steak dinner. Because Fleming’s is a steakhouse. It’s located on the outside fringe of an outdoor mall so it’s hard to miss. I had heard they had recently remodeled and it did look “new” although it’s been there awhile.
Like all steakhouses, inside lighting was rather dim. I still don’t get that. Every single steakhouse I’ve ever gone to has such dim lighting I start to wonder if the Lasik I had some years ago is deteriorating and I need contacts again. No, that’s just the lighting.
Also similar to other steakhouses, at Fleming’s when you order an entrée, if it’s steak, unless it’s otherwise specified, all you’re getting is a piece of meat. So if you’re doing a low-carb diet, this is the place for you (just avoid the nice warm, crusty loaf of bread they serve in the beginning). If a steak seems a bit plain on its own, even a well-made, tender, flavorful steak, never fear, Fleming’s offers a variety of sides, from veggies to potatoes to mac and cheese. Which is the side I ordered once our server had named one of the specials that night was the Lobster Mac and Cheese. She had me at lobster. With my petite filet mignon order, it was like an upscale version of surf ‘n turf.
French Onion Soup
My theory is they structure the menu this way so they can charge more. The standalone steaks are pricey enough, starting at $40 and only going up from there and the sides rack up in the $10-$15 range. While you might blink at paying $55 for an entrée, I guess they think most people don’t do the math and don’t realize they’re paying that much until they get the bill? I’m in Finance and I have pretty good math skills so they didn’t fool me. Not that it stopped me from ordering but just want to point out that I can add and I assume most people can too.
Petite Filet Mignon
In fairness though, the “side” of Lobster Mac and Cheese was generous enough to serve 2-3 people so it’s not like a modest scoop. And it really did have nice chunks of lobster meat in it. I could’ve probably just skipped the steak and eaten that as my entrée. It was delicious, albeit just a bit too rich and creamy. 
Lobster Mac and Cheese
For dessert, we ordered the molten chocolate cake (10-15 minute wait time so plan ahead if you want to get this) and the Walnut Turtle Pie. The caramel was homemade and pretty good although I’m not a fan of walnuts. The chocolate lava cake was good but, to be brutally frank, I’ve had better. They overbaked it so only a small portion of the center was still molten which is a cardinal sin in my book. The chocolate taste didn’t meet my snobby standards for good chocolate either. The ice cream was good and the clever cookie basket it came in was delicious though so that helped save the dessert.
Walnut Turtle Pie
Service was very good and our server was friendly and took great care of us. Not that we were that demanding but still, props to her. Overall, I’d say the food was okay. It was good but not worth the prices they charged. For steakhouses with dim lighting, good steak and good dessert, if I had to pay those prices, I think I prefer Sundance
Chocolate Lava Cake

Wednesday, October 8, 2014

Brookies

Brookies - made dough September 27, 2014 from Mel's Kitchen Cafe
Despite the cutesy name, I do think this is a brilliant concept. Technically I suppose you can consider it a half chocolate/half chocolate chip cookie but it’s meant to be half brownie + half cookie = brookie so you can get the cutesy name. We’ll run with that.
These take a bit more time to prepare since you’re essentially making two cookie doughs but both are easy to make so don’t let that put you off. The key to a cookie like this is that both doughs should have similar textures so you don’t have one runny batter-like dough and one firm dough. Otherwise they’ll bake up wonky. Imagine the runny dough spreading like a puddle while the other kept its shape and yet they’re supposed to be one cookie.

Fortunately, this cookie didn’t have that problem with either dough. Not surprising since the ingredients were similar in proportion of wet to dry ingredients. I do advocate making the chocolate dough first and letting it chill while you do the chocolate chip dough just to make sure it firms up enough to handle. You don’t want your butter too soft either. I took mine directly from the fridge and just beat it into submission with my Kitchen Aid. If your butter is too soft, your cookie dough(s) will be too soft and greasy.
Once you have both doughs, scoop equal parts from each dough and squish together. Yes, that’s the technical term: squish. They’ll adhere pretty easily so no need to roll into a perfect ball once the two halves join. Just squish. Chill or freeze before you bake them or store in freezer bags for baking later on.

The only drawback is these did spread. Fortunately they spread about the same so they actually turned out looking the way they were supposed to, er, more or less. Unfortunately they spread a tad more than I like my cookies to spread. They weren’t super thin but they weren’t chubby chunkies either. A less picky person would be okay with that. (Deafening silence as we let that soak into the air.) But you know me (end silence). However, taste-wise these were good cookies. The chocolate “brownie” half was good pure chocolate and the chocolate chip cookie was a delicious chocolate chip cookie. Because of my tinkering ways however, you just know I’m going to take this brookie concept and apply it to a brownie-cookie and a chocolate chip cookie that aren’t going to spread as much. Because we want chubby brookies. 
Brownie Dough
10 tablespoons butter, softened
2/3 cup lightly packed brown sugar (5 ounces)
2/3 cup granulated sugar (5 ounces)
1 large egg
1 large egg yolk
1 teaspoon vanilla extract
1 1/4 cups plus 3 tablespoons flour (7.25 ounces)
1/2 cup unsweetened natural cocoa powder (1.5 ounces)
1 teaspoon baking soda
1/4 teaspoon salt

Chocolate Chip Cookie Dough
10 tablespoons butter, softened
2/3 cup granulated sugar (5 ounces)
2/3 cup light brown sugar (5 ounces)
1 teaspoon vanilla
1 large egg
1 large egg yolk
2 cups plus 2 tablespoons all-purpose flour (about 10.75 ounces)
1 teaspoon baking soda
1/4 teaspoon salt
1 1/4 cup chocolate chips (mini size preferred)


  1. Preheat the oven to 350 degrees F. Line baking sheets with silpat liners or parchment paper. Set aside.
  2. For the brownie cookie batter, in a medium bowl with a handheld electric mixer (or in the bowl of an electric stand mixer), beat the butter, granulated sugar and brown sugar together until smooth and creamy, 1-2 minutes. Add the egg, yolk and vanilla and beat the mixture for 2-3 minutes until light in color.
  3. In a separate small bowl, whisk together the flour, cocoa, soda and salt. Add the dry ingredients to the batter and mix until combined. Cover and refrigerate while making the chocolate chip cookie batter.
  4. For the chocolate chip cookie batter, in the bowl of an electric stand mixer or with a handheld electric mixer, cream together the butter, granulated sugar, and brown sugar until smooth, 1-2 minutes.
  5. Blend in the egg, egg yolk and vanilla, mixing for 2-3 minutes until the batter is very light in color. In a separate small bowl (you can use the same one as the brownie batter dry ingredients), whisk together the flour, baking soda, and salt. Add the dry ingredients to the batter with the chocolate chips and mix until no dry streaks remain and the chocolate chips are evenly distributed.
  6. Portion both sets of dough into about 4 dozen equal pieces; they will be small teaspoon or so sized balls (if you want to be super precise, I weigh about .5 ounce balls for the brownie batter and .65 ounce balls for the chocolate chip cookie batter).
  7. Grabbing one chocolate chip cookie ball and one brownie batter ball, press them together and use your hands to gently form into a cookie shape, flattening and turning to smooth the edges and form a flattish but still thick cookie shape; they'll spread out while baking. See the simple picture tutorial below the recipe, if needed.
  8. Bake the cookies on the prepared baking sheets for 8-10 minutes. Don't overbake or they will be dry and crunchy - underbake just slightly for a soft, chewy texture. It's ok if the chocolate side crackles just a bit. Remove from the oven and let the cookies cool on the pan for 1-2 minutes before scooping onto a cooling rack to cool completely.


Tuesday, October 7, 2014

Restaurant Review: Isla (Filipino food)

Isla - lunch on September 28, 2014
When my cousins were here for my dad’s birthday party a couple of weeks ago, they went the next day to a Filipino restaurant called Isla. Neither my parents nor I had ever heard of it but, on my cousins’ recommendations, we decided to try it for lunch after church a week later. There aren’t that many Filipino restaurants where my parents live, at least not many we know about or seek out, except for Tribu. Isla was closer to our church and, ironically, within walking distance of the restaurant where we had my dad’s party.
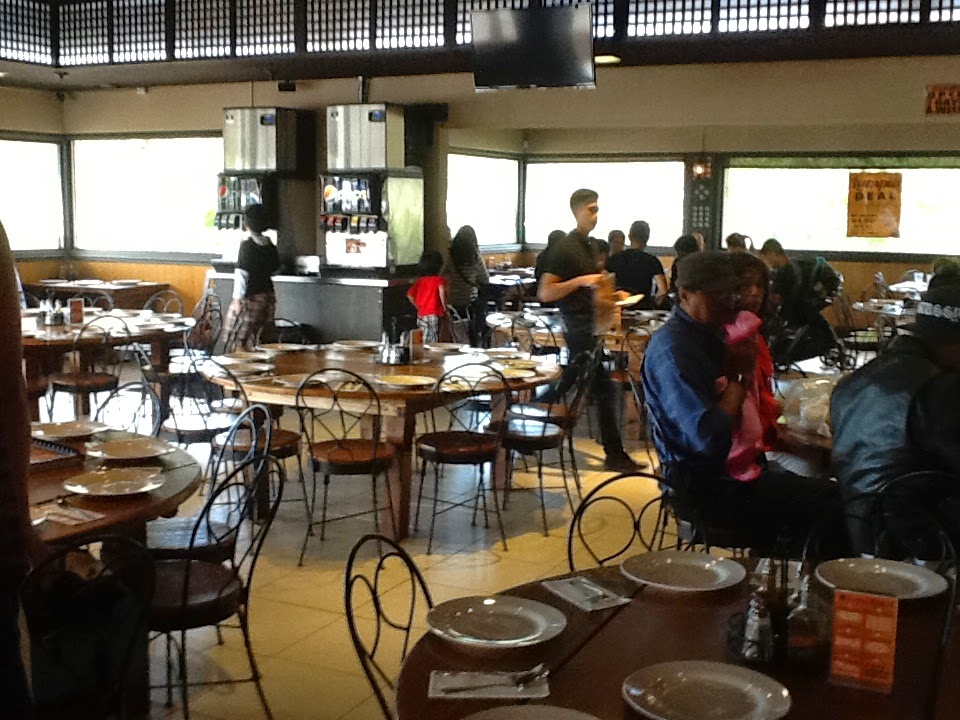
The restaurant is quite large and was structured to accommodate large groups of people as most of the round tables were set for 8-10 people. There are only a few 4-toppers and we were seated at one of those. Their menu held a lot of classic Filipino dishes and their prices were mostly in the $8-12 range. Isla offers unlimited free rice (“rice-y” Asians will appreciate this) and other specials such as if you buy more than $50 worth of entrees, you get some kind of freebie, either a discount or an appetizer, I think. Sorry, I forgot what it was.
We ordered the fried lumpia appetizer (always have to try the lumpia at a new Filipino restaurant) - $7.95 for 20 pieces. The pieces were a bit small compared to my mom’s. Before I go further, just accept that I will always compare any Filipino food not cooked by my mom to my mom’s cooking. It’s just the way of the universe. And probably one reason we don’t eat at Filipino restaurants very much because they’re often not as good as my mom’s cooking. Truth.
Lumpia
My dad got the “bangsilog” which is shorthand for “bangus” (milk fish) and “itlog” which is the Tagalog word for egg. All such “-ilog” dishes come with rice so think of them as a Filipino rice plate. With fried egg. If you want the egg scrambled, you have to let your server know when you order. Otherwise it’ll come sunny side up. My mom and I went with the pancit palabok (noodle dish) and pork BBQ. In Filipino-speak, it isn’t “BBQ Pork” or “BBQ Chicken” – the bbq comes at the end. Don’t ask me why. I just accept it.
Bangsilog
The pancit was, almost inevitably, not as good as my mom’s. The sauce was just okay and I didn’t like the noodles they used. I didn’t like the texture (a bit coarse) and the sauce didn’t make up for it. The Pork BBQ however was delicious. Great flavor, really tender and not too much fat. Not dry as pork dishes sometimes are. I could’ve wished for a little more sauce/marinade but only because it was so good and I wanted to moisten my rice more with it so that was wishing for more in a complimentary greedy sort of way. It was good and something I’d get again next time I go there.
Pancit Palabok
Pork Barbecue
Service was a bit sketchy as the servers were busy and rushed around too fast, making it difficult to catch their eye but they were nice and when we did manage to snag their attention, they were very helpful. Both my mom and I liked the “caldero” or little pot the rice came in. The authentic and larger version is the type of pot old-school Filipinos would’ve made rice in over an open flame. None of that rice cooker business. My grandmother would’ve used something like that so it gave me a pang of nostalgia.
It was also a good sign that most of the patrons while we were there were Filipino – that’s how you know it’s good. I’d go back again; they’ve got reasonable prices and yeah, that Pork BBQ has my name on it.

Sunday, October 5, 2014

Baked Pumpkin Doughnuts

Baked Pumpkin Doughnuts - made September 27, 2014 from Eat, Drink, Love
Remember how I said I wasn’t a doughnut person and yet I still bought a doughnut pan to bake doughnuts in? And how I used it once to try out a recipe? Have you heard me talk about doughnuts since then? Probably not. Mostly because I haven’t actually made doughnuts since then so I’ve had those doughnut pans sitting in the cupboard, neglected and reproachful. “Hey, you bought me. Dust me off and use me.” Every once in a while, I listen to my baking pans. Especially when their voices combine with the shrieks from the recipes on my pinboard, “Try me! Why’d you pin us if you weren’t going to use us? Are we just decorating your cyber space here??” Good questions – all of them.
To stop those voices in my head, I shut them all up by trying out this recipe for baked pumpkin doughnuts. We’re still having Indian summer weather but it’s October so I’m pretending it’s fall. Which means pumpkin stuff. Mostly because I wanted to use up the leftover pumpkin puree from the Glazed Pumpkin Sugar Cookies I’d made before.

Baked doughnuts almost always have the texture of cake doughnuts rather than yeasted doughnuts. Which makes sense since you’re baking them like a cake rather than frying them. Healthier for you but it’s a small round cake with a hole in the middle, just to set your expectations. I liked these doughnuts in that they were cakey and the melted butter/cinnamon-sugar coating just made the doughnut. Honestly, the doughnut was just the vehicle to get the butter-cinnamon-sugar into your mouth. Pumpkin doesn’t have a strong flavor so these may be a bit bland if you don’t do the coating but why would you leave it out? These would also be good glazed with some royal icing (confectioners’ sugar, vanilla extract and milk).
Similar to cakes, these doughnuts are best served fresh the day they’re made. If you’re not going to serve them right away, don’t coat them at all; just wrap them individually in plastic wrap, place in a freezer bag and freeze them. When you’re ready to serve them, let them thaw, refresh them slightly by heating in the microwave or oven then dip them in melted butter and roll them in cinnamon sugar or skip the butter and just glaze them.
1 3/4 cups all-purpose flour
2 teaspoons baking powder
1/2 teaspooon salt
1/2 teaspoon cinnamon
1/2 teaspoon nutmeg
1/2 teaspoon allspice
1/8 teaspoon ground cloves
1/3 cup butter-flavored olive oil (I used regular)
1/2 cup light brown sugar
1 large egg
1 teaspoon vanilla extract
3/4 cup pumpkin puree
1/2 cup milk

Cinnamon Sugar Coating
6-7 tablespoons unsalted butter, melted
2/3 cup sugar
2 tablespoons ground cinnamon
  1. Preheat oven to 350 degrees F. Spray a doughnut pan with non-stick spray.
  2. In a mixing bowl, stir together the flour, baking powder, salt, cinnamon, nutmeg, allspice, and cloves.
  3. In a separate, larger bowl, stir together oil, brown sugar, egg, vanilla, pumpkin and milk until smooth.
  4. Add dry ingredients in with the wet ingredients and mix until just combined, being careful not to overmix. Spoon the batter into each cavity of the pan. Bake for about 10-15 minutes or until a toothpick inserted comes out clean. 
  5. For cinnamon sugar coating, melt about 6-7 tablespoons of butter. In a separate bowl, stir together about 2/3 cup sugar and 2 tablespoons of cinnamon. Dip each doughnut into the butter until completely coated and then dip into the cinnamon and sugar. Repeat with each doughnut.

Saturday, October 4, 2014

Soft Peanut Butter White Chocolate Chip Cookies

Soft Peanut Butter White Chocolate Chip Cookies - made dough September 7, 2014 from Cookies and Cups
I normally pair peanut butter with semisweet or milk chocolate – and fine combinations those are too. This is a different twist with white chocolate instead. Both these flavors I’m just so-so about but figured I would go for it since I share what I bake anyway and I can’t always bake for what only I love. Well, I could but let’s try to be a little less selfish with this recipe.


It’s actually a pretty good peanut butter cookie. I made them on the small side and baked them from frozen dough. They didn’t spread much either which was a point in their favor. Although semisweet or milk chocolate pairs well with peanut butter and complements it, I thought the white chocolate chips enhanced the peanut butter flavor. It didn’t compete with the peanut butter so much as make a nice backdrop for it. So if you want a quick, easy peanut butter cookie recipe, kick the tires on this one and let me know what you think.
Oh and you will only get this "fudgy" texture that you see here if you don't overbake it. Did that even need to be said?
1 cup light brown sugar
1/2 cup butter, melted and cooled slightly
1 egg
2 Tbsp milk
1 Tbsp vanilla
3/4 cup creamy peanut butter
1/2 tsp salt
1/2 tsp baking soda
2 cups flour
1 1/2 cups white chocolate chips


  1. Preheat oven to 350°
  2. Line a baking sheet with parchment paper and set aside.
  3. In bowl of stand mixer combine all the ingredients except flour and white chocolate chips.
  4. Beat mixture on medium speed for 2 minutes, scraping sides as needed.
  5. Mix in flour until combined and finally stir in white chocolate chips.
  6. Using cookie scoop or large spoon place dough 2 inches apart on baking sheet. If you prefer not as tall of a cookie, press dough down slightly, as cookies will not spread when baking.
  7. Bake for 9-10 minutes until bottoms have just set. Do not overbake, cookies will still be soft on the inside.
  8. Allow to cool on a wire rack.