Showing posts sorted by date for query whoopie. Sort by relevance Show all posts

Wednesday, March 19, 2014

Bakery Review: Sift Cupcake and Dessert Bar

Sift Cupcake and Dessert Bar - visited March 3, 2014
Prepare for a post with lots of pictures. Because this is it. After my niece Lauren and I filled up on dim sum, we headed out of Chinatown and made our way down (and up) California to go to Sift Cupcake & Dessert Bar. I'd first heard of Sift by watching Cupcake Wars. A big reason I watch Cupcake Wars is to find out about local small business cupcakeries - more places to try out. Whenever I hear of any in my area, it goes on my list of places to visit someday. For Sift, this was the day.

Last summer, I did the same thing with Frost. Frost Cupcake Factory actually won their episode of Cupcake Wars but if you recall my review of their cupcakes, I was rather disappointed as the textures on most of the cupcakes I bought were dry and their flavors weren't very spectacular in terms of taste. So my expectations for Sift were a lot lower because Sift got knocked out in one of the qualifying rounds and, unlike Frost, couldn't boast being Cupcake War winners.

But before I get to the cupcakes, let's talk about Sift's cute little bakery because it really was a cute little bakery. Sift is located in lower Pacific Heights; Lauren and I were so busy talking when we were walking there that we actually passed it because we were on the other side of the street. We had to double back to find it.


The bakery storefront itself isn't very big but for a cupcakery, it's still a decent size, similar to Sprinkles and Kara's Cupcakes. It's very cheery and filled with pastel colors. One look at their display cases and I was predisposed to like them anyway. They also were smart in their display and storage space by having shelves house their cupcake boxes (above). The cupcake boxes have cute sayings on them and double as decorations until they're needed.

Sift has a selection of not just cupcakes but also "soda pop" (not to be confused with the likes of Diet Coke and their ilk because they didn't have any but actual old-fashioned soda pop) as well as layer cakes, macarons, Krispy cakes (amped up Rice Krispie treats), and whoopie pies. I have a one-track mind and I came for cupcakes so cupcakes are what we bought.
When faced with such mouthwatering choices, it's always hard to narrow down my selections. I highly recommend you check out Sift's flavor menu so you can appreciate my First World struggle. In the end, I bought a Samoa Cupcake and Lauren chose a carrot cupcake. We also bought a red velvet and a chocolate one for Lauren to bring back for Shyla.
Red Velvet and All for the Cookie cupcakes

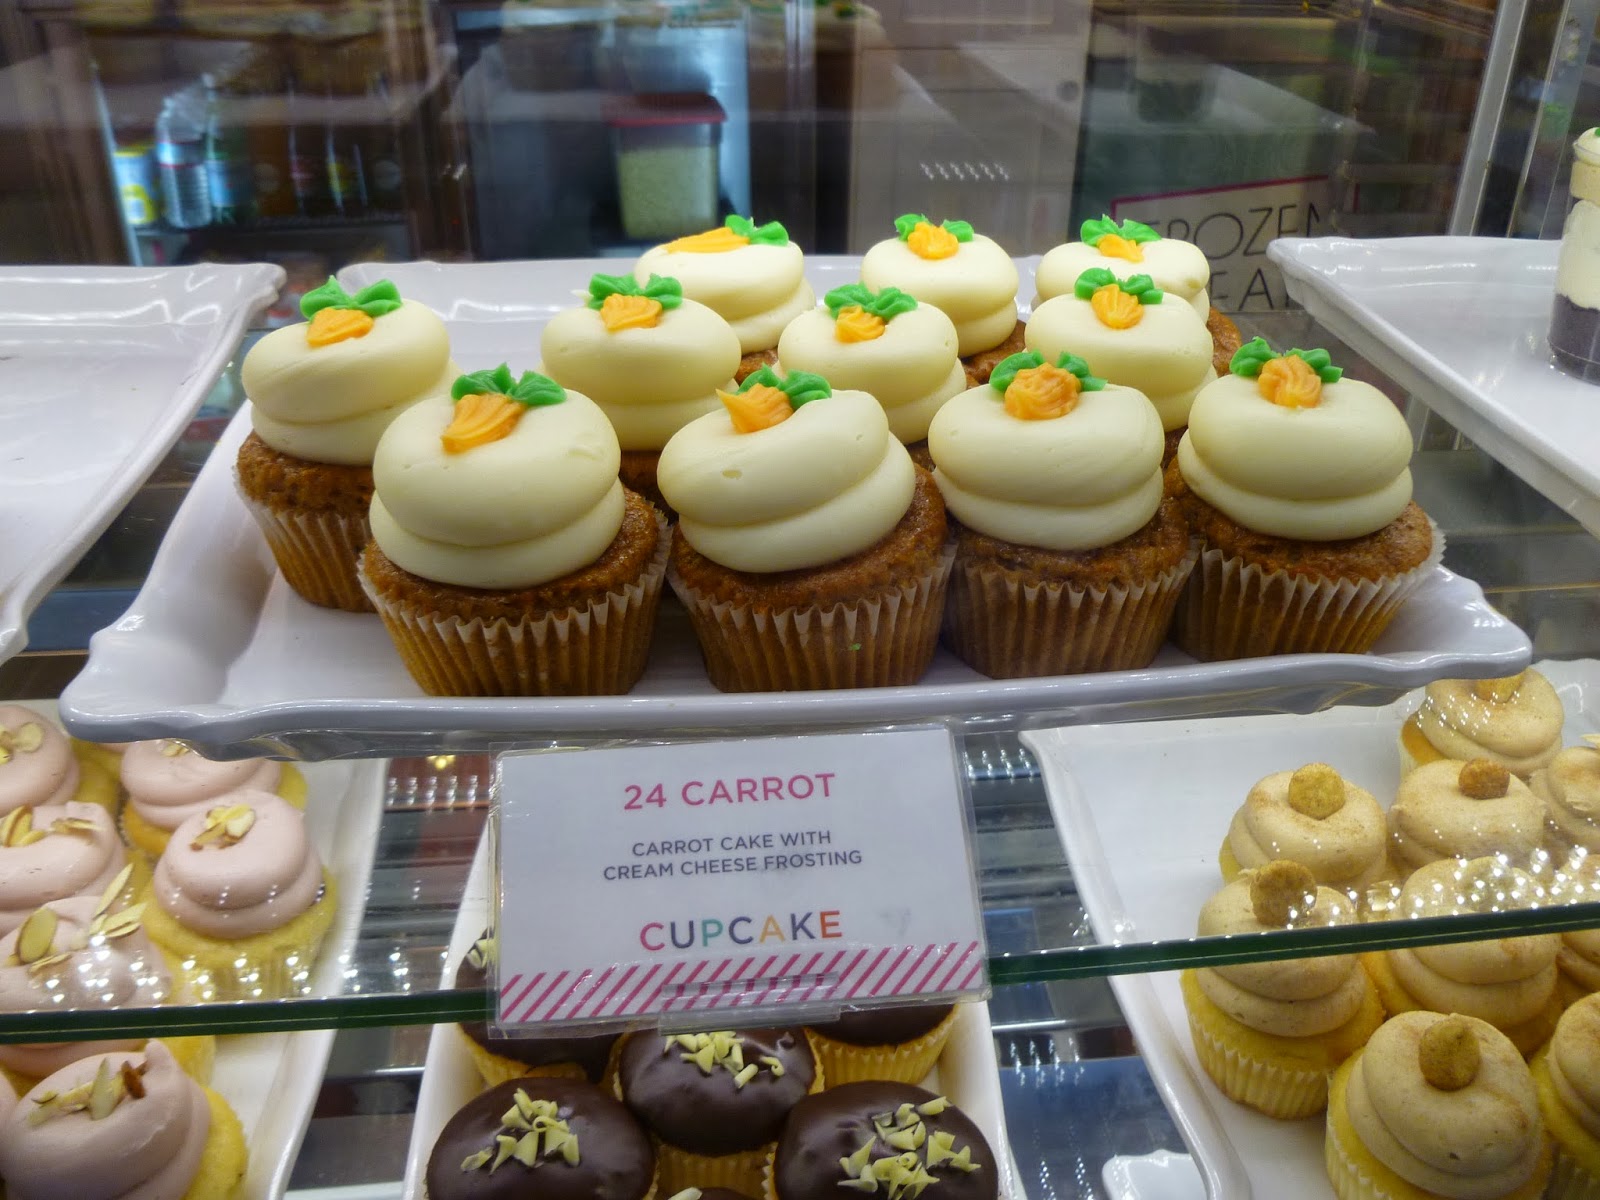
The carrot cupcake was topped with the traditional cream cheese frosting and decorated with an icing decoration of a carrot. It was my favorite way carrot cake (or cupcake) should be made: with just carrots. The flavor card on the bakery counter that describes each flavor even points out there are no nuts or raisins in their carrot cupcake. Points for Sift. It was also a really good cupcake, cakey, fluffy and moist but not greasy.


The Samoa cupcake was a coconut cake filled with chocolate ganache and topped with vanilla frosting garnished with toasted coconut and ganache drizzle. If that sounded good to you, it's because it was. I loved this cupcake. Let me repeat that: I loved this cupcake. Moist, fluffy, perfect coconut flavor. And here's the shocking thing: I also loved the frosting. If you know me at all, you know I always say I'm not a frosting person, I only like a little frosting to go with my cake and I never profess love for frosting. This is the only cupcakery I've been to where I not only like the frosting but I ate it all. Yup, you read that right. I love Sprinkles red velvet cupcake and I prefer their frosting over most places but I don't ever eat all of the frosting on a Sprinkles cupcake. Not so with Sift's Samoa cupcake. Loved it. The toasted coconut on top was the perfect complement in texture and flavor with the frosting too.

I even liked the ganache filling although if I had to give one piece of feedback to Sift, I'd recommend they switch out the chocolate ganache for a caramel filling instead. The chocolate is already represented in the drizzle on top but I was missing the caramel component of a traditional Samoa. Still, this was a darn good cupcake, chocolate ganache filling included, so I have no complaints. Actually, let me rephrase that: I enjoyed this cupcake so much that I did something else I never do. I bought another one. Buying another cupcake isn't so unusual but typically I would get a different flavor to try. But I liked the Samoa so much that I had to have another one. Not right that moment of course but I bought it for later. And just to really push the outer limits of my waistband, I also chose one of the chocolate cupcakes to try out another time.
Carrot Cupcake on the left, Samoa on the right
I bought the "Sky is Falling" cupcake which was a chocolate cupcake filled with white chocolate mousse and topped with a chocolate buttercream. But I was really greedy for the Samoa again. I had the second one the next day and it was just as good as the first one, even a "day old" and I ate all the frosting again. You've no idea how mind-boggling that is to me.
I didn't get to the Sky is Falling cupcake until the following day - in the interests of moderation, one high-calorie treat a day is all I normally allow myself. This one was more typical of other cupcakes I've had elsewhere. I don't know whether it's because it was two days old by then or it just wasn't as good as the Samoa to hook me in but on this one, I ate the cupcake but left a lot of the frosting. It was good but just not as good as the Samoa. Sorry I don't have a picture other than the bakery case. For once, I forgot to take one before I ate it.
All in all, I thought Sift's cupcakes were delicious and I enjoyed them much more than the ones from Frost. I'll have to hunt up their Cupcake Wars episode again and see where they went wrong in the competition but they win in my cupcake book.

Thursday, February 24, 2011

Dulce de Leche Duos

Dulce de Leche Duos - made February 24, 2011 from Baking From My Home to Yours by Dorie Greenspan (book #47)


I love this baking book, no two ways about it.  The sometimes lengthy directions are mainly geared for novices so I tend to skim them and do my own thing but if you're a beginning baker, this is a great recipe book to talk you through the steps of baking each recipe.  Nearly every recipe I've tried from it has turned out and they're straightforward to make and taste great.  Don't let the size of the book intimidate you.  As far as I'm concerned, the more recipes, the more pages and the more pictures it has, the better.  This one book alone could probably keep me busy baking for a year, not only trying new recipes but going back to the ones I've already made from it that have turned out well.

This is another sandiwch cookie recipe and has dulce de leche as the star ingredient, both mixed in the cookie dough itself and as the filling for the sandwich cookies.  I used up the last of the dulce de leche that my friend Jenny brought me from South America for the cookie dough itself so I substituted nutella for the sandwich filling.  Dulce de Leche and chocolate hazelnut?  There's a duo I can get behind.

The dough for this is pretty soft, even after I froze it for a couple of hours.  I ended up giving up using my small ice cream scoop for the dough rounds since it was a little too soft to be scooped properly.  So I used two small spoons to shape them in roughly spherical shapes. Follow the sandwich cookie rule and make each one small and approximately the same size (which is a little harder to do without an ice cream scoop). It bakes like a chocolate chip cookie with crisp edges and chewy middles so it's a little fragile when used as a sandwich cookie (be careful when you handle them to spread the filling and sandwich them).  It tastes great as a standalone cookie even without the filling but do try some with the filling, whether you use dulce de leche, nutella or something else.  Just make sure that whichever filling you use, it's a soft, spreadable consistency.  I had to warm up the nutella slightly as it was too firm to spread over a fragile cookie.  15 seconds in the microwave and a good stir and it worked fine.

This is a tasty little cookie, not too sweet, despite the dulce de leche in the batter.  It's not crisp all the way through like most cookies used for sandwich cookies but not cakey soft like whoopie pies.  Rather, it's a nice middle ground between the two.  You neither want to underbake it (too soft) or overbake it (too crisp/brittle).  Instead, Goldilocks it to "just right" with golden brown edges while the middle is still a lighter tan color.

2 ½ cups all-purpose flour
1 teaspoon baking soda
¼ teaspoon salt
2 sticks (8 ounces) unsalted butter, at room temperature
¾ cup store-bought dulce de leche, plus more for filling
¾ cup packed light brown sugar
½ cup sugar
2 large eggs

1.    Preheat the oven to 350⁰F.  Line two baking sheets with parchment paper.
2.    Whisk together the flour, baking soda and salt.
3.    In the bowl of a stand mixer with the paddle attachment, beat the butter at medium speed until soft.  Add the ¾ cup dulce de leche and both sugars and continue to beat until light and fluffy, about 3 minutes.  Add the eggs one at a time, beating for 1 minute after each addition.  Reduce the mixer speed to low and add the dry ingredients, mixing only until just combined.
4.    Spoon the dough onto the baking sheets, using a heaping teaspoon of dough for each cookie and leaving 2 inches between them.
5.    Bake the cookies for 10 to 12 minutes, turning around halfway for even browning.  The cookies should be honey brown with a light sugar crust, but they will still be soft, so remove the sheets from the oven but let cookies sit for another minute or two on the baking sheet.  Then, using a wide metal spatula, transfer the cookies to a rack to cool to room temperature.
6.    Repeat with the remaining dough, making sure you cool the baking sheets before using them again.
7.    When the cookies are completely cool, spread the flat bottoms of half the cookies with a small amount of dulce de leche, and sandwich with the flat sides of the remaining cookies.

ETA: Every Saturday I try to participate in a "Sweets for a Saturday" post on a blog Lisa started up.  Go check it out - it's worth it:

Thursday, December 9, 2010

Peanut Butter Whoopie Pies

Peanut Butter Whoopie Pies - made December 5, 2010 from Martha Stewart Cookies (book #21)


Up until last month, I'd never had a whoopie pie.  I knew what they were - cakey cookies sandwiched with filling - but I'd never made them before.  Maybe it was because I didn't think cookies should be cakey.  We all know how I feel about that subject.  Maybe because I thought the name was silly - it's a pie?  It's a cookie?  It's whoopie?  Okay, I get odd notions sometimes.  In any case, whoopie pies were not in my every day baking arsenal.

However, last month, I made the Spiced Pumpkin Cookie Cakes which were essentially pumpkin whoopie pies.  Those turned out pretty well so I was a bit more broad-minded when I saw this recipe for peanut butter whoopie pies from Martha Stewart's Cookies book.  It was the same concept - cakey chocolate "cookies" with peanut butter filling.  The main selling point though was it used 2 cups of buttermilk and I had a pint to use up this week before the expiration date so it seemed like a good opportunity to make whoopie (yeah, you know I had to get a bad pun in)....pies.

These turned out really well.  The batter is softer than a cookie dough but more firm than cake or brownie batter.  I used two spoons to shape the blob of cookie dough/batter back and forth before dropping onto a parchment-lined cookie sheet.  I made the blobs fairly smooth and they smoothed out even further and baked into thick, puffy cookie-like shapes.  I wouldn't call them cookies though since they had the texture and softness of a little cake.  Definitely only bake these for 8 minutes as that's long enough to give them a nice, moist texture without being raw or dry.  I only made half the peanut butter filling recipe since I tend to go light on fillings and knew a full recipe would be too much.  I ended up a little short but I sandwiched the remaining cookies with dulce de leche that my friend Jenny brought back for me from South America.  Heaven.  Instead of cookies or "pie", think of these as little chocolate cakes sandwiched with peanut butter filling.  Regardless of the nomenclature, they go down really well and look nice too.


Cookies
3 ½ cups all-purpose flour
1 ½ cups unsweetened cocoa powder (I used 1 cup Pernigotti cocoa and ½ cup Hershey’s cocoa)
1 tablespoon baking soda
1 teaspoon baking powder
1 teaspoon salt
2 sticks (1 cup) unsalted butter, room temperature
2 cups sugar
2 large eggs
2 cups buttermilk, room temperature
2 teaspoons pure vanilla extract

Filling
1 1/3 cup natural creamy peanut butter
1 cup (2 sticks) butter
1 ½ cups confectioners’ sugar
Coarse salt, optional

1.        Preheat oven to 400˚F.  Line two baking sheets with parchment paper.  Sift together flour, cocoa powder, baking soda, baking powder and salt.  With an electric mixer, beat butter and sugar on medium speed until light and fluffy.  Add eggs, buttermilk and vanilla.  Beat until well combined.  On low speed, slowly add dry ingredients, mix until combined.
2.       Drop 1 ½ tablespoons of batter onto prepared baking sheets, spacing 2 inches apart.  Bake until set, about 8 minutes, rotating halfway through.  Do not overbake.  Cool completely on a wire rack.
3.       Make filling: With an electric mixer, beat peanut butter and butter on high speed until smooth.  Reduce speed to low.  Add confectioners’ sugar; mix until combined.  Raise speed to high and mix until fluffy and smooth, about 3 minutes.  Season with salt, if desired.
4.       Assemble cookies: spread 1 heaping tablespoon filling on the flat side of 1 cookie.  Sandwich with another cookie.  Repeat with remaining cookies and filling.  Cookies can be refrigerated in single layers in airtight containers up to 3 days.  Bring to room temperature before serving.

Saturday, November 6, 2010

Spiced Pumpkin Cookie Cakes


Spiced Pumpkin Cookies Cakes - made October 31, 2010 from the Sweet Melissa Baking Book by Melissa Murphy (book #4)


I was so busy with moving that I barely noticed October was ending and Halloween was upon me before I knew it.  I moved to a new development that isn’t completely built out or even fully occupied yet so there was a distinct lack of trick or treaters in my neighborhood.  Which was just as well since I only had time to buy one bag of chocolate and even that I forgot at my parents’ house.  But my concession to Halloween was to try out this recipe for Spiced Pumpkin Cookie Cakes.  I was a little skeptical when I read the directions about piping the batter because that automatically means it’s going to be a soft batter.  And sure enough it was, almost the consistency of cake batter.  Which worried me that the cookies would spread into lakes of flat, thin cookies.  Fortunately, my new kitchen has a convection oven so I gambled that they would bake in the convection setting before they spread too much.
I was therefore pleasantly surprised that the cookies didn’t really spread and instead baked in almost the same size and shape I dropped them into (using two spoons as I didn’t want to bother with piping anything).  They did flatten a bit but only enough to round out into more even shapes than my plopping of cookie dough/batter onto the cookie sheet.  These have the texture of little pumpkin cakes, rather than “cookies”.  Think whoopie pies but the pumpkin cake version.  Someday I’ll have to make the traditional whoopie pies of chocolate cake cookies with vanilla filling.  In the meantime, these were a great substitute.  I loved the pumpkin cakes, the molasses was just the right touch and the cream cheese filling complemented the cookies very well.  And this is from someone who normally doesn’t like cream cheese.  

The only thing I would caution is to not underbake these.  I had them in the convection setting for 10-12 minutes but another minute or two wouldn’t have hurt.  Once they cool, they’re really moist and the tops get a little sticky, especially if they’re not baked long enough.  I wouldn’t advocate overbaking them either but these won’t set like traditional cookies when underbaked.  Instead they’ll just be mushy cakes if you don’t bake them long enough.  These make for an awesome fall dessert or afternoon snack.  One recipe made for a little more than 18 sandwich cookies with a (to me) generous amount of filling.  Another winning recipe from the Sweet Melissa Baking Book.

For the cookie cakes
½ cup firmly packed light brown sugar
½ cup granulated sugar
8 tablespoons (1 stick) unsalted butter, at room temperature
¼ cup molasses
1 large egg
1 cup pumpkin puree, fresh or canned
2 cups all-purpose flour
1 teaspoon baking soda
1 ½ teaspoons ground cinnamon
½ teaspoon freshly grated nutmeg
¾ teaspoon kosher salt
½ cup whole milk
Confectioners’ sugar, for dusting

For the cream cheese filling
6 tablespoons unsalted butter, softened
6 tablespoons cream cheese, softened
¾ cup confectioners’ sugar
¾ teaspoons freshly grated orange zest (about ½ orange)
½ teaspoon pure vanilla extract

1.        Position a rack in the center of your oven.  Preheat the oven to 350˚F.  Line a cookie sheet with parchment paper.
2.       To make the cookie cakes: In the bowl of an electric mixer fitted with the paddle attachment, mix together the brown and white sugars on low speed to get rid of any lumps.  Add the butter, and beat together until light and fluffy, 1 to 1 ½ minutes.  Add the molasses and egg, and mix to combine.  Scrape down the sides of the bowl.  Add the pumpkin puree and mix to combine.
3.       In a separate bowl, whisk together the flour, baking soda, cinnamon, nutmeg and salt.
4.       Add the flour mixture to the pumpkin mixture in three batches, alternating with the milk. Mix well after each addition.  Scrape down the sides of the bowl.  Blend thoroughly, but do not overbeat.
5.      Drop the dough by rounded teaspoonfuls onto the prepared cookie sheet.  Bake for 12 to 15 minutes, or until a toothpick inserted into the center of one of the cookies comes out clean.  Remove to a wire rack to cool completely before filling.  Do not underbake.
6.       To make the filling: In the bowl of an electric mixer fitted with the paddle attachment, combine the butter, cream cheese, confectioners’ sugar, zest and vanilla.  Start mixing on low speed and then continue on medium speed until just fluffy and smooth, 2 to 3 minutes.  Do not overbeat.
7.       To complete the cookie cakes: Turn half of the cookies upside down onto a freshly lined cookie sheet.
8.       Using a pastry bag fitted with a ¼-inch round pastry tip (Ateco #801 or use a resealable plastic bag with a corner cut off or a teaspoon), pipe or place about 1 teaspoon of filling onto each upside-down cookie cake.  Place the remaining cookie cake halves (right side up!) on top.  I skipped the pastry bag and just spread with a small spatula.  Be careful though as the cookies have the texture of cake and might fall apart if not handled gently.
9.       Refrigerate briefly until set, 15 to 20 minutes.  Dust with confectioners’ sugar before serving.

Keep the cookie cakes refrigerated in an airtight container for up to 4 days.

Lark's Country Heart