Sunday, July 14, 2019

Shortbread Cookies with Cookie Butter

Shortbread Cookies with Cookie Butter - made July 5, 2019, adapted from My Cookie Journey
I had pinned this recipe awhile ago but couldn’t make it when I was in my temporary digs with two thirds of my stuff packed in boxes in the garage because in those boxes were my star tip and plastic piping bags. But now that I’m (mostly) unpacked and found all my baking stuff again, it seemed like a good time to finally try this recipe. The original recipe called for filling these with jam in the center. You know my feelings about jam. So I used cookie butter.

First, let me say these were delicious. Not too sweet, not too buttery like those (damn delicious) Danish butter cookies in the blue tin, and the cookie butter was the perfect complement to the cookie.

Second, I will also say these were a pain in my flat butt to make. The dough wasn’t hard to mix together and it had the perfect malleable texture. But these were a pain because that perfect malleable texture also meant the dough was too stiff to pipe out of that star tip. I foolishly ignored the suggestion in the original recipe to warm up the dough slightly if it was too stiff before I put it in the plastic piping bag fitted out with the star tip. Once I realized the dough was too stiff to pipe, I couldn’t pop the whole thing into the microwave to warm since the star tip was metal.

So I had to empty the dough into a bowl, warm it up slightly in the microwave, put it back into another piping bag with the star tip, and try again. It was better on the second try except the dough was still a bit stiff. I gamely kept piping rosettes but halfway through, the pressure was too much for the opening of the bag and the star tip burst through. Sigh. Scrape back into the bowl, warm it up for another few seconds, put into a third piping bag.

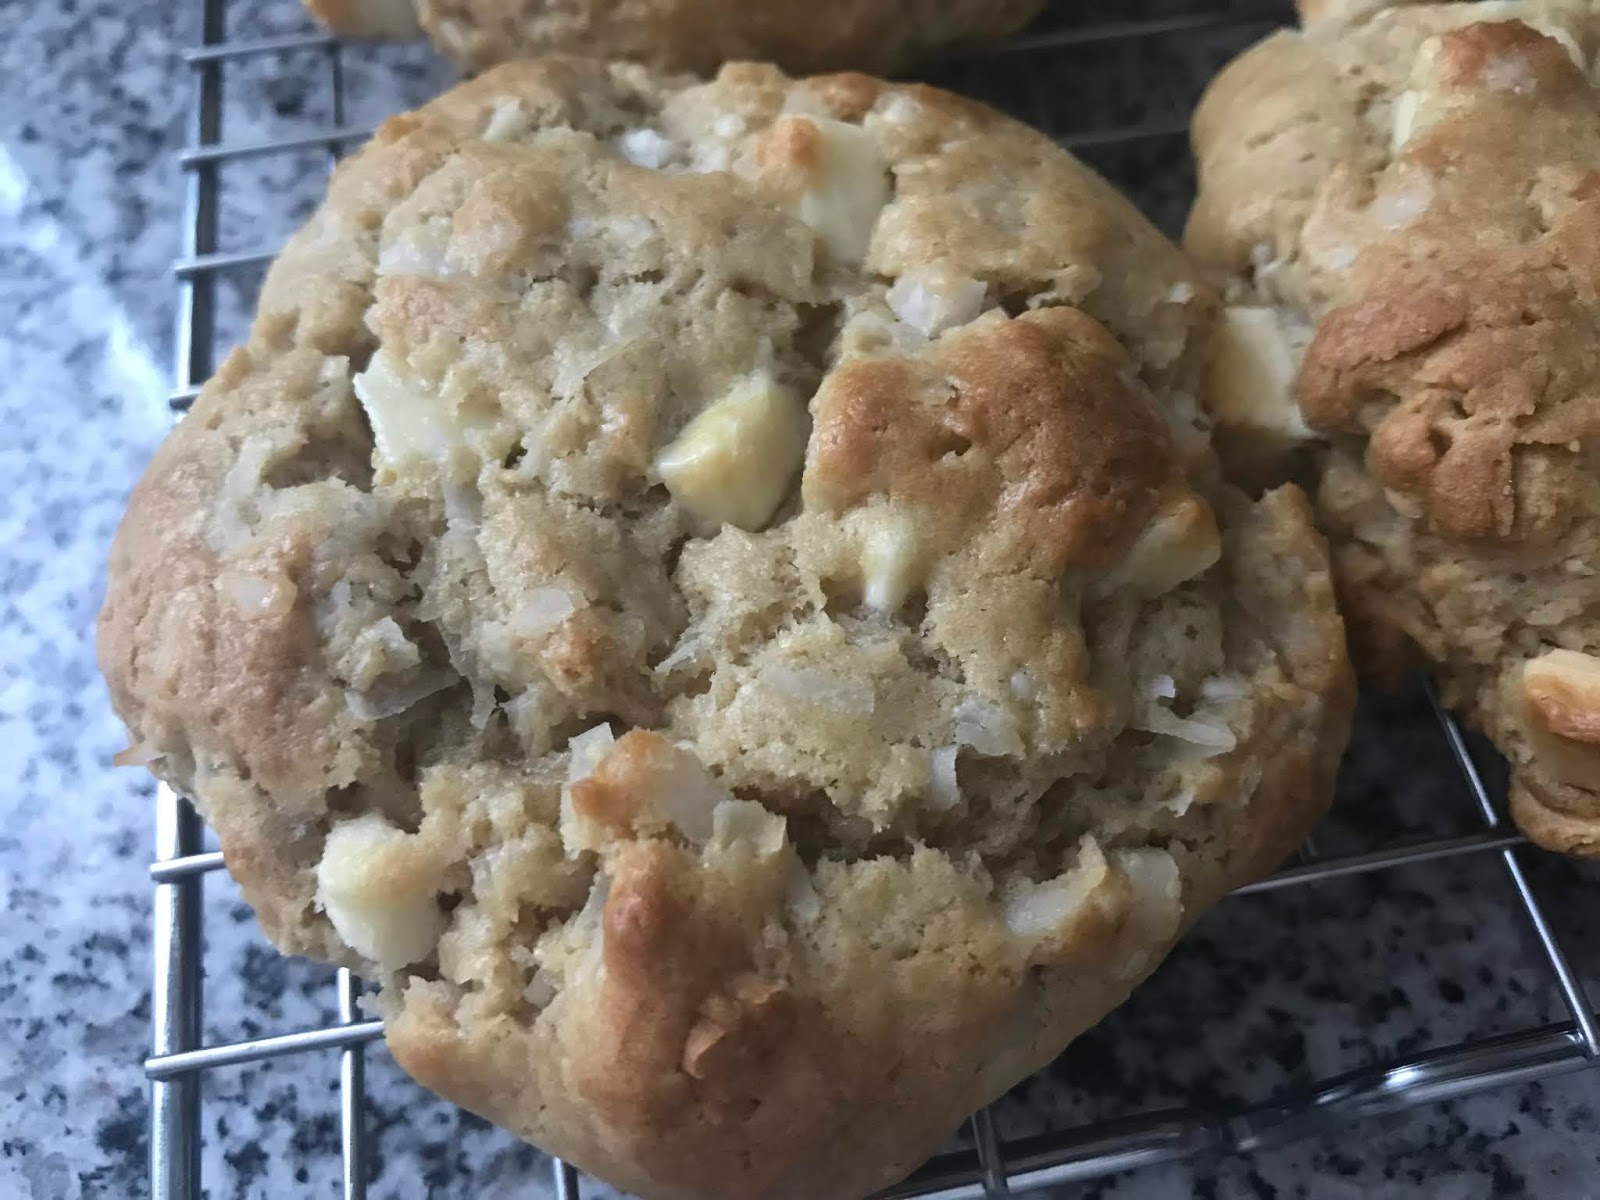
I eventually got them all piped and I have to say, they actually looked like honest to goodness rosettes. Apparently, a stiff-ish dough can make it look good in the end. They browned easily so don’t bake them too long. I loved the texture and the rosettes make the perfect vehicle for the cookie butter.


Warm the cookie butter slightly to make piping them into the center wells a little easier. The cookie butter will set once it cools in the cookie. Despite my torturous experience, I will make these again.

200 g unsalted butter, softened
80 g powdered sugar
2 egg whites (I used 1/4 cup of liquid egg whites)
2 teaspoons vanilla extract
1/2 teaspoon salt
320 g all-purpose flour
cookie butter
  1. Preheat oven to 425 degrees F. Line baking sheets with parchment paper.
  2. Cream together butter and powdered sugar until well combined. Add egg whites, vanilla extract and salt; mix until combined.
  3. Add the flour in three additions and beat each addition on low speed until just combined; do not overmix.
  4. Transfer dough into piping bag fitted with large star tip. Pipe rosettes of cookie dough onto prepared baking sheets. Make a small indent in the center of each cookie with the back of a teaspoon and fill with cookie butter. Bake 8-10 minutes or until edges are light golden brown. Remove from oven and transfer cookies to wire racks to cool.

Thursday, July 11, 2019

Chocolate Chip Cookies (Baker by Nature)

Chocolate Chip Cookies - made dough July 4, 2019 from Baker by Nature
Another chocolate chip cookie recipe. Yes, I know, I make them a lot. But my sister is a realtor and was holding an Open House last weekend and asked if I could bake cookies for it. I was happy to, as it let me test out another recipe. Since I started working remotely, I didn't have my coworkers anymore to eat my baking experiments. Fine, I'll use random strangers looking to buy a new home instead.
However, since these were for the consuming public, I couldn't default to my usual, let's-make-cookies-as-big-as-my-head size of cookies. These were meant to be dainty samples to be welcoming at an Open House. So I made these a "normal" size. Meaning small dough balls baking into small cookies.
This recipe’s approach to chocolate chip cookies combines the flavor of brown butter with the consistency of solidified butter. Most browned butter recipes have you using the browned butter in melted form as the base of the batter. This one has you brown the butter then chill it until it’s solidified but at “room temperature” or softened. So you will need to plan ahead for a little extra chilling time.

Since I have a Kitchen Aid stand mixer, I didn’t worry too much about chilling only until the butter was in the softened state since the paddle attachment could beat the butter into submission if I chilled it too much. 


The cookies were pretty good. The deck was slightly stacked against them though since my usual preference was for behemoth-sized cookies made with milk chocolate chunks or chips. Since these were going to feed strangers at an Open House, I made them smaller and used semisweet chocolate chips. But once I got past that, the cookie itself was moist, had a chewy texture and that caramelized brown sugar caramel flavor of a good chocolate chip cookie.

1 cup (2 sticks or 16 tablespoons) unsalted butter, melted and browned then chilled until room temperature
2 1/3 cups all-purpose flour
1 teaspoon baking soda
1/2 teaspoon salt
1 cup + 2 tablespoons dark brown sugar, packed
1/2 cup granulated sugar
1 tablespoon vanilla extract
2 large eggs
12 ounces semisweet chocolate chips or chunks
  1. Brown the butter in a medium saucepan over medium heat, stirring constantly, cooking for 3-4 minutes until butter has browned. Pour into a heatproof bowl (I used the mixing bowl of my stand mixer), scraping all the browned bits into the bowl. Place the bowl in the refrigerator for 1 hour, or until the butter has solidified.
  2. In a medium-size bowl, whisk together the flour, baking soda and salt;set aside.
  3. In the bowl of a stand mixer fitted with the paddle attachment, cream browned butter, brown sugar, granulated sugar and vanilla until combined, light and fluffy, about 2 minutes. Add in the eggs, one at a time, beating for 15 seconds after each addition. 
  4. Remove bowl from mixer and fold in dry ingredients, mixing with a wooden spoon until the flour has been incorporated. Add chocolate chips. Portion into golf-ball-size dough balls, cover and chill for several hours.
  5. When ready to bake, preheat oven to 375 degrees F. Line baking sheets with parchment paper. Evenly space dough balls onto prepared baking sheet. Bake for 9 - 10 minutes or until edges are golden and middles are no longer raw or shiny. Let cookies cool on the baking sheet for a few minutes then transfer to a wire cooling rack to cool completely.

Sunday, July 7, 2019

Chewy Sugar Cookies

Chewy Sugar Cookies - made June 25, 2019 from Butternut Bakery
It's been awhile since I've posted as I've been busy moving, unpacking, unpacking and settling into the new place. Before I moved, however, I made this cookie dough and, fittingly, it was the first thing I baked in my new kitchen.

I say fittingly because I love my new kitchen. It's made for a baker like me and I chose the options and design that wouldn't just look nice but was also functionally what I needed and used. Lots of counter space to work on, double convection ovens for the first time in my life and enough cupboard space to accommodate the baffling array of dessert platters I seem to have accumulated without my own knowledge.
Having a convection oven is what I missed the most in the past 6 months. I had one in my old house so I'd forgotten the difference it made until I only had a "normal" oven to work with. I found the bottoms of my cookies would end up more baked and a little harder than they should have been, even when I underbaked them. They would gradually soften to match the rest of the cookie after several hours but you're talking to someone who only eats a cookie 10-20 minutes out of the oven. #firstworldproblems

I also say fittingly because not only do I love my new kitchen but I also love this recipe for sugar cookies. In fact - and you know I try to avoid hyperbole unless the recipe really warrants it - this might be the best ever sugar cookie recipe I've ever tried. Seriously.
Usually I find sugar cookies too sweet or spread too thin. Neither is an issue with this cookie. You know how I endorse the cookie recipes I love the most? I eat most of them myself. Usually I'll bake a taste test cookie to try it out for myself then I'll bake the rest off, give them away and move on.

I did bake a few for my family when they came over last week but, I can't lie; the rest of the dough is tucked away in my freezer, to be baked one at a time, once a day, for my afternoon snack. I'm like a dragon protectively sprawled over its hoard, the way I'm hovering over the frozen dough balls in a ziploc bag in my freezer. I'm not proud of it but there you have it. It's not like I can't make more either but I'm running low on cake flour. Time for a Target run.
1 1/2 cups cake flour
1 1/2 cups all-purpose flour
3/4 teaspoon salt
1 teaspoon baking soda
1 cup unsalted butter, melted
1 1/4 cups granulated sugar
1/4 cup packed brown sugar
2 teaspoons vanilla extract
1 large egg + 1 large egg yolk
Decorative sugar for sprinkling on top, optional
  1. In a small bowl, whisk together cake flour, all-purpose flour, salt and baking soda; set aside.
  2. In the bowl of a stand mixer fitted with the paddle attachment, cream together the melted butter, granulated sugar and brown sugar on medium speed until fully combined. Mix in the egg, egg yolk and vanilla.
  3. Mix in the dry ingredients, mixing only until just combined. Do not overbeat. Chill the dough in the refrigerator for 10-15 minutes.
  4. Line a baking sheet with parchment paper. Portion the dough into golf-ball size dough balls and place in neat rows on baking sheet. Cover with plastic wrap and chill in refrigerator for at least 4 hours or overnight.
  5. When ready to bake, preheat oven to 375 degrees F. Line another baking sheet with parchment paper and evenly space chilled dough balls 2 inches apart. Bake for 12-14 minutes, until edges are set/lightly golden grown and middles no longer look raw or shiny. Let rest on baking sheets for a few minutes then transfer to wire racks to cool completely. If desired, sprinkle with decorative sugars while cookies are still hot. Cool completely.

Wednesday, June 26, 2019

Coconut Cream Cheese White Chocolate Chip Cookies

Coconut Cream Cheese White Chocolate Chip Cookies - made dough June 4, 2019 from I'd Rather Bake Than
This was another cookie I made to go into the cookie bags for my coworkers. I've been meaning to make these for awhile but they had the random ingredient of 6 ounces of cream cheese and you know they come in 8-ounce blocks. I hate having leftover ingredients that may or may not be used.
But, in a serendipitous move, the Gluten-free Chocolate Chip cookies (experiment #2) that I made, also for the cookie care packages, needed 2 ounces of cream cheese so I could make both recipes and use up the whole cream cheese block without any waste.
Plus, I had some white chocolate chunks that was just enough to include in this recipe so using up the rest of the bag also meant one less thing to pack up and move.

Baking with white chocolate is always tricky. You have to bake the cookies long enough to actually bake but oftentimes, that also means the white chocolate chunks that are exposed to the heat turn brown. Not very attractive.

And I don't like white chocolate enough to bake with it enough to remember until too late that the best way around this conundrum is to tuck the white chocolate chunks into the dough so they're not exposed, bake the cookies then press more white chocolate chunks over the tops of the cookies right when you take them out of the oven.

The heat from the hot cookies will help the white chocolate chunks melt enough to adhere to the baked cookie but won't be hot enough to burn or brown the white chocolate. I have to remember that next time I make these or other white chocolate cookies.

These turned out pretty well. The dough was easy to work with, the cookies didn't spread that much and they were pretty tasty. Not a strong cream cheese flavor but the cream cheese definitely added to the smoothness of the cookie's texture. The coconut added to the chewiness and made for a nice flavor combination with the white chocolate.
If you like macadamia nuts, I'd recommend adding some so you go the full mile with white chocolate, coconut and macadamias.
3/8 cup (6 tablespoons, 85 grams) butter, melted and cooled
6 tablespoons cream cheese, softened, room temperature
1 teaspoon vanilla extract
1 large egg + 1 large egg yolk
3/4 cup (150 grams) brown sugar
1 cup (60 grams) coconut
2 1/3 cups + 2 teaspoons (285 grams) all-purpose flour
1 teaspoon baking powder
3/4 teaspoon baking soda
1 1/4 cups white chocolate chips
  1. Whisk together the melted butter with the cream cheese and vanilla extract. Mix in the egg and egg yolk then add the sugar, mixing until creamy and combined.
  2. Add in the flour, baking powder and baking soda, mixing until just combined. Do not overmix. Fold in coconut and white chocolate chips. Chill dough if soft. Otherwise, portion into golf-ball-size dough balls, cover and chill or freeze for several hours or overnight.
  3. When ready to bake, preheat oven to 350 degrees F. Line baking sheets with parchment paper and evenly space dough balls. Bake 8-10 minutes or until edges are golden and middles no longer look raw. Remove from oven, let cool on baking sheets for several minutes before removing to wire racks to cool completely.

Sunday, June 23, 2019

Gluten-free Chocolate Chip Cookies #2

Gluten-free Chocolate Chip Cookies Experiment #2 - made dough June 4, 2019 from My Gluten-Free Kitchen
This is my second experiment with making gluten-free chocolate chip cookies. The first one turned out "okay" but still had the grit I hadn't yet learned to avoid.
This time around, I followed the tips and tricks to gluten-free baking by letting the dough chill in the refrigerator for at least 4 hours (more like 6 hours) and it probably helped that this had a little cream cheese to make a more smooth dough.


The tricks worked. This definitely had a better texture than the other recipe, no real grittiness in the mouthfeel. It still had a bit of a taste you don't normally get in non-gluten-free chocolate chip cookies but, to be honest, if I had to do a blind taste test, I'm not sure I could've picked these out as gluten free.

Additional plus is they didn't spread too much and remained a nice thickness that I prefer in my cookies. I gave these away in the cookie care packages I gave my friends at the wedding we all went to and I don't think any of them realized the cookies were gluten free.


2 1/4 cups (282 grams) all-purpose gluten-free flour blend with xanthan gum (if your flour blend doesn't have xanthan gum, add 1/2 teaspoon xanthan gum)
1 teaspoon baking soda
1 teaspoon salt
2 ounces cream cheese, softened
3/4 cup (12 tablespoons) unsalted butter, melted
1 cup packed brown sugar
1/2 cup granulated sugar
1 1/2 teaspoons vanilla  extract
2 egg yolks
2 cups chocolate chips
  1. In a medium bowl, whisk together gluten-free flour, xanthan gum if using, baking soda and salt; set aside.
  2. In the bowl of a stand mixer, combine cream cheese and melted butter. Add brown sugar and granulated sugar, mix on medium speed for 2 minutes with the paddle attachment.
  3. Add vanilla extract and egg yolks, one at a time, mixing on medium-low speed until well combined.
  4. Add the flour mixture, beating on low until just combined.
  5. Fold in chocolate chips. Portion into golf-ball-size dough balls, cover and refrigerate a minimum of 4 hours or up to 4 days.
  6. When ready to bake, preheat oven to 375 degrees F. Line baking sheets with parchment paper. Evenly space dough balls on cookie sheet. Bake 11-12 minutes, until edges are set and middles are no longer raw or shiny. Do not overbake. Let cookies sit for 2-3 minutes then remove to a wire cooling rack to cool completely.