Saturday, June 15, 2019

Snickerdoodles (no cream of tartar)

Snickerdoodles - made dough on June 1, 2019 from Stuck on Sweet
You're going to see some cookie recipes in the new few posts. I hadn't been baking that much lately since I'm working remotely these days and I don't really want to bring baked goods with me on the flight back to my office. Too difficult, especially with cookies, to keep intact.
But I was driving back to the Bay Area to attend my coworker's wedding and there would be a few other coworkers there so I used both as an excuse to try a few new recipes for cookie care packages.
My coworker, Eileen, whose wedding it was, ranks snickerdoodles as her favorite cookies. Whenever I want to try a new snickerdoodle recipe, I know I have at least one very willing taste tester. Since it was her wedding, I decided it'd be a good time to try another snickerdoodle recipe.
If you're a snickerdoodle purist, you might not consider this a "real" snickerdoodle since it doesn't contain cream of tartar, which is a hallmark of snickerdoodles, as is the cinnamon-sugar coating.
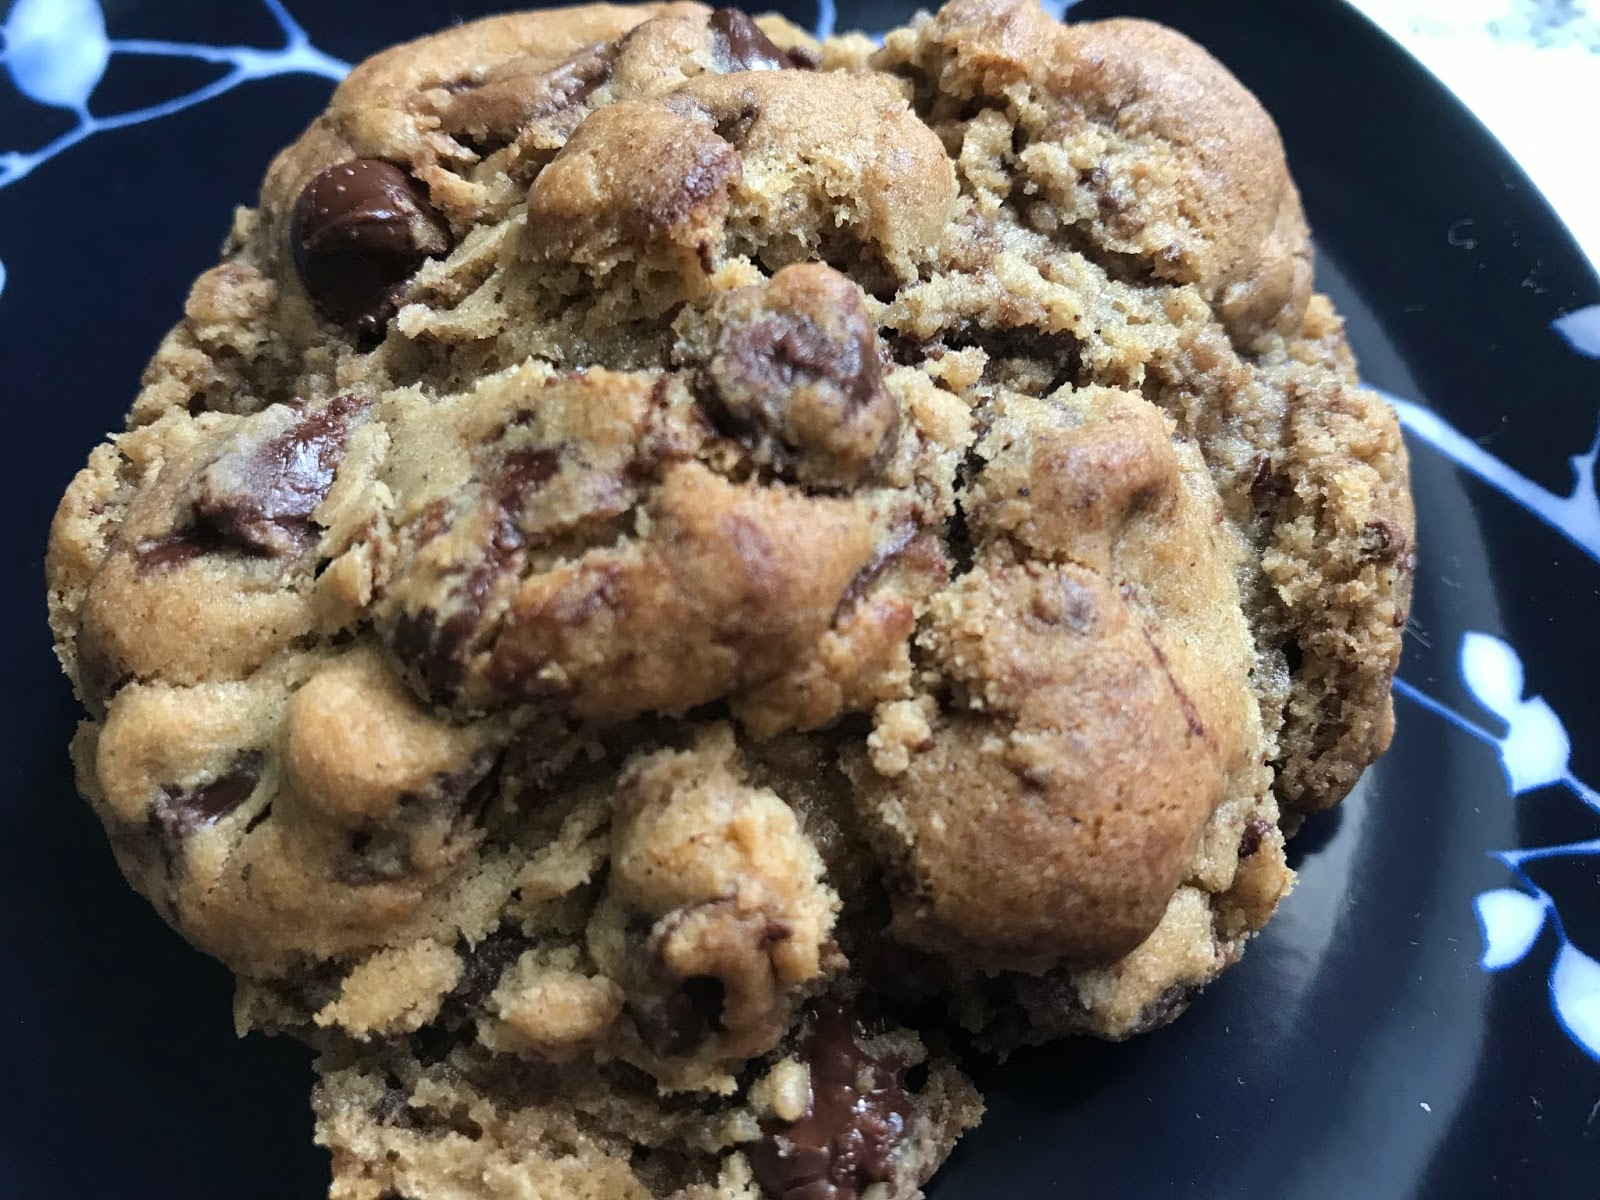
I'm not that snobby about snickerdoodles as long as they taste good, with cream of tartar or not. And these tasted good. They spread more than I would've like and some ran into each other since you know I have a tendency to make big cookie dough balls. Go big or don't bother baking them, I say.

Still, even though they didn't stay as thick as I would've liked, these had nice crisp edges and chewy middles. The flavor was also quite good. I would probably make them a little smaller than my usual norm so that they'd be a bit more normal-sized with their spread but all in all, a nice snickerdoodle recipe.

2 3/4 cups all-purpose flour
2 teaspoons baking powder
1/2 teaspoon salt
1 teaspoon cinnamon
1 cup (2 sticks) unsalted butter
1 1/4 cups granulated sugar
1/4 cup dark brown sugar
2 large eggs
1/2 teaspoon vanilla extract

3 tablespoons granulated sugar
2 1/2 teaspoons cinnamon
  1. In a bowl, mix together flour, baking powder, salt and 1 teaspoon cinnamon; set aside.
  2. In a mixer fitted with the paddle attachment, cream butter, granulated sugar and brown sugar. Add vanilla extract and eggs, one at a time, mixing briefly after each addition.
  3. With mixer on low speed, gradually add dry ingredients, scraping down sides of bowl as needed. Mix until just combined; do not overmix. Cover bowl and chill for 15 minutes.
  4. Portion into golf-ball-size dough balls, cover and refrigerate or freeze for several hours or overnight.
  5. When ready to bake, preheat oven to 350 degrees. Line baking sheets with parchment paper.
  6. Combine 3 tablespoons granulated sugar and 2 1/2 teaspoons cinnamon in a small bowl and roll dough balls, coating completely. Evenly space dough balls on prepared sheets. Bake 8-10 minutes or until edges are set and middles no longer look raw or shiny. Do not overbake. Remove from oven and let sit on baking sheet for 2-3 minutes then remove to wire rack to cool completely.

Wednesday, June 12, 2019

Gluten-free Chocolate Chip Cookies #1

Gluten-free Chocolate Chip Cookies Experiment #1 - made dough May 31, 2019 from Meaningful Eats
I am fortunate enough not to have any wheat or gluten allergies so I don't really do gluten-free baking. But, once upon a time, I came across a recipe for gluten-free chocolate chip cookies that I wanted to try so I bought a bag of gluten-free flour.
And, like nearly every time I do something like that, I didn't make the recipe shortly after I bought the ingredient and ended up moving it with me, unopened bag of gluten-free flour and all. Since I'm facing another move and I didn't want to move it again, I decided to start using it and went back to the recipes I'd pinned earlier that prompted the purchase of the gluten-free flour in the first place.
First up is this recipe for gluten-free chocolate chip cookies. My bag of Bob's Red Mill Gluten-Free Flour already had xanthan gum in it so I didn't have to purchase xanthan gum separately. From what I'd read about gluten-free baking, some of the concerns are with texture as it can be gritty if not used properly. You can get around this with several tricks, including letting the dough sit in the refrigerator for a few hours to let the liquid really absorb into the dough.
I underestimated the power of that suggestion as I went right from making the dough and forming it into dough balls to putting them directly into the freezer. Freezer vs refrigerator isn't the same thing since freezing the dough will literally keep them "as is" whereas refrigeration will allow more liquid absorption and flavor development.
On the whole though, the texture wasn't that bad. There was a slight grittiness but it was okay. I was less enamored of the flavor. It wasn't bad or anything but there was something I couldn't put my finger on. I'm not sure that in a blind taste test, I would've identified this as gluten-free as it held up in looks and texture like a regular chocolate chip cookie with wheat flour. But, taste-wise, not sure this would be my favorite. Whether that was due to it being gluten-free or not, it's too early to tell. I have more experimenting to do with gluten-free flour. Stay tuned.

1 stick or 1/2 cup butter
1 tablespoon milk
3/4 cup brown sugar
1/4 cup granulated sugar
1 egg
2 teaspoons vanilla
1 1/3 cups gluten-free all-purpose flour that contains xanthum gum (I used Bob's Red Mill), 7.5 ounces
1/4 cup almond flour, 1 ounce (can substitute gluten-free all-purpose flour)
1 teaspoon baking soda
1/2 teaspoon salt
1 cup chocolate chips
  1. In a medium bowl, whisk together the gluten-free flour, almond flour, baking soda and salt; set aside.
  2. Melt butter in a saucepan over medium heat. When melted, whisk constantly as butter foams then the solid particles begin to brown on the bottom, 5-8 minutes. Remove from heat.
  3. Add milk, brown sugar and granulated sugar; whisk to combine. Add the egg and vanilla; whisk to combine.
  4. Using a rubber spatula, mix in the dry ingredients until combined. Stir in the chocolate chips.
  5. Cover the bowl and let sit for 30 minutes. Portion into golf-ball-size dough balls and chill or freeze for several hours or overnight.
  6. When ready to bake, preheat oven to 350 degrees F. Line baking sheets with parchment paper. Evenly space dough balls on prepared baking sheet. Bake 10-12 minutes or until golden and the middles are no longer raw or shiny. Let cool 5 minutes then transfer cookies to wire rack to cool completely.

Monday, June 10, 2019

Chocolate Chip Cookies with Self-Rising Flour

Chocolate Chip Cookies - made dough May 26, 2019 from Kindly Unspoken
This recipe was an attempt to use more of my White Lily self-rising flour. I'm not used to baking with self-rising flour so I don't have a repertoire of recipes that use it. At the time I made the dough for this, it was around Memorial Day so I had a vision of making patriotic-looking cookies using the simple addition of red, white and blue M&Ms
Plus, honestly, since I'm moving shortly, I was also trying to use up as many ingredients in my pantry as possible. The more I use, the less I have to move.
Sadly, these didn't turn out in reality what I wanted them to look like in my head. I was hoping for chunky, chubby cookies but these spread thin. I also envisioned strategically placed colored M&Ms proclaiming colors-of-the-flag decorations. But the spread of the cookies due to the liquidity of the dough also sunk most of the M&Ms into the cookie as it baked. This was also a little too sweet for me, possibly because of the addition of the M&Ms.

As always, when a recipe doesn't turn out the way I'd like, I think it has more to do with me than the recipe. My cookies didn't turn out the way it looked on the original blog I got it from. I suspect my dough was more liquid than it should've been but I used the same ingredients and I mixed the butter straight from the fridge so not sure what happened there.
1 cup butter, softened
1 large egg
1 teaspoon vanilla extract
2/3 cup granulated sugar
1/2 cup dark brown sugar
2 cups self-rising flour
12 ounces chocolate chips
  1. Cream butter, egg and vanilla in large mixing bowl. Add in granulated sugar and dark brown sugar until creamy.
  2. Slowly add in flour, 1/2 cup at a time.
  3. Fold in chocolate chips. Portion dough into golf-ball-size dough balls and chill or freeze, covered, for several hours or overnight.
  4. When ready to bake, preheat oven to 375 degrees F. Line baking sheets with parchment paper and evenly space chilled or frozen dough balls. Bake for 8-11 minutes or until edges are set and middles are no longer raw.

Friday, June 7, 2019

Cream Cheese Biscuits

Cream Cheese Biscuits - made May 27, 2019, adapted from Revere World
This is the third of the three biscuits recipes I managed to find that didn't use buttermilk. Instead, the fat comes from butter and cream cheese. Cut both into flour and, voila, biscuits.
I modified the original recipe by cutting the butter from 2/3 cup to 1/2 cup, mostly because it's a pain to portion 2/3 cup of butter and it was easier to use 1 stick of butter or 1/2 cup. #lazy
Fortunately, the biscuits survived my experimentation, albeit I had to squeeze handfuls of the mixture to get the dough to come together. I handled as sparingly as I could though so the biscuits wouldn't be overworked.
Ironically, this turned out to be the fluffiest of the three recipes. I didn't underbake it but I didn't overbake it either. This does have the tang of cream cheese, which I don't love, but still, I really liked the texture of these biscuits.
Next time, I think I would cut back a little on the cream cheese and increase the butter. Hopefully that'll preserve the texture but give the biscuits more of a buttery flavor rather than the tang of cream cheese.
As always with biscuits, these are best served immediately, while they're hot out of the oven or at least very warm.
8 ounces full-fat cream cheese
1/2 cup butter
1 cup self-rising flour, plus more for dusting
  1. Pulse together the cream cheese, butter and flour in a food processor until combined, about 10 pulses, stopping to scrape down the sides of the bowl halfway through. Turn out onto a piece of lightly floured parchment paper and pat into a disc. Refrigerate 1 hour.
  2. Place an oven rack on the highest rung and preheat oven to 425 degrees F. Line a large baking sheet with parchment paper.
  3. Sprinkle a work surface with flour, unwrap the dough and sprinkle the top and a rolling pin lightly with flour.
  4. Roll out to 1/2" thick and cut with a 1 1/4"-thick biscuit cutter. Place them on the baking sheet about 1" apart. Roll the scraps together to cut out more biscuits.
  5. Bake about 14 minutes on the top rack until golden and puffed, rotating the pan halfway through. Brush the tops with melted butter, if desired, and serve warm.

Wednesday, June 5, 2019

Easy Cream Biscuits

Easy Cream Biscuits - made May 26, 2019 from Melissa's Southern Style Kitchen
My biscuits-without-buttermilk experiments continue. These biscuits look a little (okay, a lot) amateurish but that was because I only had a scant cup of heavy cream and still added the full amount of flour in the recipe. So, clearly, the dough didn't hold together very well.
However, I ended up liking these biscuits better than the other recipe. I got smart this time and actively looked for a recipe that used self-rising flour. Struck gold with this one that not only called for self-rising flour but the only other ingredient was heavy cream.
Seriously, you can't have it easier than 2-ingredient biscuits. Three ingredients if you count the butter you apply on top of the hot biscuits (count it, trust me, #butterforever). It would be better if you used the full amount of the cream or cut back on the flour if you didn't have a full cup of cream but, regardless, I liked the texture of this biscuit. It was a little dense and I underbaked it just a tad but that's because I like my biscuits a bit doughy.
There was some good crunch on the top but the inside, slathered in melting butter, was my favorite.
2 cups self-rising flour, plus additional for dusting
1 cup heavy cream plus additional as needed
1/4 cup butter, melted
  1. Preheat the oven to 450 degrees F. Brush the bottom and sides of a 10-inch cast iron skillet with melted butter, reserving some for the tops. Set aside.
  2. Add the flour to a medium-size mixing bowl. Make a well in the center.
  3. Pour the cream into the center then use a fork to gradually incorporate the flour.
  4. Turn the dough onto a lightly dusted nonstick surface. Turn to coat with flour. Do not knead.
  5. Roll or pat to 1-inch thickness. Use a 2 1/2-inch biscuit cutter to cut into rounds. Arrange in the buttered skillet. Re-roll scraps gently and repeat.
  6. Brush the biscuit tops with half of the butter. Bake for 10-14 minutes or until golden. Brush the tops after baking with remaining butter. Serve immediately.

Monday, June 3, 2019

Homemade Southern Biscuits

Homemade Southern Biscuits - made May 25, 2019 from The Anthony Kitchen
A long while back, I splurged and (over)paid for a couple of bags of White Lily Flour on amazon. White Lily products aren't sold locally where I lived so online was the only way I could get them. At the time, I'd heard so much hype about how great White Lily flour was for cakes and biscuits that I succumbed to temptation and bought a couple of bags. Only to let them languish in my pantry for months. I even ended up moving them to my new place earlier this year. Now I'm looking at another move shortly and I couldn't bear moving them again, especially since their expiration date had just passed. Sigh.

So I decided to make biscuits and see if using White Lily flour would really make a difference. For context, I don't make very good biscuits. I follow the recipe, try to handle the dough sparingly, make sure my butter is cold, yada yada. But expert biscuit maker, I'm not.As my previous biscuit attempts will attest.

But I am nothing if not optimistic or persistent so I decided to give it another try. Of course, nearly every biscuit recipe I found on pinterest all called for buttermilk. Which I didn't have and, as I was going back to work shortly, didn't want to run out and get. I had milk, I had heavy cream, I had cream cheese but no buttermilk.
No matter - I found recipes that called for either milk, heavy cream or cream cheese so I decided to run an experiment and try out the different biscuit recipes, the more to use my White Lily flour on. The first recipe was this one that called for whole milk. I dutifully followed the recipe but realized too late that my White Lily flour was self-rising flour which already contained leavening ingredients and salt. I treated it like all-purpose flour and followed the recipe below.

I nearly convinced myself that would be okay as the flour had just expired so maybe adding the leavening agents would actually help. Ha. HAHAHA. *wipes tear*. That'd be a no.

For one thing, these biscuits didn't rise very much. Worse, they were too salty. They weren't bad, per se. Just eat them warm and add butter. But I've got nothing to brag about in how they turned out. All I can say is it at least used up some of the flour. I'm sure they would turn out if made properly so I should probably give the recipe another chance.
2 cups all-purpose flour, plus extra for working with dough
1 teaspoon baking powder
1 teaspoon baking soda
1 teaspoon salt
6 tablespoons cold unsalted butter, cut into small cubes
3/4 cup whole milk
  1. Preheat the oven to 400 degrees F. Line a baking sheet with parchment paper.
  2. In a large mixing bowl, combine 2 cups flour, baking powder, baking soda and salt; whisk to combine.
  3. Scatter the cubes of butter across dry mixture and, using a pastry blender or two knives, cut in the butter until the cubes are pea-sized.
  4. Add the milk and stir with a wooden spoon until the dough comes together. Lightly knead the mixture with your hands, if necessary, to bring it all together. Do not overhandle.
  5. Transfer the dough to a work surface dusted with flour and pat out until 1" thick. Cut into 2" squares or use a biscuit cutter to form the biscuits.
  6. Transfer to the prepared baking sheet and bake for 15 to 18 minutes or until the biscuits are golden brown. Serve warm.

Friday, May 31, 2019

Homemade Taco Seasoning

Homemade Taco Seasoning - made May 21, 2019 from Whole New Mom
Before I discovered Penzey's, I'm not sure it would've ever occurred to me that you can make your own taco seasoning. Matter of fact, I've even bought ready-made Taco seasoning from Penzey's whenever I wanted tacos. But - hello - taco seasoning is made up of individual seasonings so it follows that you can make it "from scratch". Talk about your duh moment.
I didn't have any Penzey's Taco Seasoning but had a hankering for tacos after I'd bought some low-carb tortillas and ground beef. It's a point of stubbornness that I only want to buy my spices from Penzey's (no, I'm not affiliated with them, I just love their spices and believe in supporting the company) so it was unthinkable for me to run to the grocery store and buy taco seasoning that didn't have a Penzey's label on it.

So pinterest to the rescue again when I searched for homemade taco seasoning recipes. This one from Whole New Mom won hands down as I had all but one of the ingredients for it. When does that ever happen? I tend to only buy spices after I have a specific recipe to use it for; otherwise I don't cook enough to be sure I'd actually use it. The only thing I didn't have was the red pepper flakes but I figure that'd be all right since I had everything else.
Obviously, this is the easiest recipe to date since it's literally just measuring spices and mixing them in a small bowl. Then - results - homemade taco seasoning. This turned out a bit spicy for my bland taste buds but did have good flavor. For me, next time, I'd probably cut back a little on the pepper and it was still okay to skip the red pepper flakes. Otherwise, hey, I can now "make" taco seasoning.
2 tablespoons chili powder
1/2 teaspoon garlic powder
1/2 teaspoon onion powder
1/2 teaspoon red pepper flakes
1/2 teaspoon oregano
1 teaspoon paprika
1 tablespoon cumin
2 1/2 teaspoons salt
2 teaspoons pepper

Combine all ingredients in a small bowl. Mix well. Store in a tightly closed container.