Saturday, June 9, 2018

Nothing Bundt Cake copycat Lemon Bundt Cake

Nothing Bundt Cake copycat Lemon Bundt Cake - made May 20, 2018 from Favorite Family Recipes
I’ve been a fan of Nothing Bundt Cake ever since I first tried them almost 10 (?) years ago. The red velvet was my first favorite but I’ve expanded my devotion to encompass the lemon bundt cake and more recently, the vanilla bundt cake. It isn’t just the flavor but also the fluffy texture that ensnared me. The funny thing is, sometimes I’d swear it was from a cake mix. It tastes way better than any cake mix I’ve had but the fluffiness, particularly of the lemon bundt cake, reminded me (fondly) of those Sarah Lee pound cakes my mom used to buy when I was a kid and that was our rare treat for dessert after dinner.
I’ve tried out a pretty decent copycat version of theNothing Bundt Cake red velvet bundt cake but I’ve always wanted to take a swing at making a copycat version of the lemon bundt cake. Since the texture reminded me of a cake mix, I thought this version would be a good one to test to see how close I could get.
You can tell two obvious things from the pictures right away. First, Nothing Bundt Cake has no need to fear my icing skills. I tried making their signature “frosting petals” over my cake. Don’t look too closely or you can see how dismal my efforts were. It’s actually not hard to make the round petals; simply put your frosting into a plastic frosting sleeve, cut the tip in a straight line, then pipe. The trick is making sure there are no air holes in your bag of frosting or your frosting won’t come out in an unbroken line and apply pressure evenly with no hesitation. I had some issues with consistency and even pressure. Shrug. When you’re not a frosting person, apparently, you don’t hone your frosting skills. Ha.
Second thing you can tell from the picture of the slice of cake is this did not have the fluffy texture of the original Nothing Bundt Cake lemon cake. It was still a good cake but, just like the banana cake from Icing on the cake whose texture I still haven’t been able to replicate, I couldn’t do it with this one either. It wasn’t fluffy enough. It was moist though and still a good cake. As a matter of fact, it turns out my coworkers liked this so much I had several people stop me in the hall and in the kitchen to tell me how much they liked this cake and how good it was. So if you want an easy lemon cake with a cake mix base, this is a great option. I don’t think I would consider it a copycat NBC bundt cake though, other than how I frosted it to copy the signature look of a Nothing Bundt Cake. If I had iced it the normal way or made it as a glaze, I think this would just been a good lemon cake. So the search continues for a copycat.

1 lemon cake mix
1 3.4-ounce lemon pudding mix
1 cup sour cream
4 large eggs
1/2 cup canola oil
1/4 cup lemon juice
1/4 cup water

Frosting
1 8-ounce package cream cheese, softened
1/4 cup butter, softened
1 teaspoon vanilla extract
2 cups powdered sugar
  1. Preheat oven to 350 degrees F.
  2. Using the paddle attachment of a stand mixer, beat the cake mix, pudding mix, sour cream, eggs, oil, lemon juice and water for 2 minutes until mixture is smooth and creamy.
  3. Pour batter into greased Bundt cake pan and bake for 45-50 minutes or until toothpick inserted in thickest part of cake comes out clean. Cool for 10 minutes then invert and let cool upright until completely cooled.
  4. Frosting: in a medium bowl, beat cream cheese and butter until smooth and creamy. Mix in the vanilla then gradually add the powdered sugar. Beat until desired consistency. Frost cake.

Monday, June 4, 2018

Almond Butter Coconut Cookies

Almond Butter Coconut Cookies - made dough May 12, 2018 modified from If You Give a Blonde a Kitchen
The original recipe called for adding dark chocolate chunks and nuts into these cookies. I'm sure that would've been good as well...except I don't really care for nuts in my cookies and I decided to omit the chocolate chunks as well to make this a more simple coconut cookie.

I'm glad I went with the more purist approach as I loved this cookie. Loved everything about it. The dough was easy to make and easy to handle, not too stiff or sticky. You can see from the pictures that the cookies didn't spread very much and stayed thick. They're (mostly) of uniform thickness because I made the dough into balls then flattened slightly into thick discs. The cookies baked more evenly that way.

The almond butter also gives this a different taste and texture than using all butter or peanut butter. My favorite aspect of this cookie was the texture. It's chewy and moist, especially with the addition of the coconut. I also liked the flavor of both the almond butter and the coconut. This has the brown sugar caramelized overtones I also favor in non-chocolate cookies. This is the perfect cookie for the heat of summer and those summer picnics since there's no chocolate to melt if served in hot weather. Also a must-try for coconut lovers. Which we must have at work as when I put these cookies out in the communal kitchen at the office, I'm not sure they lasted an hour before all I came back to was an empty plate.

1 1/2 cups all-purpose flour
1 teaspoon baking soda
1/2 teaspoon kosher salt
1/2 cup (1 stick) unsalted butter, softened
3/4 cup almond butter
1/2 cup granulated sugar
1/2 cup dark brown sugar, packed
1 egg
1 teaspoon vanilla extract
1/2 cup coconut flakes
  1. In a medium bowl, whisk together the flour, baking soda and salt; set aside.
  2. In the bowl of a standing mixer with the paddle attachment, cream together the butter, almond butter, granulated sugar and brown sugar until light and fluffy, about 2-3 minutes. Add egg and vanilla, beat until just combined.
  3. Gradually add the flour mixture in two batches, mixing until just combined. Do not overmix. Fold in the coconut.
  4. Portion dough into golf-ball size dough balls. Cover, chill or freeze several hours or overnight.
  5. When ready to bake, preheat oven to 350 degrees F. Line baking sheets with parchment paper. Evenly space frozen cookie dough balls on baking sheet. Bake 12-14 minutes, until edges are golden and middles no longer look raw or shiny. Do not overbake.
  6. Let cool on baking sheet for several minutes then transfer to wire cooling rack to cool completely.


Friday, June 1, 2018

Nutella Fudge Cookies

Nutella Fudge Cookies - made dough May 12, 2018 from Tutti Dolci
This is a good chocolate cookie. It's meant to be a Nutella cookie but the chocolate tends to overwhelm the Nutella so you only really get a Nutella taste by swirling Nutella into the cookie dough without fully blending it into the dough.

The dough mixes easily and handles well. It doesn't spread much so if you want domed cookies, make into a ball, freeze for a few hours, then bake. If you want your cookies of uniform thickness, then shape dough into thick discs, freeze for a few hours and bake.

As I usually do when I want swirls of Nutella in the cookie, I dollop spoonfuls of Nutella over the mixed cookie dough, scoop into golf-ball-size balls, being careful to keep the Nutella dollops mostly intact (you can pat bits of dough over the exposed Nutella to make the dough balls easier to handle), freeze until firm then bake.
When baked, you can still see the Nutella dollops intact in the cookie.

If you want a fudgy cookie with Nutella swirled into it, this is the recipe for you. If you want more of a Nutella flavor in the cookie itself, I recommend the Nutella Swirl Cookies.
1/2 cup flour
3 tablespoons unsweetened cocoa powder
1 teaspoon baking soda
1/4 teaspoon salt
3/4 cup Nutella, plus more for swirling into dough
1/4 cup almond butter
2/3 cup granulated sugar
1 large egg
1/2 teaspoon instant espresso powder
1/2 teaspoon vanilla extract
flaky salt, for topping, optional
  1. Whisk together flour, cocoa, baking soda and salt in a medium bowl.
  2. Beat Nutella, almond butter, and sugar in a large mixer bowl at medium speed until smooth. Add egg, instant espresso powder and vanilla; mix until combined. 
  3. On low speed, mix in flour mixture until just combined. Do not overmix.
  4. Dollop spoonfuls of Nutella atop dough and scoop cooking dough into golf-ball size dough balls, leaving swirls of Nutella distinct in each dough ball. Cover and chill or freeze for several hours or overnight.
  5. When ready to bake, preheat oven to 350 degrees F. Line baking sheets with parchment paper and evenly space frozen dough balls. Bake for 10-11 minutes until tops are set and crackly. Cool for 5 minutes on baking sheets then transfer to wire rack. Sprinkle with flaky salt and let cool completely.


Tuesday, May 29, 2018

Brown Butter Chocolate Chip Peanut Butter Cookies

Brown Butter Chocolate Chip Peanut Butter Cookies - made dough April 6, 2018 from Picky Palate
This is a good, basic chocolate chip peanut butter cookie recipe. Easy to make and the dough is easy to shape into balls, roll into sugar and bake. I’m not sure it stands out as head and shoulders above other peanut butter cookies I’ve made but it’s still a good cookie.

The more I bake certain kinds of cookies I’ve made countless times before, I’ve come to believe it isn’t just the ingredients but how you make it that is important. I have my own cookie making technique that I stick too, almost regardless of what the recipe instructions say.

I never beat the butter and sugar as long as most recipes say because the more you beat them, the more air gets incorporated into the mixture and the more likely the cookies will be airy or cakey. I don’t do cakey unless it’s a cake. So I beat just until the two are combined and there are no obvious butter lumps.
I also barely mix the eggs in, just until they’re somewhat incorporated into the batter but not fully because when I add the dry ingredients, the eggs will become more combined into the mixture. You don’t want to beat the batter too much once the eggs are added or you can end up with a meringue-like film or texture on the outside of your cookies.

And you definitely want to mix sparingly once the flour is added to avoid developing the gluten or else your cookies will end up tough rather than chewy. Lastly, of course, I bake the cookies just until the edges are golden and the middles are “not raw”. They’ll continue baking on the hot baking sheet after you take them out of the oven and they will also set when they cool. Never overbake or your cookies will be dry.
1 stick unsalted butter
1/2 cup granulated sugar
1 large egg
1/2 teaspoon vanilla extract
1/2 cup creamy peanut butter
1 cup all-purpose flour
1/2 teaspoon salt
1/2 teaspoon baking soda
1 cup chocolate chunks or chips
  1. Place butter into a small saucepan over medium-high heat. Melt and let bubble until brown bits form at bottom of pan and butter turns a golden brown color, 5-8 minutes. Remove from heat and let cool for 15 minutes.
  2. Place browned butter and sugar into bowl of stand mixer, beating with paddle attachment until combined. Add egg, vanilla and peanut butter until combined. Gradually add flour, salt and baking soda, mixing on low speed until just combined. Fold in chocolate chips.
  3. Portion dough into golf-ball-size dough balls, cover and chill or freeze for several hours or overnight. When ready to bake, preheat oven to 350 degrees F. Line baking sheets with parchment paper.
  4. Evenly space dough balls on baking sheet and bake for 10-12 minutes, until edges have set and middles are no longer raw. Remove from oven and let cool for 10 minutes before transferring to wire rack and letting cool completely.

Sunday, May 27, 2018

Puerto Princesa, Palawan, Philippines

Puerto Princesa, Palawan, Philippines - visited April 18-20, 2018
Domestic Terminal at Ninoy Aquino International Airport
After my travel bucket list item of seeing the Banaue Rice Terraces was checked off, my next one was to visit the Underground River, located in the island of Palawan. Truthfully, it was initially to go to one of the many beautiful resorts in the Philippines. Boracay used to be the tourist spot of choice but lax regulations that allowed businesses to pollute their surroundings caused the Philippine government to shut down Boracay temporarily while they did a cleanup. So I switched my plans from Boracay to Palawan, another tourist destination.

Most people go to the island of Palawan for the beaches and resort spas. El Nido and Coron are the up and coming tourist destinations in Palawan. I’m not really a big fan of beaches or beach resorts. I’m one of those travelers where when I go on vacation, I like to do things and have experiences, rather than lying on a beach somewhere and doing nothing. I can do nothing at home. When I travel, I like to explore new places (and eat). So, instead of beautiful beaches and resorts, I opted to fly into Puerto Princesa as that was the closest airport to get to the Underground River.


The flight from Manila to Puerto Princesa is less than an hour in the air. It was my first time flying out of the domestic terminal at Ninoy Aquino airport as usually when I go to the Philippines, I stick to the island of Luzon as that’s where Manila and where my relatives are located. (Remember, the Philippines is an archipelago of more than 7,000 islands.) I was pleasantly surprised at how nice the domestic terminal was; it was even better than the international terminal I normally fly out of in that it had more choices for stores and eats. I was dropped off early for my flight as Manila traffic is unpredictable so I had some time to wander around and, okay, yes, I had a waff-wich, also a new experience for me – it’s a tasty waffle sandwiched with the filling of your choice. Not gonna lie – I had two, a savory one (ham and cheese) and a dessert one (chocolate and hazelnut).

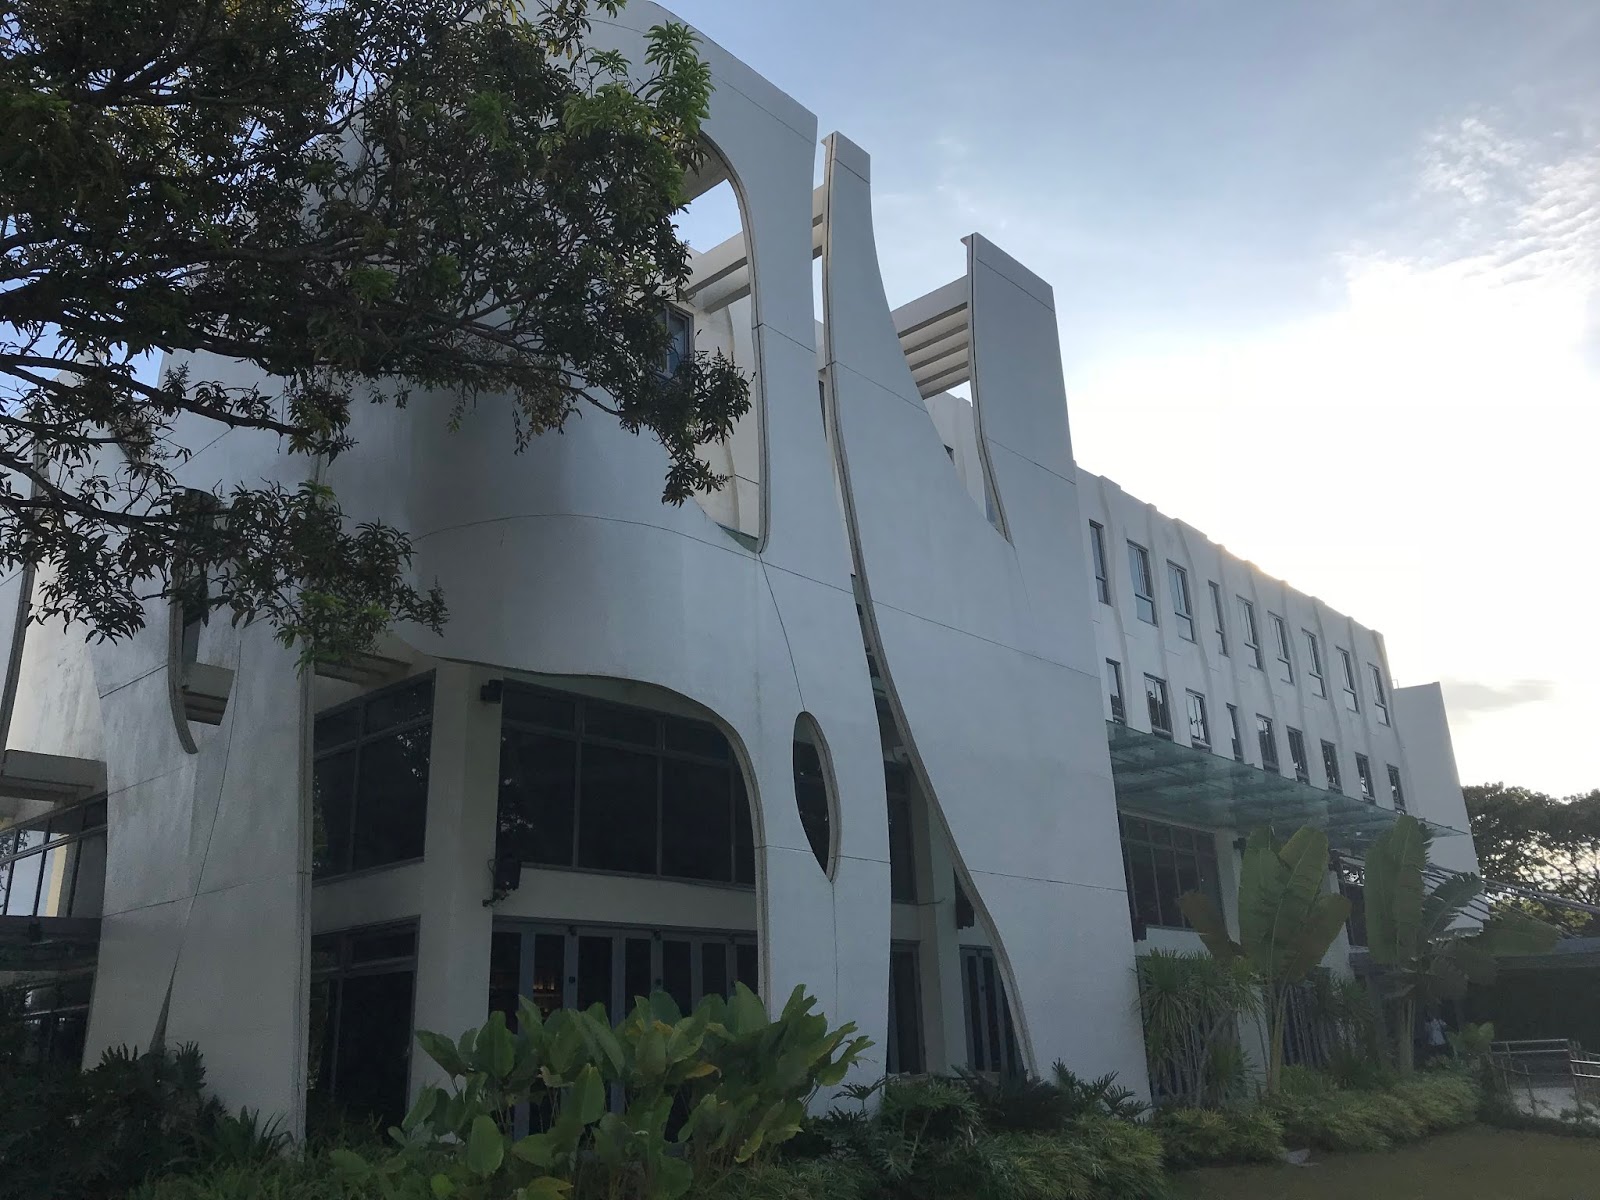
The flight was smooth and I had booked my hotel weeks beforehand. Thanks to recommendations from tripadvisor.com, I found the Canvas Boutique Hotel which was touted as being mere minutes from the airport with free shuttle service. And they didn’t lie. The driver came up a few minutes after I emerged from the airport, loaded me into the shuttle and 3 minutes later, deposited me in the hotel lobby. Couldn’t have been easier.

The hotel was perfect for my purposes. The staff was friendly, the room was spacious and clean (and air conditioned!), there was free wifi and free breakfast in the mornings. I had arranged the tour of the Underground River through them for 2,000 pesos (approximately $40 USD). They took care of booking it and all I had to do was provide my credit card for payment and come down the next morning at the appointed time.

The tour accommodated 10 tourists and we were loaded into a shuttle van along with our driver, Emman (not to be confused with my cousin Emman – Emmanuel is a very common name in the Philippines which is still predominantly a Catholic country), and our tour guide, Dean. Dean was very informative and gave us some history about the Underground River, which is one of the longest navigable underground rivers in the world.
It’s a very popular tourist destination and often involves long wait times as it’s also one of the places cruise ships dock so their passengers can go on day excursions to the cave. Groups are given priority if someone has a flight they have to catch later in the day. The Underground River Tour itself is meant to only be a half-day excursion but due to the travel time to get there (about 2 hours from Puerto Princesa) and the potential wait times, the tour companies book it as an all-day trip.

I wasn’t well prepared for the tour as I had been too busy at work to do much prep beforehand. In hindsight, my travel tips for this tour: bring/wear bug repellent (it’s the tropics, after all). If you’re like me and are unprepared, the tour does make one stop before we get to the  pick up spot for the Underground River. It’s meant to be a bathroom break, a photo op with beautiful scenery, and a place to pick up snacks, tsotchkes, sunscreen and bug spray. I got an extra bottle of water and bug repellent.

Second tip: wear lots of sunblock with the highest SPF you can find as that tropical sun is no joke (remember, you’re close to the equator) and bring a hat or something for your head. If you forget or aren’t prepared (hello, that’s me), there are a plethora of sellers walking around the Puerto Princesa Underground River Tour pickup selling hats, freshwater pearl jewelry, rosaries and clear plastic pouches for cell phone protection. I bought a hat for 120 pesos ($3). My relatives probably would’ve wanted me to haggle but, hey, I’m a tourist and $3 was cheap for a pretty straw hat.
We waited a bit at the dock while Dean got out tourist permits. We also got lucky as he found a lone tourist, Mark, who had a flight out of Puerto Princesa later that afternoon and Dean invited him to join our group so we got priority in line (thanks, Mark).

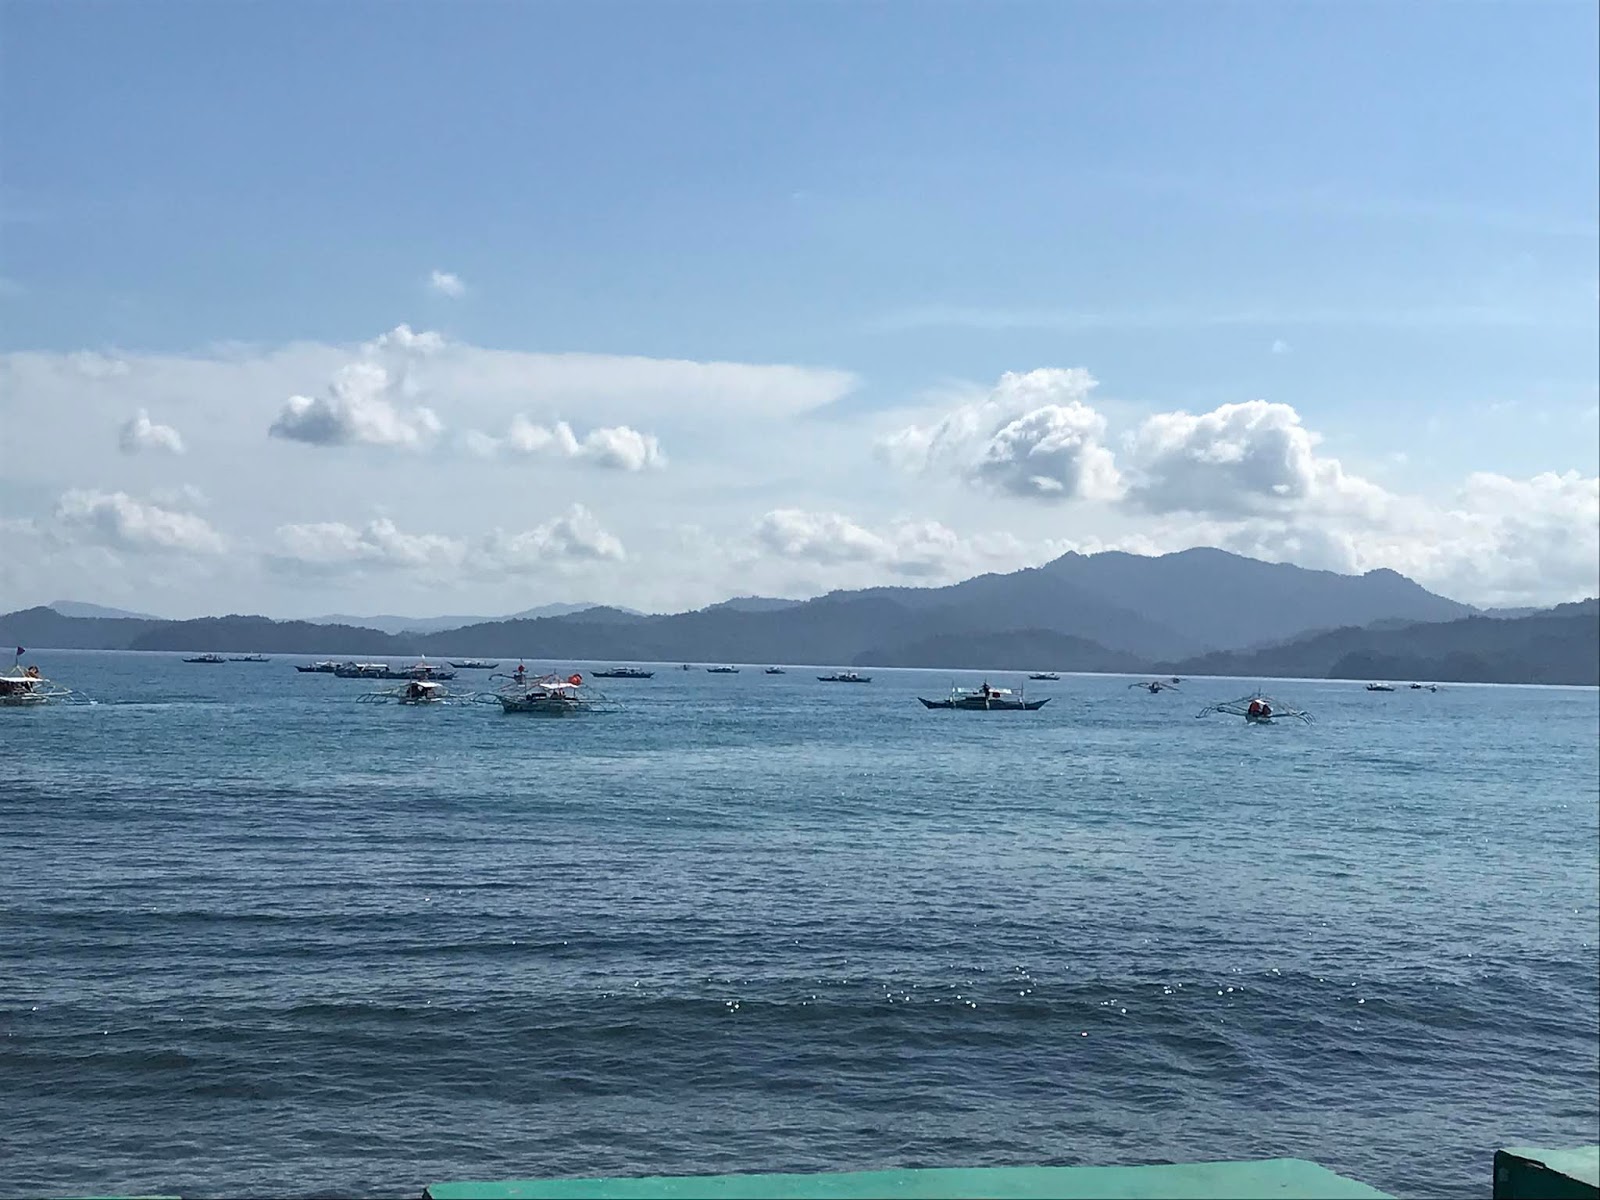
 At the pickup spot, the tour group split into 2 boats and we were ferried across the water to another small island and offloaded onto a stretch of beach. It’s within this that the Underground River starts. Oh and third tip: wear flip flops that you don’t mind getting wet. I completely missed that memo but Dean was kind enough to give me his and went barefoot. Because when you get off the little boat you were ferried in, you go about ankle deep into the water before making your way onto the sandy stretch of beach. Yeah, my leather sandals wouldn’t have done well. I hesitated to take Dean’s flip flops and planned to just go barefoot myself when I left the boat but he insisted and it seemed churlish to refuse when he was so concerned about all of us having a good experience, flip-flopped feet and all.


We did a brief walk, saw a really big-ass lizard (shudder) indigenous to the area and were duly informed to leave the monkeys alone and to be wary of their boldness in snatching at anything plastic bag-like as they’ve learned to equate that with holding food (curse previous tourists who fed them when they shouldn’t have just because they thought they were cute).


The short walk from the beach to the start of the tour was a very beautiful lake where each boat takes 10 passengers and is rowed manually by the guide (not Dean but the Underground River Tour guide, one for each boat). Each passenger is given an audio pack and headphones and the tour can be listened to in a variety of languages. Besides myself, our tour group included 3 young guys from Finland, a Dutch couple, two older Filipino ladies and 2 younger ones in their 20s. Mark, our priority addition, like me, was a tourist from the USA, also Filipino but here for the explicit reason to see his home country as a tourist.

I imagine with 10 people plus the guide in the boat, it’s difficult to navigate and row, especially since most of these guides are not big and bulky. Nevertheless, ours guided us expertly through the Underground River. We entered a cave and from there, were “rowed” or poled (I am extremely ignorant of nautical/sailing/rowing terminology so bear with me) about 1.3 kilometers into the cave and back. The underground river runs longer than that through the various caves but we did the short version as not all of the passages are wide enough to accommodate the boats.

Inside, it’s completely dark, as you would expect from a cave. The guide shines a light in conjunction with what the audio tour is saying as we navigate each part of the cave. There are various stalactites and stalagmites throughout and the tour has a firm religious bent, down to interpreting some of the structures as “the Last Supper” and the nativity. I thought they were interesting rock formations formed over possibly millions of years.

Bats are the natural habitants of the caves and, although it was the sleeping time for most of them, we could hear them, clicking as part of their echo-location way of moving about. We were warned several times that it we were looking up, to keep our mouths closed. Our guide joked that if we felt something wet and cold, that was okay since it was water. If it was warm, that was not okay since it was likely bat guano. Erk.

Fortunately we all had been given helmets to wear to protect our heads in case anything more serious than bat guano dropped on us. These were caves after all. It was all pretty fascinating, gently being rowed down the river and back, seeing the lights sweep over the various cave formations, and seeing what nature had created persistently and patiently over more years than my mind could wrap around. It gives you pause to reflect on all the wonders of nature and the time it took to be created.
At one point of the tour, our guide turned off his light and we were plunged into total darkness to give us a sense of what it’s like for the natural cave dwellers who inhabited this domain. I’m not afraid of the dark but I gained a healthy respect for any and all creatures who made that cave (or any other) their home and what they evolved to in order to survive in complete darkness. It was so dark I could feel that total absence of light pressing onto my eyeballs. If that makes sense. It was dark.

Once we emerged from the cave, we were rowed back to the landing then there was a brief wait before we headed back to the beach to be picked up by the boat taking us back to our original docking place. The tour included lunch at a buffet restaurant. Don’t picture it as a Vegas-like casino buffet set up. It was cafeteria, bench-style seating with the food arranged in the middle of the open-air dining room. All of it was local Filipino cuisine, from adobo to pancit inihaw na isda (grilled fish) and lumpia to maja blanca and watermelon for dessert. As Dean told us ahead of time, “it isn’t fancy but it’s good food.” I would agree. I’m a picky eater but I found enough to eat and enjoy. While not Michelin-star caliber, it was tasty and filling.


After a leisurely lunch, we piled back into the van, waved goodbye to Mark who had his own transportation back to Puerto Princesa and had a merry van ride back to our respective hotels. Similar  to when I went to Belize, I didn’t go for the beaches and leisure but to see and experience something unique, which the Underground River was. I was glad of the experience to top off my tourist stay in the Philippines.