Thursday, July 14, 2016

Caramel-Stuffed Brown Sugar Cookies

Caramel-Stuffed Brown Sugar Cookies - made dough June 16, 2016 from Carlsbad Cravings
Ever since I discovered these fleur de sel caramels at Trader Joe’s, I’ve been looking for ways to use them, preferably by “stuffing” them into cookies. Of course, you don’t really stuff them. Like those miniature boats inside glass bottles, you simply build the bottle around the boat. Or in this case, you wrap the cookie dough around the caramel.


This cookie dough was very easy to work with and that’s key when you have to handle the dough and do more than form it into a ball. For this, I scooped out the dough, patted into a disc, placed the unwrapped caramel in the center and sealed it inside the dough. I kept the shapes halfway between ball and thick disc to accommodate the caramel. I didn’t want it to bake thin so (of course) I froze the dough. When making this type of cookie, always make sure you seal the caramel completely inside the dough. You don’t want any cracks that will enable the caramel to leak out. I did have that happen with one cookie but fortunately the crack in the dough was on top so the caramel stayed inside the cookie and peeked out rather than leaked out.

I had hoped these cookies would stay thick and chubby and that when you bit into it, the caramel would flow out. You know me and flowy by now. It didn’t quite work out that way. The cookies did spread to an even thickness but fortunately, so did the caramel. It’s almost amazing how neatly it stayed within the cookie and matched its spread. Subsequently, you had caramel in almost every bite of cookie, even near the edges.

I did find these brown sugar cookies a trifle too sweet for me though. They were still good and the caramel made them great but if you want to cut the sweetness, you might want to sprinkle a little fleur de sel on top of the cookies before serving.
14 tablespoons unsalted butter, melted
2 cups plus 2 tablespoons all-purpose flour
1/4 teaspoon baking powder
1/2 teaspoon baking soda
1 3/4 cups dark brown sugar
1/2 teaspoon salt
1 large egg plus 1 egg yolk
1 tablespoon vanilla
20-24 caramel candies
  1. Whisk flour, baking soda and baking powder together in medium bowl; set aside.
  2. Combine melted butter, brown sugar and salt and beat until combined. Add egg, egg yolk and vanilla; mix until combined. Add flour mixture and mix until just combined.
  3. Scoop 1 tablespoon of dough and place caramel in center. Add another tablespoon of dough on top of caramel, pinch edges together and roll into a ball or thick disc. Repeat until all remaining dough is gone. Cover and chill or freeze until firm, several hours or overnight.
  4. Preheat oven to 350 degrees. Line 2 baking sheets with parchment paper.
  5. Place cookies on prepared baking sheets, evenly spaced apart and sprinkle with fleur de sel. Bake for 11-13 minutes or until barely golden. Let cool for 5 minutes before transferring to cooling rack.

Monday, July 11, 2016

Brown Butter Cinnamon Crinkles

Brown Butter Cinnamon Crinkles - made dough May 14, 2016, modified from Cookies and Cups
I make so many cookie recipes (you’ll notice I mostly do cookies and brownies on my blog) that I always like to look for something a little out of the norm in a cookie. Or a type or flavor of cookie I haven’t made before. I’d make crinkle cookies before but not brown butter and/or cinnamon crinkles. Crinkles really just refer to rolling the cookie dough ball in powdered sugar before baking and when the cookie flattens and spread, the coating of powdered sugar spreads with it and makes the crinkles. I’m pretty sure that’s true even though I just made that up.

In any case, these were good crinkles (I mean, hello, brown butter). I made the dough first, shaped into dough balls, and froze them first without rolling them in powdered sugar. When I was ready to bake them, I whisked together some cinnamon with the powdered sugar before I rolled the frozen dough balls in the mixture. These were meant to be cinnamon crinkles after all so I wanted to make sure I got the taste of cinnamon in them. Plus, let’s be honest, I’m looking for additional ways to use up my Spice Island cinnamon so I can replace it with Penzey’s cinnamon.

These turned out pretty well. They didn’t spread very much, I did my underbaking thing so they came out puffy and moist and they tasted good. One of my coworkers complimented me later on that, especially on how moist they were. I can’t abide a dry cookie and underbaking is the best way to avoid that. If you’re into pretty visuals, the powdered sugar coating doesn’t provide as pretty a contrast as if this had been a chocolate cookie crinkle but I still maintain taste trumps appearance and this was delicious.

10 tablespoons butter, sliced
2 1/2 cups all-purpose flour
1 teaspoon baking powder
1 teaspoon ground cinnamon
1/2 teaspoon salt
1 cup granulated sugar
1/4 cup brown sugar
2 eggs
1 teaspoon vanilla
1/2 cup powdered sugar, for rolling
1 tablespoon cinnamon, for rolling
  1. Place the butter in a saucepan. Cook over medium heat until the butter melts and begins to foam. Continue to cook, whisking frequently until the butter becomes an amber color and brown flecks form. Butter should have a nutty aroma. Remove from heat and let cool slightly.
  2. Whisk together the flour, baking powder, cinnamon and salt; set aside.
  3. Add the granulated sugar and brown sugar in the bowl of a stand mixer fitted with the paddle attachment. Pour the cooled butter into the sugars and mix on medium speed to combine. Add in the eggs and vanilla, mixing just until smooth.
  4. With the mixer on low, slowly add in the flour, mixing until just incorporated. Cover the mixing bowl and refrigerate for at least an hour. Portion into golf-ball-size dough balls, cover and chill or freeze for several hours or overnight.
  5. When ready to bake, preheat oven to 350 degrees F.
  6. Line baking sheets with parchment paper. Mix together powdered sugar and cinnamon; roll dough balls into mixture and evenly space on baking sheets. Bake for 10-12 minutes or until cookies are set. Cool for several minutes then transfer cookies to wire rack to cool completely.


Thursday, July 7, 2016

Chocolate Chip Cookie Brownies

Chocolate Chip Cookie Brownies - made April 30, 2016
I’m not entirely sure what my vision was for these brownies. I think I wanted something like cookie dough brownies but not the “dough” part of cookie dough since I don’t like cookie dough. So that would make them like chocolate chip cookie brownies and I had some vision that it would be like half-baked, gooey chocolate chip cookies embedded in rich, moist, fudgy brownies.

I sort of got that even though the cookies were more like fully baked chocolate chip cookies sitting in a brownie. A couple of things hampered my vision and made me see spots. One is cookies need less baking time than brownies. So even if you cover the frozen cookie dough completely with brownie batter like I did, inevitably, your cookies still bake and become fully baked even if your brownies are underbaked. Second, this was exacerbated by the fact that adding chunky cookie dough balls and covering with brownie batter made the brownies thicker than normal and required longer baking time. Ack.
If I had to do this all over again, I would cut the dough balls into smaller pieces and spread them around more, baking in a slightly bigger pan and make thinner brownies. I don’t know if I would get the same results but logic decrees they would need less baking time and therefore maybe the cookie dough wouldn’t bake completely.
I used existing recipes for brownies and chocolate chip cookies but you can substitute with your favorite recipe for each and see how they turn out. These were still pretty good but they didn’t quite meet my exacting standards or vision. Execution (partial) fail.

Fudgy Brownies

Chocolate Chip Cookies - any chocolate chip cookie recipe will do
  1. Prepare cookie dough as directed and portion into golf ball size balls. Chill until firm. Do not bake separately.
  2. Prepare brownie batter as directed.
  3. Preheat oven to 350 degrees F. Line an 8” baking pan with foil and lightly spray with nonstick cooking spray.
  4. Pour half the brownie batter in prepared pan. Cut 8 dough balls in half (you will have extra dough to bake just as cookies). Arrange each half, cut side down, in a 4 x 4 formation, spacing them evenly. Pour remaining brownie batter over them covering dough balls completely.
  5. Bake 40-45 minutes or until toothpick inserted near the center into the brownie portion (try to avoid poking into the cookie dough ball) comes out with moist crumbs.
  6. Let cool completely before cutting and serving.

Monday, July 4, 2016

Bakery-Style Thick & Chewy M&M Cookies

Bakery-Style Thick & Chewy M&M Cookies - made dough July 2, 2016 from The Pinning Mama
I have a month's worth of blog posts to put up but I'm leapfrogging this one to the head of the line so I could post it in time, in case any of you were wondering what to do with your red, white and blue M&Ms or you find some on sale at the grocery stores tomorrow.

I'm not as fond of M&M cookies as much as I like how they look. Thanks to the proliferation of all the different colors and the M&M people being savvy enough to cater to their seasonal market, you can turn almost any recipe into a holiday-appropriate one. I found this recipe originally as a Christmas cookie made with red and green M&Ms.


Christmas still seems excessively far away and I had a bag of red, white and blue M&Ms so it was easy enough to make 4th of July M&M cookies instead. The recipe is the same and you only need to swap out the appropriately-colored M&Ms to make it holiday friendly (don't forget that for Halloween, Valentine and Easter baking as well).
The dough was incredibly easy to make and held together well. After you mix it, remove the bowl from the mixer and add the M&Ms by stirring in with a wooden spoon. That'll help keep most of them whole and not break them into bits. Reserve a large handful to press along the tops once you form the dough balls so you can strategically place them for maximum colorful effect.
The cookies themselves were quite good and didn't spread. If you don't like M&Ms and the crunch of the candy coating in them (that's why I'm not quite as fond of them in cookies), simply omit them and replace completely with chocolate chips. Either way, whether as traditional invented-by-Ruth-Wakefield chocolate chip cookies or as red, white and blue accented cookies, they represent the holiday well. Happy Birthday, USA!
1 cup unsalted butter
1/2 cup shortening
1 1/2 cups dark brown sugar
1/2 cup granulated sugar
2 large eggs
4 teaspoons vanilla extract
4 1/3 cups all-purpose flour
2 tablespoons cornstarch
2 teaspoons baking soda
1 teaspoon salt
1 bag M&M mini baking bits or M&Ms of your choice
  1. Mix butter, shortening and sugars until light and fluffy.
  2. Add eggs and vanilla; mix until combined.
  3. Combine flour, cornstarch, baking soda and salt.
  4. Gradually add dry ingredients into wet ingredients and mix until combined. If the dough is crumbly, stir in water, 1 teaspoon at a time, until it just holds together. The dough should not be sticky.
  5. Add in M&Ms and stir with wooden spoon until evenly distributed.
  6. Using 1/4 cup measure, scoop out dough and form into golf-ball-size dough balls. Cover and freeze for several hours or overnight.
  7. Preheat oven to 350 degrees and line baking sheets with parchment paper. Evenly space frozen dough on baking sheets and bake cookie 12-15 minutes or until edges are golden brown and middles are no longer raw. Cool several minutes on baking sheets then transfer to wire racks to cool completely.

Saturday, July 2, 2016

Monkey Bread - Nutella and Cookie Butter versions

Monkey Bread - made June 11, 2016 (original hack)
I love all the décor associated with 4th of July. Not only do they prominently feature the American flag but I just like the red, white and blue, the stars and stripes, the whole thing. So it’s a surprise that I don’t have more Independence Day “stuff”. I have a serving bowl my sister gave me awhile back but that’s it. Until I fell for the Sur la Table catalog not too long ago and ended up buying a set of 4 stars and stripes ramekins. I love ramekins and have too many. But *cough* these were on sale and piffle on “too many”.
Popping out of the top

Messy
Usually I like to bake apple cobblers and lava cakes in ramekins but apples are best in the fall and lava cakes don’t really scream 4th of July to me (okay, they scream “year round” to me) so I thought I’d try a different dessert altogether.

Now you have to understand that sometimes the baking visions in my head don’t match the baking reality that comes out of my oven. Such is the case here. My original concept was to make 1 ramekin of Nutella monkey bread and 1 of Cookie Butter monkey bread. Brilliant, right? I was going to fill each piece of bread dough with either Nutella or cookie butter, dip in butter, roll in cinnamon sugar, arrange in ramekins, pipe extra Nutella over the Nutella-stuffed dough and cookie butter over the cookie butter-stuffed dough, bake to goodness then drizzle more Nutella or cookie butter over the appropriate ramekins.

After I took the top layer off and baked the rest
I stand by my vision but I’m afraid my execution left something to be desired. For one thing, I underestimated the rise and puff of the dough pieces as they baked so I overstuffed the poor little ramekins and the pieces of the top layer popped out during baking. My oven thanks me for the mess I made in it. Because of the overstuffing, the melted, baking butter also leaked over the sides of the ramekins and dripped onto my oven floor. The bottom layer of dough didn’t get a chance to bake as much as it should have before the top layer was perfectly baked and a bit crunchy. To add further insult to my baking injuries, neither the Nutella nor the cookie butter melted into flowy goodness in the ramekins as I had envisioned they would. Instead they baked to a more solid form because of the amount of time it took the dough to bake. They didn’t burn but they weren’t the ooey gooey “glaze” I had expected. The filling inside the dough balls remained fine but the additional dollops I had put between and over the dough balls laughed at my attempt at flowy.


So….much as I would’ve wished for a better outcome to christen my new 4th of July ramekins, the baked dough balls I did manage to salvage were actually pretty tasty. I always say failures teach as much as, if not more than, successes so for this one I learned it would to best to use less dough (only fill ramekin 2/3 full, max), don’t pipe extra Nutella or cookie butter before baking and instead, glaze the warm monkey bread with either as soon as you take it out of the oven. There you have it - Happy Birthday, USA!

1 package Pillsbury Grands Biscuits (any biscuit dough will do - if you end up with too much dough, freeze the rest or bake as normal biscuits)
2 tablespoons butter, melted
1/2 cup sugar
1 tablespoon cinnamon
Nutella
Cookie Butter
4 large ramekins
  1. Preheat oven to 375 degrees. 
  2. Lightly spray ramekins with nonstick cooking spray.
  3. Combine sugar and cinnamon in a small bowl. Have melted butter in a separate bowl.
  4. Cut each biscuit into quarters. Roll out or stretch each quarter slightly, place a teaspoon of Nutella or cookie butter filling in the center, pinch the edges together to enclose the filling completely and roll into a ball.
  5. Coat in melted butter then roll in cinnamon sugar mixture. Arrange dough balls in even layer in ramekin, filling each ramekin no more than 2/3 full to allow room for the dough balls to expand as they bake.
  6. Bake until tops are golden. Drizzle melted Nutella (or cookie butter) over top and serve warm.

Thursday, June 30, 2016

Gooey Chocolate Chip Cookies from The Bon Appetito

Gooey Chocolate Chip Cookies - made dough June 11, 2016 from The Bon Appetito
You’d think after making so many chocolate chip cookies, one recipe after another in a fairly short period, that I would get sick of them, become really jaded and elevate “The Best” category to some Holy-Grail-like stature. I am really jaded and I am super picky but I’m not yet sick of chocolate chip cookies. Hey, I sacrifice for my craft and if that means trying out more cookie recipes and eating them, I’m all in.

I was going to end this series with the copycat LevainBakery recipe from Broma Bakery but this was a late entry of “hey, let’s try just one more” and I’m glad I persisted because this also ended up being an amazing cookie. Can’t really articulate which this was so good/great/the best that would differentiate it from the Broma Bakery recipe other than it also makes big, thick cookies and I love the flavor. I’m not going to question it too closely.
You’ll notice some of the cookies look like they had milk chocolate chunks and others like they had semisweet chocolate chips. I didn’t make two batches but ran short on the chocolate chunks towards the end of scooping out the cookie dough so I had to supplement with the chocolate chips. You make do with what you have. And now I’ve ended up with 3 more recipes for chocolate chip cookies to add to the 4 that are already on my go-to list. You can’t have too many great recipes for awesome cookies.
So let’s recap some key learnings from my highly unscientific study. I deliberately didn’t go into how certain ingredients might make a cookie more this or less that. Because this isn’t science class and I’m no scientist, just a baking hobbyist. But here are some common sense learnings:
Baking the cookies at high heat initially is fine to help it set quickly and not spread too much but don’t leave it at that high temperature for more than the first 5 minutes or so. Preheat it high then lower the temp to 350-365 degrees, depending on your oven. I found even baking at 375 degrees the whole way through still burns some of the chocolate chips.
Cookies with slightly more brown sugar than granulated sugar tended to taste better. A more prevalent amount of granulated sugar tends to make the cookie sweet without adding to the caramelized brown sugar overtones in a good chocolate chip cookie.
Always bake from frozen dough if you want thicker cookies. 
If you want more even thickness in your cookies versus a dome in the middle, shape the cookies into thick discs rather than golf-ball dough balls. This is strictly a personal preference decision only you can make. Just know if you bake as dough balls, the edges of the cookies will be thinner and bake to more crispness while the middles will be chubbier and more chewy. Baking as thick discs allows for cookies of a more even thickness and texture all around.
Always underbake – bake just until the edges are golden brown and the middle is no longer raw dough. Cookies continue to bake on hot cookie sheets even after you remove them from the oven and they’ll set as they cool.

Lastly, optimum cookie eating is when the chocolate chip cookies have been 10 minutes out of the oven. This gives them enough time for the edges to cool to crisp while the middles are gooey, the whole cookie is still warm but not hot and the chocolate is melty. Most importantly, enjoy every bite.
1 pound (4 sticks) unsalted butter
1 3/4 cups granulated sugar
2 1/4 cups packed light brown sugar
4 large eggs
3 cups plus 2 tablespoons pastry flour
3 cups bread flour
1 tablespoon salt
2 teaspoons baking powder
2 teaspoons baking soda
1 tablespoon pure vanilla extract
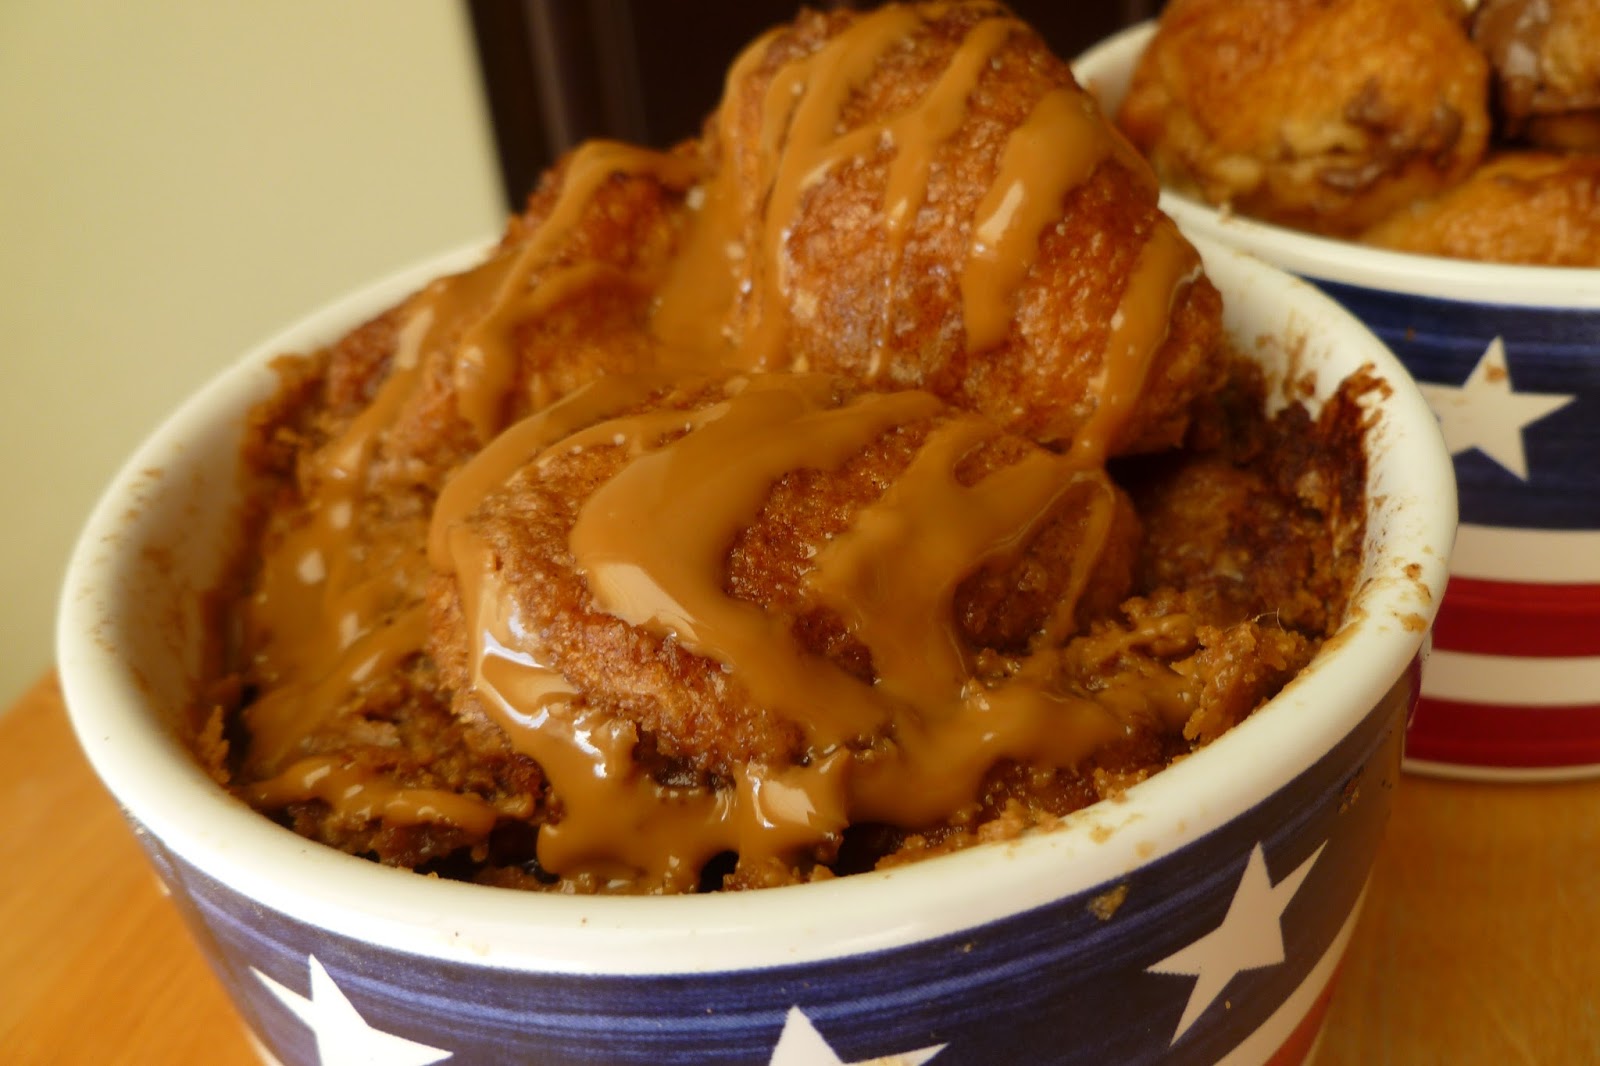
2 pounds bittersweet chocolate, coarsely chopped (I used milk chocolate chunks and semisweet chocolate chips)
  1. In the bowl of an electric mixer fitted with the paddle attachment, cream together butter and sugars.
  2. Add eggs, one at a time, mixing until just combined after each addition.
  3. Reduce speed to low and add both flours, salt, baking powder, baking soda and vanilla; mix until just combined. Add in chocolate; do not overmix.
  4. Scoop dough into golf-ball size balls and chill, covered, or freeze for several hours or overnight.
  5. When ready to bake, preheat oven to 350 degrees. Line baking sheets with parchment paper.
  6. Evenly space dough 2 inches apart on baking sheets. Bake until lightly browned and middles are no longer raw, about 15-20 minutes. Cool slightly on baking sheets before transferring to wire rack to cool completely.