Friday, June 24, 2016

Ultimate Chocolate Chip Cookies from Lovely Little Kitchen

Ultimate Chocolate Chip Cookies - made May 21, 2016 from Lovely Little Kitchen
We now get firmly into the "GREAT" category of chocolate chip cookie recipes that I've tried. What put this recipe in the Great category is this cookie delivered on several of my key chocolate chip cookie categories: it stayed thick, it looked good, it had crisp edges when freshly baked and just barely lukewarm and it was chewy.


The cream cheese gave it a smooth texture, not only in appearance but also in texture. It was chewy but more creamy than chewy, probably also from the cream cheese. But don’t worry if you don’t like cream cheese (I typically don’t); you can’t taste the cream cheese in this one. It plays more of a role with the texture than the taste.


If you want to impress your friends and family with a “professional” looking cookie, this would be a good, I mean great, choice.


1/2 cup butter
1/2 cup dark brown sugar, packed
1/2 cup granulated sugar
2 ounces cream cheese, softened
1 egg, plus 1 egg yolk
1 teaspoon vanilla extract
2 1/4 cups all-purpose flour
1 teaspoon baking soda
1/4 teaspoon salt
2 teaspoons cornstarch
2 cups semisweet chocolate chips
  1. Heat butter in a heavy-bottomed saucepan over medium heat until melted. Continue cooking until milk solids turn light brown and a nutty fragrance emerges. Set aside to cool slightly before refrigerating until a soft solid.
  2. Cream cooled browned butter with brown sugar and granulated sugar on medium speed until light and fluffy. Add the cream cheese and mix until incorporated.
  3. Add egg, egg yolk and vanilla until combined.
  4. In a separate bowl, mix flour, baking soda, salt and cornstarch.
  5. With mixer on low speed, gradually add the flour until just incorporated. Add chocolate chips and mix,
  6. Scoop 1/4 cup of dough and pat into a thick disc, about 1/2-inch thick. Repeat with remaining dough, cover, and chill or freeze for several hours or overnight.
  7. Preheat oven to 350 degrees. Line baking sheets with parchment paper and space cookies evenly. Bake 11-13 minutes or until edges are golden brown and middles no longer look raw. Cool briefly on baking sheets then move to wire rack to cool completely.

Thursday, June 23, 2016

Copycat Levain Bakery Chocolate Chip Cookies from Modern Honey

Copycat Levain Bakery Chocolate Chip Cookies - made dough June 4, 2016, modified from Modern Honey
I was of two minds about this cookie and whether I would put it in the “Good” or “Great” category. If I followed the directions as is, it would end up in the Good bucket. If, after learning from my mistakes in following the recipe as is and rated it based on my modifications, it would still be in the “GOOD” column but closer to “GREAT” than before. So maybe “Really Good”? In any case, it’s probably a good segue from the GOOD to the GREAT classification as straddling both.
If you’re from New York, chances are high that you know all about Levain Bakery. Heck, I’m not from New York and even I’ve heard of them. Probably because I keep up with all things cookies. Levain is known for humongous, delicious cookies and since I tried a copycat version of their chocolate cookie, I searched out a copycat of their chocolate chip cookie. I found two that I tried but let’s stick to this one for now.
The original recipe advocates making large cookies (of course) and baking at a high temp of 410 degrees to set the cookies quickly and keep them thick. What this particular recipe taught me is, with my oven (and bear in mind, all ovens are different), 410 degrees is too hot for cookies. Not only did it burn the chocolate, but by the time the middles were just barely past the raw stage and I could take them out, the outer ring of the cookie was almost dry. So I wasn’t very happy about that.

That was the first sheet of cookies. For the next sheet, I lowered the temp to 375 degrees. Yes, they spread a bit more but it was worth it not to have dry edges while the middles got to an appropriate stage of gooey-but-not-raw. There was still some burning around the edges of the chocolate chunks but nothing too serious and they didn’t taste burnt, they just looked a little dark chocolate when they’re not dark chocolate. But I must say, these took a really good picture when the chocolate chunks were still melty-warm.
1 cup cold butter, cut into tablespoons
1 cup dark brown sugar
1/2 cup granulated sugar (or 1/4 cup granulated sugar + 1/4 cup turbinado sugar)
2 eggs
1 teaspoon vanilla extract
1 1/2 cups cake flour
1 1/2 cups all-purpose flour
1 teaspoon cornstarch
3/4 teaspoon baking soda
3/4 teaspoon salt
2 cups chocolate chunks (I used Trader Joe's milk chocolate Pound Plus bar)
  1. In large mixing bowl, cream together cold butter and sugars for 4 minutes or until creamy and well combined.
  2. Add eggs, one at a time, mixing well after each one.
  3. Stir in flours, cornstarch, baking soda and salt. Mix until just combined. Stir in chocolate chips.
  4. Portion into large balls, cover and chill in refrigerator or freezer for several hours or overnight.
  5. When ready to bake, preheat oven to 410 degrees F. Line baking sheets with parchment paper and space 4 large dough balls on each sheet. Place in oven and immediately lower temp to 375 degrees.
  6. Bake for 9-12 minutes or until golden brown on top. Let cool on baking sheet for at least 10 minutes before moving to wire rack to cool completely.

Wednesday, June 22, 2016

"All-Time Favorite" Chocolate Chip Cookies from Gimme Some Oven

"All-Time Favorite" Chocolate Chip Cookies - made dough May 20, 2016 from Gimme Some Oven
The third recipe in the "GOOD" category. This version of the chocolate chip cookie from Gimme Some Oven looked so picture perfect – an almost even doneness but you could tell it wasn’t overbaked and wouldn’t be dry. If chocolate chip cookies could model, this would strut down the runway. At least it would when Gimme Some Oven made them. Mine weren’t as picturesque.

I didn’t overbake them but they did brown a bit more than the original. I couldn’t help it. When I tried for the pale golden even look Gimme Some Oven got, the cookies were still too raw in the middle so I had to bake them a wee bit longer. 


They tasted good and if I wasn’t actively comparing them to so many other recipes, they’d probably be great. But I will have to put them in the good category. 


1/2 cup butter
1/2 cup brown sugar, packed
1/3 cup granulated sugar
1 egg
2 teaspoons vanilla extract
1 1/2 cups all-purpose flour
2 teaspoons cornstarch
1 teaspoon baking soda
1/4 teaspoon salt
1 cup (or more) chocolate chips
  1. In the bowl of a stand mixer, use the paddle attachment to cream together the butter and sugars on medium-high speed until light and fluffy, about 3 minutes.  Add egg and vanilla, and mix until combined, about 1 minute.
  2. Add in the flour, cornstarch, baking soda and salt, and beat on medium-low speed until combined. Fold in the chocolate chips by hand until just combined.
  3. Use a large cookie scoop (equivalent to 3 tablespoons) or a spoon to shape the dough into balls, cover, and chill or freeze for several hours or overnight.
  4. When ready to bake, preheat oven to 350°F and line baking sheets with parchment paper. Evenly space the frozen dough balls on baking sheets and bake for 10-12 minutes until the edges are just set. The centers may look slightly undercooked. Cool cookies on the baking sheet for about 5 minutes, then transfer to a wire rack to finish cooling. 

Tuesday, June 21, 2016

Cake Boss Chocolate Chip Cookies

Cake Boss Chocolate Chip Cookies - made dough May 6, 2016, adapted from Key Ingredient
Another chocolate chip cookie recipe in the "Good" category. My bar is so high for chocolate chip cookies that the odds are really, really low of finding another standout one. Sadly, this one didn’t beat those odds. It was still a good cookie and had I been earlier in my chocolate chip cookie baking career, it might’ve gotten higher marks.

The edges browned and crisped up obligingly, the middles were chewy and this was a very tasty cookie. But this still spread too much for my taste and it didn’t stand out amongst the hundreds (yes, hundreds) of recipes I’ve tried over the years for chocolate chip cookies. I baked it from frozen dough but it still spread rather flat-ish. I baked at a higher temp on the convection setting in an attempt to “freeze” the cookie to a certain thickness before it spread too much. That only very partially worked. Still flatter than I would’ve liked.

The taste was good but it didn’t stand out for me. Although, when I brought these into work, I did get positive feedback from one of my coworkers in the form of, “did you bring in those M&M cookies? OMG, I had it for breakfast.” Accompanied by a reverent tone I reserve when speaking of cookie butter. So someone liked these a lot.
1 cup (2 sticks) butter
1 cup granulated sugar
1/2 cup dark brown sugar
1 teaspoon baking soda
1 teaspoon salt
1 teaspoon vanilla
2 large eggs
2 1/4 cups all-purpose flour
1/2 teaspoon cinnamon
2 cups semisweet or milk chocolate chips or chunks
3/4 cup M&M baking bits
  1. In a bowl, whisk together flour, cinnamon, baking soda and salt. Set aside.
  2. Cream butter and sugars together in the bowl of a stand mixer using the paddle attachment until thoroughly combined. Add eggs, one at a time, beating just until incorporated. 
  3. Add dry ingredients, in three batches, mixing until just combined. Do not overmix.
  4. Add chocolate chips or chunks and M&M baking bits. Portion dough into golf-ball-size dough balls, cover, and chill or freeze for several hours or overnight.
  5. When ready to bake, preheat oven to 350 degrees F. Line several baking sheets with parchment paper. Evenly space frozen dough balls on baking sheets. Bake 13-15 minutes, turning midway through baking time, or until just golden brown at the edges and middles are no longer shiny or raw. Remove from oven, let cool for a few minutes then remove to wire racks to cool completely.

Sunday, June 19, 2016

Copycat Mrs Fields Cookies with Caramel-Filled Chocolate Chips

Copycat Mrs Fields Cookies - made dough April 16, 2016 from Averie Cooks
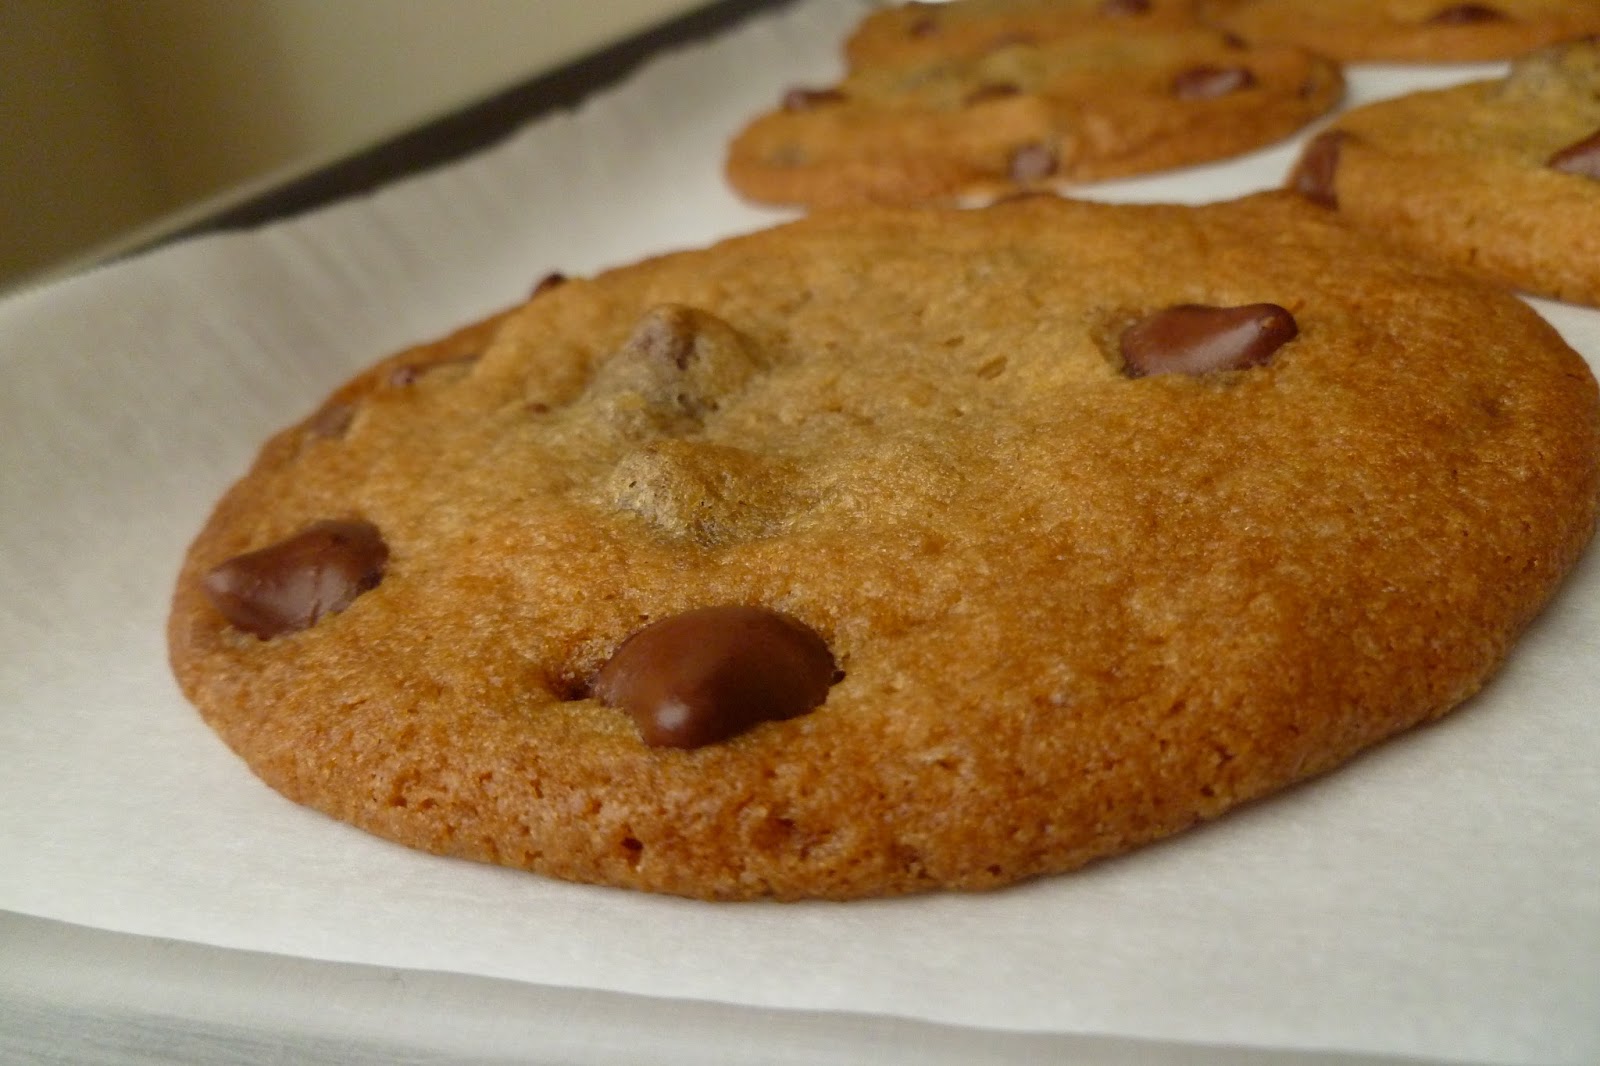
First up in the "Good" category
There was a period in my adolescence when I would’ve sold my soul – or at least rented it out – for the recipe of the real Mrs. Fields’ cookies. I loved those things. It was the first time in my early memory where I remember you could buy a cookie at the mall and they were delicious. Prior to Mrs. Fields’, if you wanted a “homemade” cookie, you made it at home.  I spent years trying to recreate those cookies and despaired of ever coming up with a thick, chewy chocolate chip cookie recipe. The recipe on the Nestle Tollhouse package just couldn’t cut it. Even now, years later when I have no less than 4 go-to recipes for my “perfect” chocolate chip cookie, any new ones that claim to be a knock off of the Mrs. Fields’ cookie catches my eye.
I had read Debbi Fields’ autobiography and scored through all the cooking magazines that talked about the tips she sparingly gave about how to make her cookies. Besides the usual yada yada about using the freshest ingredients (who doesn’t do that? No, don’t tell me), I remember her talking about the key was to bake at a low temperature. That always seemed counterintuitive to me because a lower baking temperature just gives the cookie more time to spread. You don’t want that. But this copycat recipe advocated the same thing so I thought maybe I was just wrong.

I did all the usual, mix it with cold butter, don’t overmix, portion and freeze the dough balls, preheat the oven fully on the convection setting and bake from frozen dough. I did 2 test batches, one baked at the recommended 300 degrees F and one at the usual 350 degrees F, both on the convection setting. Now here’s the thing: the cookies baked at the lower temp spread out more and flattened. The next baking sheet of frozen dough balls, still from the same batch of cookie dough, baked at the higher temp, spread less and baked thicker. Intuitive, right? Consider my head scratched because I don’t know how Mrs. Fields did it but I can’t replicate it.

No matter. It was one good lesson learned that it's still better to bake at a higher temperature (at least 350 degrees) if you don't want flat cookies. These were good cookies and turned out well but they didn’t knock any one of my top 4 favorites from their elevated perch. One last note, for the chocolate chips, I used the “Delightfuls” which were slightly larger than normal chips filled with caramel. I thought they would be the mini version of the caramel-filled Hershey kisses with flowy caramel. Nope. Actually, if you didn’t know the chips were filled with caramel, you would never have guessed. They just seemed like normal chocolate chips. There didn’t seem to be enough caramel inside the chips to make an impression. Just a note in case you think the Delightfuls are worth the extra $$s instead of a bag of  regular chocolate chips. Nah, they’re unfortunately not as Delightful as expected. It didn’t detract from the goodness of the cookie but my higher hopes for gooey, melt-y caramel chocolate goodness were dashed.
1 cup dark brown sugar, firmly packed
1/2 cup granulated sugar
1 cup (2 sticks) cold unsalted butter, cut into 1/2" cubes
2 large eggs
2 teaspoons vanilla extract
2 1/2 cups all-purpose flour
1/2 teaspoon baking soda
1/2 teaspoon salt
2 cups (12 ounces) semisweet or milk chocolate chips
  1. In the bowl of a stand mixer fitted with the paddle attachment, beat the butter and sugars together to form a grainy paste, 4-5 minutes, scraping down the sides of the bowl as needed.
  2. Add the eggs and vanilla and beat on medium-low speed until just combined.
  3. Add the flour, baking soda and salt; beat on low speed until just combined. Do not overmix. Add chocolate chips.
  4. Scoop into golf-ball-size dough balls, cover and chill or freeze for several hours or overnight.
  5. When ready to bake, preheat oven to 300 degrees F. Line baking sheets with parchment paper and evenly space frozen dough balls. Bake 15-16 minutes or until edges are brown and tops no longer look raw. Let cool on baking sheet for 5 minutes before removing cookies to a wire rack to cool completely.

Saturday, June 18, 2016

Chocolate Chip Cookie Recipes Galore

Chocolate Chip Cookies - recipes coming up
Heads up that I’m about to start a series of posts on different chocolate chip cookie recipes. I hadn’t started out with this series in mind. Instead, I had made a couple of different recipes at different times just to try them. And since I’m always behind on blogging, I’ve had them for some time. Then one weekend, my niece had asked if I could make chocolate chip cookies for her coworkers. She needed 3 dozen and most of the recipes I had pinned on my pinterest board made anywhere from 12-18 cookies so I figured it would be a good chance to try out several cookie recipes at once. Which then led me to wonder about the differences between the recipes and how that would alter the texture or taste of any of them. It was the closest thing to “scientific testing” I was likely to do but this was something that has always been nagging at me (insert first world problem here).
Why were there so many variations and what really changed between them? Why was one cookie better than another? What made it so? What really constituted “better”? How could varying different proportions of what are essentially the same base ingredients really changing the cookies? How do different ways to mix together cookie dough change the cookies themselves that much? So many questions, so many recipes to try.
I already had two by default before I even embarked on this, er, quest. Baking for my niece added another 4 kinds. And I added more from there.
Before I unveil them – and you know it’ll be a protracted process with all of these different recipes – I’ll give you a sneak preview of what I’ve tried (the ones pictured here are the ones I liked best). First, let’s be clear. There’s never a bad chocolate chip cookie. Not the way I make them, says me immodestly.  Second, regardless of the ingredients list, I have my own process for mixing cookie dough and baking cookies that has stood me in good stead through the years and countless cookie recipes. I will be sharing those so you, too, can make amazing, pack-the-pounds-on cookies that’ll be worth those empty calories (let’s not kid ourselves). And third, remember, what’s “the best” to one person may not be the best to another. Just so you know, my criteria of what makes THE BEST chocolate chip cookies are they’re thick and chubby, loaded with milk chocolate chunks or chips (you can substitute semisweet if you’re not me), have crisp edges, chewy ooey gooey middles, and an amazing caramelized brown sugar flavor complemented by the melty goodness of (milk) chocolate chips/chunks. No nuts! If you like any of those things, read on, MacDuff. Loosen your belt, factor in extra workouts for the next few weeks, run an extra mile or five and kiss that bikini body goodbye.
Lastly, because there’s never a bad chocolate chip cookie (see above paragraph) but there are gradations of good cookies, rather than stack ranking each recipe by number, I’m going to group them into broader categories: good, great and best. Remember my picky scale? That means “good” to me is usually “these are delicious” to most other people. “Great” to me = “OMG, these are amazing” from others. My “best” means I had more than 1 cookie and other people’s reactions range from “that’s my favorite cookie ever” to “I hate you, I can’t fit into my clothes anymore, are there anymore cookies left?”
To provide a little suspense, we’ll start with the Good category, move to Great and end with Best. I encourage you to make your own experiments and decide where you’d put each cookie into which category.

Before we begin, here are my cookie tips for all of the recipes, no matter which one you try:
  1. Use butter. If it isn’t butter, don’t bother. If you use margarine, I wash my hands of you. Really.
  2. Milk chocolate chunks – I like to buy the Pound Plus bar from Trader Joe’s, chop it up and use in ONE recipe. You can substitute semisweet if that’s what you prefer. I did have to use chocolate chips in some of the recipes out of necessity, meaning I didn’t have the TJ’s bar on hand when I made the dough,
  3. Chill the dough. No matter what. Trust me. Portion into dough balls and chill, covered, in the refrigerator or put directly in freezer bags and put in the freezer. To develop the flavors the most, chill for 24 hours in the fridge, then, if you have the patience of a saint, put in the freezer for overnight then bake.
  4. Substitute at least ¼ cup of the granulated sugar with turbinado or raw cane sugar. It gives an extra crunch in the chewy texture of your cookie and makes them a little different. I didn’t do this with all of the cookies I tried but for the ones I did, I liked those cookies much better.
  5. Use dark brown sugar, even if the recipe calls for light brown. Dark brown provides more caramelized brown sugar flavor.
  6. Don’t bake at less than 350 degrees. I often preheated the oven to 375 or even 400 degrees, put the cookies in at 375 for a few minutes then lowered the heat to 350 or 360. This helps the cookies set faster before they spread too much. But I don't recommend baking the whole time at 375 or 400 or else the chips start to burn before your cookies are done. Ask me how I know.
  7. Don’t overbake! Ever. Bake just until the edges are golden brown and the middles don’t look like raw melted dough. If the edges are already too brown and the middle still looks doughy, take them out anyway. Once they set, they’ll still be okay.
  8. Make the dough balls big, at least golf-ball size. This isn’t the time to be dainty.
  9. Don’t bake too many at once. The beauty of making dough balls and freezing them is you can bake only as many as you need when you need them.
That’s enough food for thought – haha – for now. First cookie recipe goes up tomorrow.