Sunday, July 22, 2018

Samoa Mini Cakes

Samoa Mini Cakes - made June 17, 2018, modified from The Seaside Baker
I was on a bit of a coconut kick, hence the Seven Layer Brownies and now these Samoa Mini Cakes. Unlike the Texas Sheet Cake Bites which I didn't make as bites but as a traditional sheet cake, I did take the time to bake these as minis.
I had a little bit of fail in that I (over)filled the mini muffin tins a little too much and therefore these baked with muffin tops. Which are fine with muffins but not with more delicate cakes. The upshot was when I turned them over to dislodge from the mini muffin cavities, some of the tops fell out while the bottoms remained stubbornly in the cavities. #bakingfail

I did manage to salvage enough whole ones to make most of the recipe yield presentable with the caramel covering, sprinkling of toasted coconut and drizzle of hot fudge, going for that epic Samoa combination.

The cakes were good, light-textured and fluffy. Probably a little too easy to pop in your mouth and chow down in one go. Since they're so small, keep an eagle eye on the bake time as you don't want to bake too long or they'll be dry.

While I did like these, I think this would be even better if, instead of mini cakes, these were mini brownies. Less fragile, more sturdy and can support the toppings better. But that's just my preference.


3.5 ounces bittersweet chocolate, chopped (I used Valrhona)
1 cup all-purpose flour
3/4 cup cocoa powder
1/2 teaspoon baking powder
1/4 teaspoon baking soda
1/2 teaspoon salt
1/2 cup unsalted butter, melted
1 1/2 cups sugar
1 large egg
2 teaspoons vanilla extract
1 cup buttermilk
1 1/2 cups sweetened shredded coconut, toasted
Caramel sauce
Hot fudge sauce
  1. Preheat oven to 350 degrees. Generously spray mini bundt pans or mini muffin tins with nonstick cooking spray.
  2. Melt chocolate over the top half of a double boiler set over hot water; set aside.
  3. Whisk together flour, cocoa powder, baking powder, baking soda and salt in a bowl.
  4. In the bowl of your stand mixer with the paddle attachment, beat melted butter and sugar on medium high speed for 2 minutes. Add egg and vanilla and beat for an additional 2 minutes.
  5. Stir in melted chocolate.
  6. Alternately add flour mixture and buttermilk; stir until just combined.
  7. Spoon batter into prepared pans and fill 2/3 of the way full. Bake for 10-12 minutes or until a toothpick inserted in the center comes out clean or with a few moist crumbs.
  8. Cool for 5 minutes in the pan then invert cakes onto a cooling rack to cool completely.
  9. Once cool, heat caramel sauce and hot fudge in separate bowls for 30 seconds.
  10. Dip cakes into warm caramel sauce then spinkle with generous amount of toasted coconut. Drizzle cakes with hot fudge sauce.

Tuesday, July 17, 2018

Seven Layer Brownies

Seven Layer Brownies - made June 16, 2018 from Just Add Sprinkles
Do you like Magic Cookie Bars? Also known as Seven Layer Bars, the traditional one has a graham cracker crust, generous layers of chocolate chips, butterscotch chips and toasted nuts or other add-ins, a blanket of coconut and a cover of sweetened condensed milk that's baked to caramelized perfection. They're sweet, ooey and gooey.
The beauty of Seven Layer or Magic Cookie Bars, in addition to being so easy to make, is you can create endless variations, depending on taste and preference. I've made them as Nutella Hazelnut Toffee Magic Cookie Bars (adds a layer of Nutella over the crust), Oreo Rolo Magic Cookie Bars (crushed Oreos as the base instead of graham cracker crumbs) and Almond Joy Cookie Bars.

But this is the first time I've made a "Seven Layer" brownie. The concept is the same with all the variations of toppings you want but in this one, instead of the base being a graham cracker crust, it's a fudgy brownie. Such a simple concept but a brilliant one I hadn't thought of before.

The only tricky thing is you don't want to overbake or underbake the brownie before and after you put the toppings on. Err on the side of caution and underbake the brownie so that you give yourself enough time to bake the top layer enough to slightly brown the sweetened condensed milk.
When baked properly, this is fudgy goodness as the base and a combination of flavors and textures for the top layer. They were consumed quickly at work, always a good sign. One of my coworkers told me he had three pieces. Can't ask for a better endorsement than that.
1/2 cup (1 stick) unsalted butter
8 ounces bittersweet chocolate, coarsely chopped
1 cup granulated sugar
3 large eggs
2 teaspoons vanilla extract
1 cup all-purpose flour
1/4 cup unsweetened cocoa powder, sifted
1/2 teaspoon salt
sweetened coconut flakes
butterscotch morsels
semisweet chocolate chips
chopped toasted pecans
1 14-ounce can sweetened condensed milk
  1. Preheat oven to 325 degrees F. Line a 9 x 9" baking pan with foil and lightly spray with nonstick cooking spray.
  2. In the top half of a double boiler set over hot water, melt butter and chocolate, whisking until melted and smooth. Let stand 5 minutes before adding sugar, mixing thoroughly. Add eggs and vanilla extract, beating until combined.
  3. Add flour, cocoa powder and salt; mix until completely combined and batter is glossy.
  4. Pour into prepared pan and bake for 30 minutes. After 30 minutes, remove from oven and sprinkle top with coconut flakes, butterscotch morsels and chocolate chips. Sprinkle with chopped toasted pecans then pour sweetened condensed milk, coating top evenly.
  5. Return brownies to oven and bake for 10 to 15 minutes more. Remove from oven and let cool in pan for 1 hour before lifting out of pan and cutting into squares.

Friday, July 13, 2018

Texas Sheet Cake Bites

Texas Sheet Cake Bites - made June 10, 2018 from Life in the Lofthouse
Technically, these were supposed to be baked in mini muffin tins, hence the "bites" part of the name. It's a traditional Texas sheet cake recipe and easily adapted to be bite-sized morsels by changing the pan(s) you bake them in.
These would probably have been cuter baked in mini muffin tins but when I was making the batter, I didn't have time to go the bite-size route so I opted to go back to the traditional form and baked in a 9 x 13" pan. Easier to frost, portion and give away in less time.

Regardless, this was a good cake, no matter which way it's baked. The important things are not to overbake it and to use the good-quality cocoa powder (as always, I use Pernigotti).

2 cups sugar
2 cups all-purpose flour
1 teaspoon baking soda
1/2 teaspoon salt
1 cup butter
3/4 cup water
5 tablespoons cocoa powder
1/2 cup buttermilk
2 large eggs

Frosting
1/3 cup buttermilk
1/2 cup butter
5 tablespoons cocoa powder
1 pound confectioners' sugar
1 teaspoon vanilla
  1. Preheat oven to 325 degrees F. Prepare mini muffin tins by lining with mini paper liners or spray generously with nonstick cooking spray then dust with flour.
  2. For the cake: mix sugar, flour, baking soda and salt in a large bowl.
  3. Combine butter, water and cocoa powder in a medium saucepan and bring to a boil. Remove from heat then pour over dry ingredients. Gently mix together.
  4. Fold in buttermilk then eggs. Blend until smooth; batter will be thin.
  5. Using a small 1-tablespoon cookie scoop, place one scoop of batter into each mini muffin cup. Bake for 10-12 minutes; remove from oven. Cool for 5 minutes then gently remove mini cake bites from tins. Cool completely.
  6. Frosting: in a medium saucepan, heat milk, butter and cocoa over medium heat until mixture comes to a boil. Remove from heat then whisk in confectioners' sugar and vanilla until smooth.
  7. Carefully spoon a tablespoon of frosting over each bite. Frosting will set after a few minutes. 

    Tuesday, July 10, 2018

    White Chocolate Brownies

    White Chocolate Brownies - made June 10, 2018 from Rosie's Bakery's Chocolate-Packed, Jam-Filled, Butter-Rich, No-Holds-Barred Cookie Book
    White chocolate lovers, you don't usually get much love on my blog since I'm not a big fan of white chocolate but this one's for you. Not only are there chunks of white chocolate in this brownie but also white chocolate melted and incorporated into the batter.

    The melted white chocolate adds a smoothness to the batter and a richness to the baked brownie. It's not an overly strong white chocolate taste but prevalent nonetheless. If you want to go completely purist, you can substitute even more white chocolate for the semisweet chocolate chunks.

    I liked this brownie more than I expected, mostly because I liked the "fudginess" of the texture, similar to a traditional fudge brownie. As always, it's important to use quality chocolate, especially when it comes to white chocolate. Imitation will not do. Cheap white chocolate is chalky with a crumbly mouthfeel and weird aftertaste. The good stuff is creamy and actually tastes like white chocolate. Not to be confused with real chocolate but we'll let that go.
    I omitted the macadamia nuts in this because of my aversion to nuts in blondies but if you don't mind the nuts softening during baking, feel free to add them for the traditional white chocolate macadamia flavor profile.
    12 ounces white chocolate
    4 ounces bittersweet chocolate
    1 1/2 cups all-purpose flour
    1/2 teaspoon baking powder
    1/8 teaspoon salt
    10 tablespoons unsalted butter
    3/4 cup granulated sugar
    3 large eggs
    2 1/2 teaspoons vanilla extract
    3/4 cup coarsely chopped macadamia nuts, optional
    1. Preheat oven to 325 degrees F. Line a 9-inch square baking pan with foil and lightly spray with nonstick cooking spray.
    2. Chop 6 ounces of the white chocolate very fine and set aside. Chop remaining 6 ounces white chocolate and bittersweet chocolate coarsely; set aside.
    3. Sift the flour, baking powder and salt together in a small bowl; set aside.
    4. Melt the butter in a small saucepan over low heat; do not allow to bubble. Remove pan from heat and add the finely chopped white chocolate but do not stir. Set aside.
    5. Using an electric mixer on medium-high speed, beat the sugar, eggs and vanilla in a medium-sized bowl until thick and pale, about 5 minutes.
    6. With the mixer on low speed, add the butter mixture and mix to combine, about 115 to 20 seconds. Scrape down sides of the bowl.
    7. Add the flour mixture on low speed and mix just until combined. Fold in white chocolate and bittersweet chocolate (and macadamia nuts, if using) with a rubber spatula. Spread batter evenly into prepared pan. Bake until toothpick inserted near the center comes out with a few moist crumbs, about 30 to 35 minutes.
    8. Let cool completely before cutting into squares.

    Friday, July 6, 2018

    Restaurant Review: La Bodega, Kansas City, MO

    Restaurant Review, La Bodega, Kansas City, MO - dinner on June 2, 2018
    After we stocked up on our artisanal chocolates, clutching those elegant carrier bags from Christopher Elbow like 6 Gollums with 
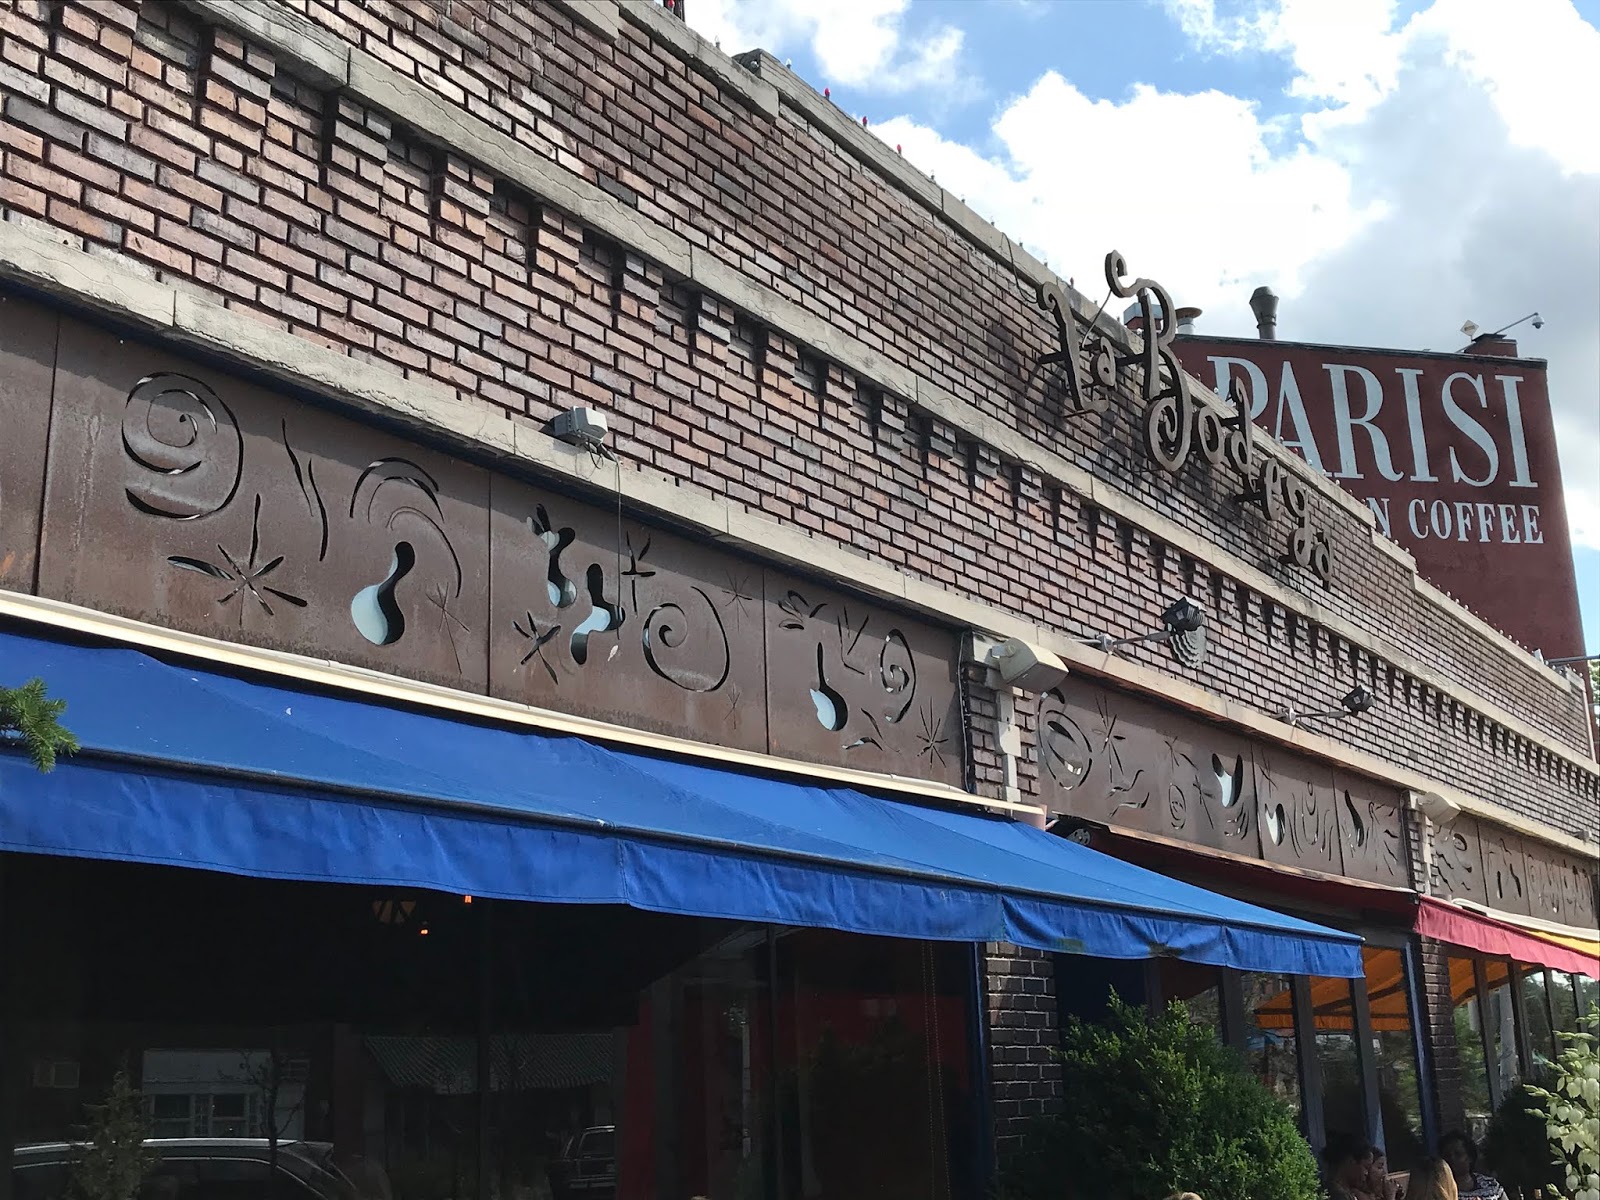
the Precious, we made our way to La Bodega, Mel’s go-to for tapas. We arrived deliberately on the early side for dinner, partly because one of us had to leave a little early and partly to take advantage of the happy hour special of half-off on the happy hour menu of a select number of tapas.

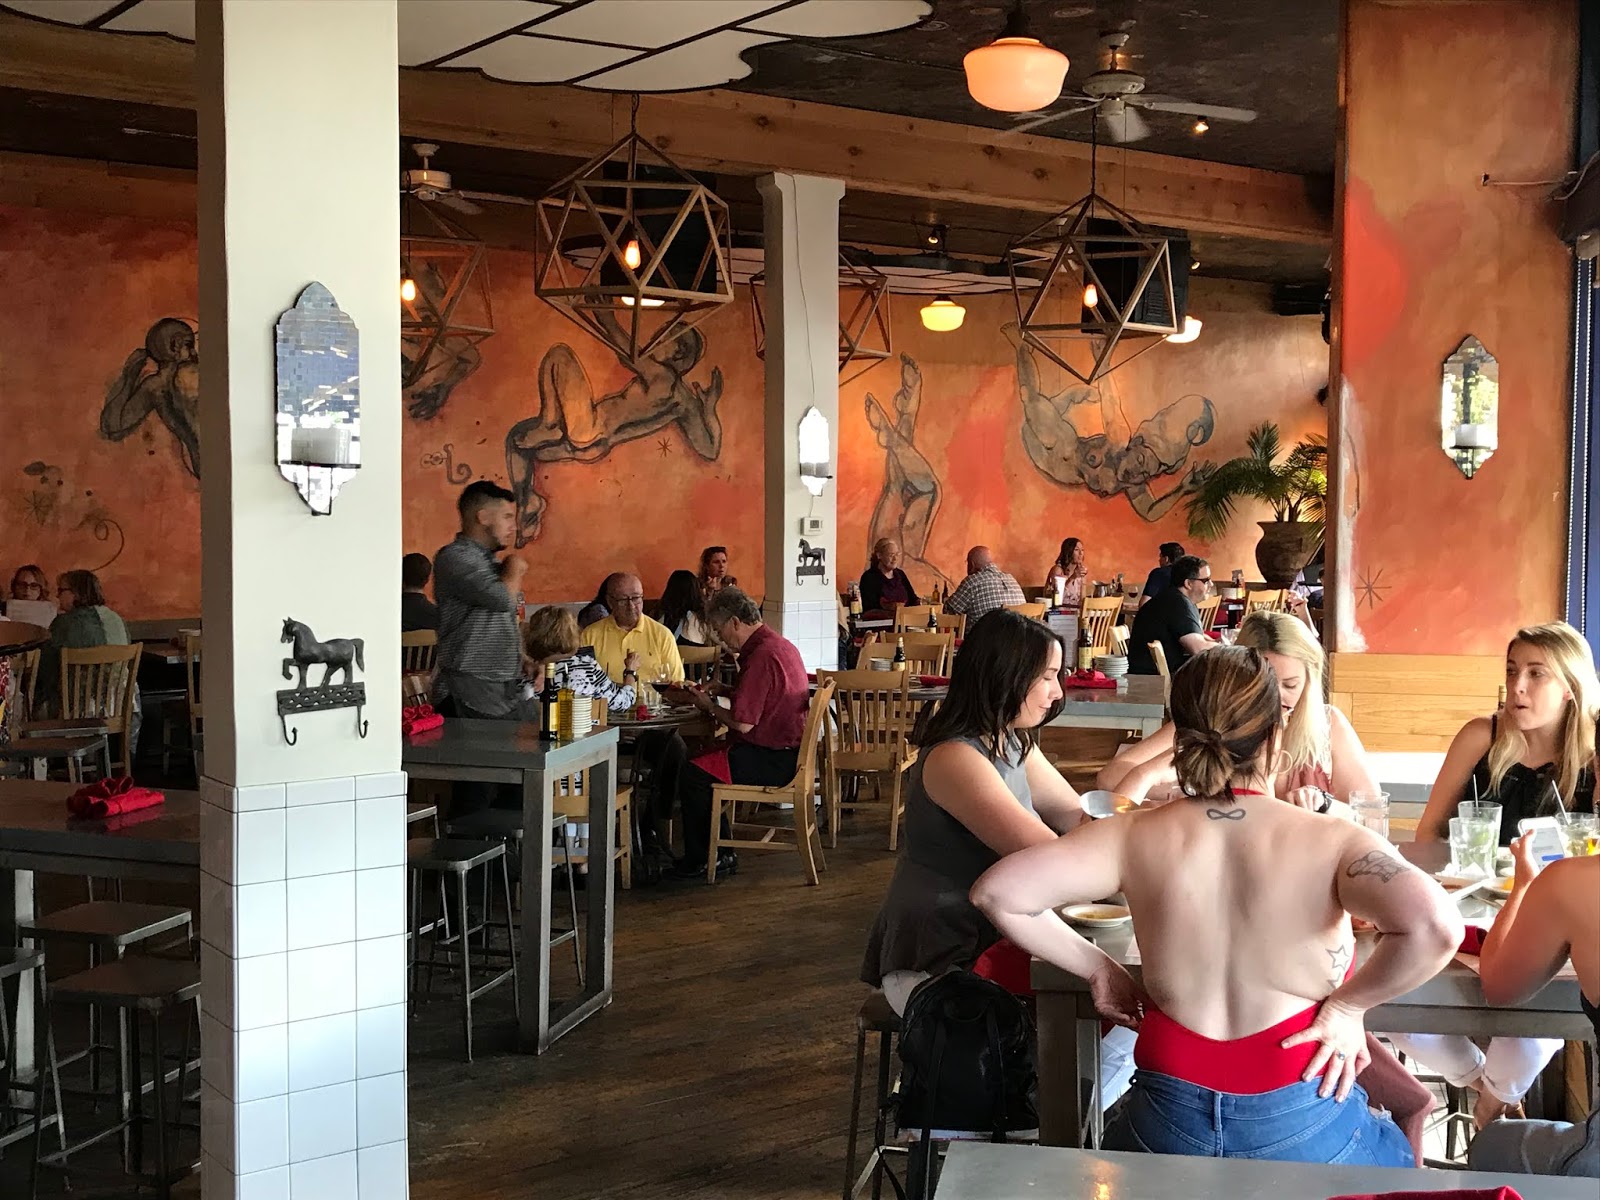
    La Bodega was an interesting restaurant with artistic décor, its walls fully painted, depicting various scenes. It wasn’t too crowded when we arrived and we were able to order a wide variety and number of tapas which were delivered fairly quickly. If you’ve never had tapas before, think of them as the Spanish equivalent of dim sum: small plates with appetizer-sized food in a variety of flavors. The key is variety. The advantage of tapas is you can order a wide assortment, try all sorts of different things and not limit yourself to one particular, “normal”-sized entrée. 
    Sangria


    Tapas are meant for small bites, sharing and trying new dishes without weighing you down by eating too much of any one thing. In theory, anyway, because if you liked a particular dish, you could certainly put in another order for it.

    Albondigas Caseras (meatballs in a spicy garlic cream sauce)

    Las Pelotas Estofadas (meatballs in red wine-bravas sauce)
    There were 6 of us and that was a good number to try a number of different tapas dishes, just enough that everyone could have at least 1 bite of everything, possibly more if you liked something more than someone else. The nice thing about going to a tapas place with a group is the more you could order and the wider the variety since we all had different preferences. I favored the meatball tapas plates (carnivore) while other friends liked the mushrooms and the cheeses.
    Croqueta de Pollo (Chicken Croquettes - delicious)

    The downside of enjoying tapas is, similar to dim sum, you tend to consume more because there are so many different things to try. “Just a bite” of 12 different tapas plates tends to add up and you (*I*) end up full before I know it. And there are likely more plates I just have to try. Still, it’s a small price to pay for an occasional indulgence. It’s not every day I’m in Kansas City at a delicious tapas place with awesome friends.

    Champinones a la Plancha (Roasted Mushrooms)
    I can’t remember all of the specific dishes we tried but there weren’t any I didn’t like. Service was great, our tapas dishes were delivered promptly, even when we did a second round of orders and the wait staff was very nice. Prices were reasonable, even more so at 50% off. 

    Montaditos del Carne de Cerdo (pulled pork)

    Jamon Iberico

    Solomillo con Cobrales (grilled beef tenderloin with Spanish bleu cheese)
    Some of the dessert choices were expected in that, in keeping with the Spanish theme, there were churros and flan. A little more mainstream were the cheesecake and chocolate cake. A slight disappointment on my part that tres leches cake wasn’t on the menu. And surprising was the offering of a s’mores cake. It was a warm chocolate cake with fudge sauce, buried under a toasted marshmallow covering. I’m not a big fan of marshmallows but my friend Jen was and I could get down with the warm chocolate cake part so it was an easy choice to make. 
    S'mores Cake
    The s’mores dessert was pretty good, although I admit to being full enough that I could only manage a few bites. It was definitely a decadent capper to a delicious meal. So far, Mel hadn’t steered us wrong yet on great places to eat in Kansas City.